EngageCX Installation Guide
Getting Started
Overview
This guide provides step by step instructions for installing the EngageCX solution, in various deployments to meet your organization needs.
See Pre-Installation Checklist for reference information about system requirements, including operating systems, hardware, and additional software and tools requirements.
This guide provides installation instructions for single or distributed deployments, along with additional post installation settings.
Once the Engage solution has been installed, get acquainted with the Sysadmin Website or find more about EngageCX modules and functionalities from Enterprise Website.
As always, if you have questions or issues, please submit them in here or send an email to engagecxsupport@mhcautomation.com.
Installation
This section provides step by step instructions for installing the EngageCX solution. To continue, please select the deployment type you intend to proceed with:
- If you want to install all Engage components on a single server, see the Single Instance topic;
- If you want to install the Engage solution in an HA mode, see the Double Instance topic;
- If you want to install the Engage solution in a more complex deployment with one or more components located on different servers, see the Complex Deployments topic.
Single Instance
This section provides step by step instructions for installing all EngageCX Platform components on the same machine (with the exception of the database).
Installer Description
The installation files are named according to the version of the product. Generally, the setup name has the following structure: Product Name - Architecture - Build Version - Build Number.
In the example below, you can identify the details mentioned as follows:
- Product Name: EngageCX
- Bit Version: x64
- Build Version: 13.3.8
- Build Number: 9311

Starting the Installation
To open the installation wizard, double-click on the .exe file and wait for the Setup to initialize:
When the setup finished preparing the install, the Welcome Screen will appear. Follow the steps described below to complete the installation.
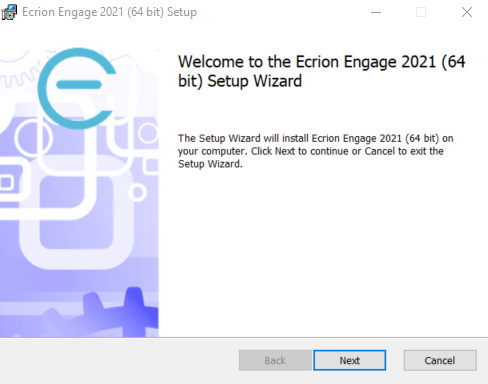
Step - Welcome Screen
The welcome screen provides details on what product is about to be installed on your machine, as well as two options, to revert changes or to proceed with the installation of the EngageCX software.
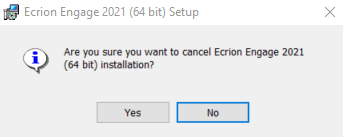
If you wish to cancel the installation, then press the Cancel button.
You will be prompted to confirm your decision, in order to prevent accidental canceling:
To proceed with the installation, select the Next button, located in the bottom region of the window.
Step - End-User License Agreement
In order to continue with the installation of the EngageCX Platform, you will need to carefully read the terms and conditions for this software.
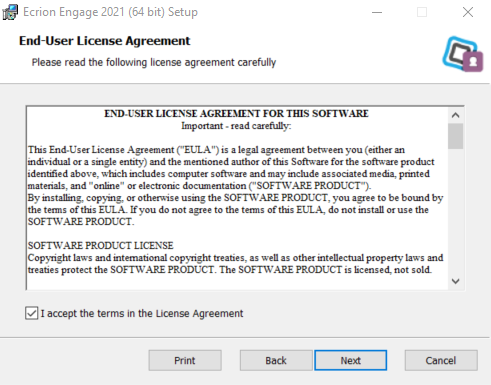
Afterwards, check the I accept the terms in the License Agreement checkbox and click Next.
Note
The Next button is greyed out until the above checkbox is selected.
Step - Destination Folder
This step in the Setup Wizard offers the possibility of setting the location where the EngageCX software will be installed. By default, the EngageCX software will be installed at: C:\Program Files\Ecrion\EngageCX_Product.
To change the default path, select the Change button on the middle-left side of the window and provide a new destination folder for the EngageCX installation.
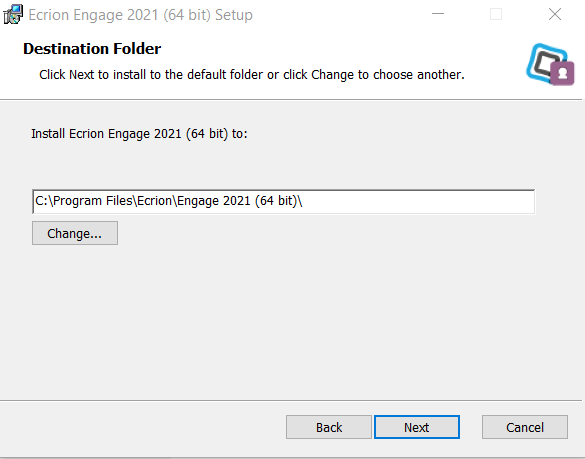
Once you have the folder set, select the Next button to continue with the installation.
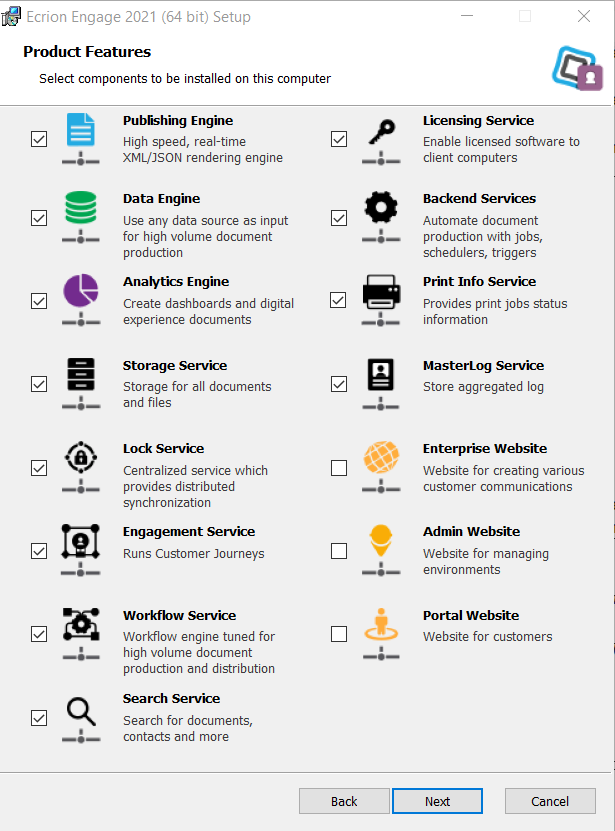
Step - Product Features Selection
EngageCX provides a series of features which can be chosen during this step of the installation. Each component is provided with a short description of its functionality.
By default, all features are selected. You can decline the installation of a component by de-selecting the associated check-box. If no component is selected, you will be unable to finish the installation.
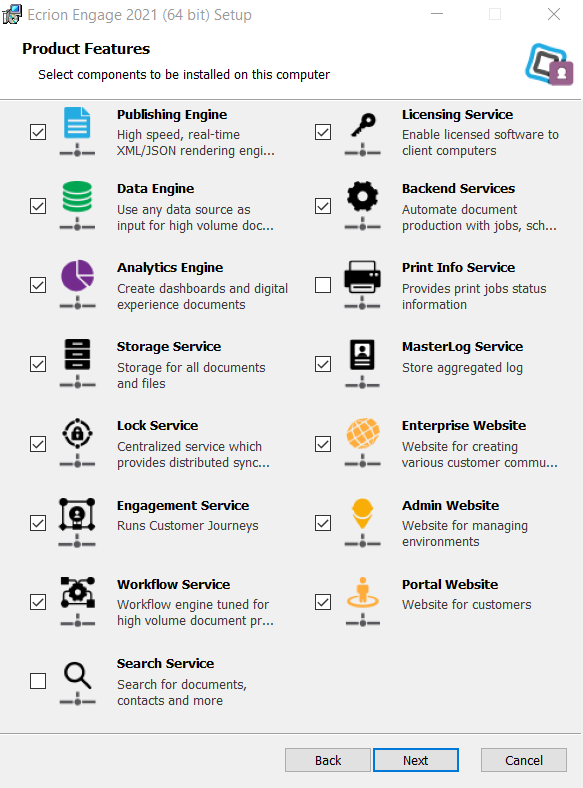
Once you select the needed features, select Next to proceed with the required settings configuration for each feature.
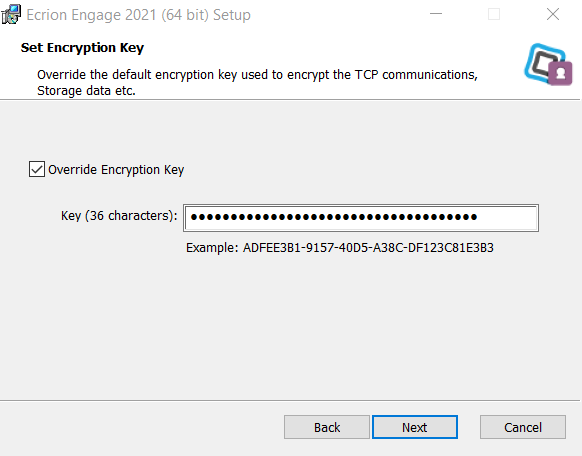
Step - Set Encryption Key
The Override Encryption Key option, if enabled, overrides the default encryption key with another one used to encrypt the TCP communications, Storage data, etc.
Step - Configure Publishing Engine
The Publishing engine is a native server component that performs XML/JSON conversions to various output formats. It is the successor of the XF Rendering Server embedded in the new EngageCX line of products.
Warning
This component is a vital service, so you will need to ensure that it is installed and available (either on the current machine or another) when using the EngageCX software.
This step allows the user to choose several backwards-compatibility options:
- Enable compatibility to the obsolete EngageCX API v1.0 (i.e.: old Ultrascale Client)
- Includes additional utilities such as:
- Render.exe: a command line tool that allows users to render different input formats to the desired output;
- Uload.NET: a command line tool that allows users to measure the system’s performance under heavy load.
- Enable obsolete version of Hot Folders automation.
Additionally, users can enable firewall rules to allow incoming remote requests. Notice that this option should remain un-checked for Single Instance installation. Enable this option only if the Publishing Engine component is deployed on a separate machine. For more details on this, please view the Double or Complex Instances installation available in this guide.
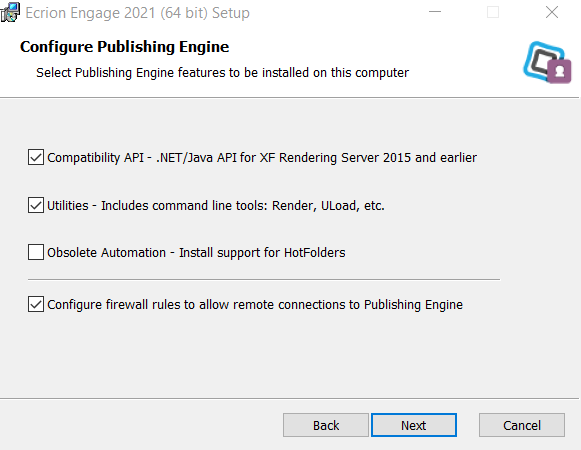
Once you select the needed features, select Next to proceed to the next step.
Step - Configure Data Engine
The Data engine is a native server component that performs data aggregation from multiple data sources (XML, CSV, Relational databases, etc.). It is used in conjunction with the Publishing engine in order to create various communications from different sources. It is the successor of the Data Aggregation Server product and it is embedded in the new EngageCX line of products.
Warning
This component is a vital service, so you will need to ensure that it is installed and available (either on the current machine or another) when using the EngageCX software.
This step also provides the user to choose several backward-compatibility options:
- Enable compatibility to the obsolete EngageCX API v1.0 (i.e.: old Ultrascale Client)
- Includes additional utilities such as:
- DASAggregate.NET.exe: an application that can process .dax documents through command line.
- Enable obsolete version of Hot Folders automation.
Additionally, users can enable firewall rules to allow incoming remote requests. Notice that this option should remain un-checked for Single Instance installation. Enable this option only if the Data Engine component is deployed on a separate machine. For more details on this, please view the Double or Complex Instances installation available in this guide.
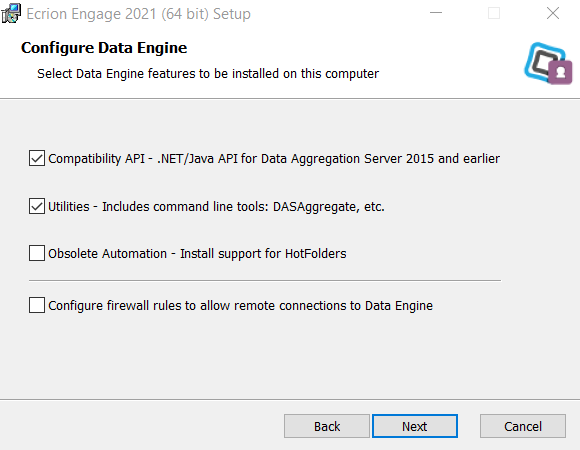
Once you select the needed features, select Next to proceed to the next step.
Step - Configure Analytics Engine
The Analytics engine is a native server component that performs analytic computations for EngageCX systems. Installing this component is mandatory only if you want to use the Analytics module within EngageCX Platform.
Additionally, users can enable firewall rules to allow incoming remote requests. Notice that this option should remain un-checked for Single Instance installation. Enable this option only if the Analytics Engine component is deployed on a separate machine. For more details on this, please view the Double or Complex Instances installation available in this guide.

Once you select the needed features, select Next to proceed to the next step.
Step - Database Settings
In this window, you will need to select a database provider. To proceed, you have two options: either use a previous configuration (only if EngageCX was installed before on the current machine), or create a new SQL Connection.
Using Existing SQL Database
To use the settings made in a previous install of EngageCX software, check the Use previous configuration option, then click Next.
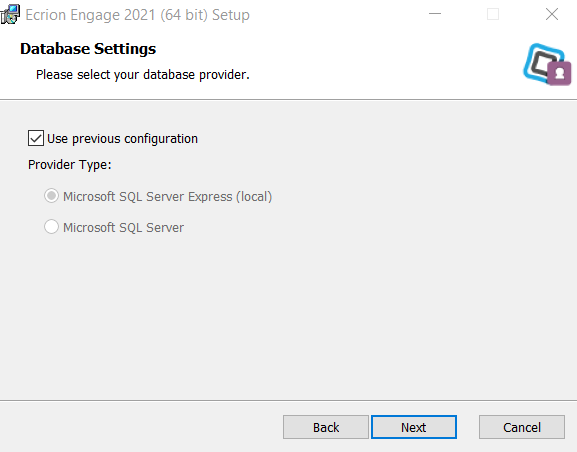
Using a New SQL Database
If you un-check the option Use previous configuration, then you must choose the Provider Type out of two options:
| Microsoft SQL Server Express | Microsoft SQL Server |
Using Microsoft SQL Server Express (local)
Choosing the Microsoft SQL Server Express (local) requires the following information:
- Select the
MSSQL Instance. - Enter the
Databasename previously created. (Default database is EOSDB4) - Select the
Authentication Type: Windows or SQL Server, along with a username and password. Note that the user must have db_owner rights to access the database.
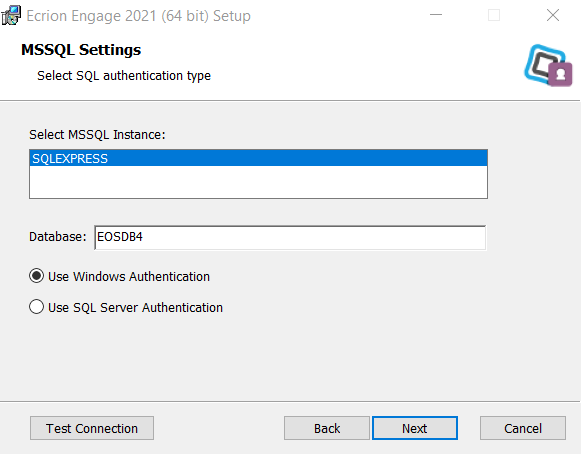
Once you provide all the necessary data, you can test the connection to ensure that all fields have been set up properly, by clicking the Test Connection button.
Using Microsoft SQL Server
Choosing the Microsoft SQL Server requires the following information:
- Enter the
Server Nameor the IP Address of the machine where the Microsoft SQL Server is installed. - The name of the
Databasepreviously created (Default database is EOSDB4). - Select the
Authentication Type: Windows or SQL Server, along with a user name and password. Note that the user must have db_owner rights. - Optionally, add the
Instance Name, if you have the Microsoft SQL Server installed as a named instance.
Note
As best practice, use Windows Authentication in case you have the possibility of giving owner permissions (to EngageCX Database), to a windows user. Otherwise, SQL authentification with username and password can be used.

Once you provide all the necessary data, you can test the connection to ensure that all fields have been set up properly, by clicking the Test Connection button.
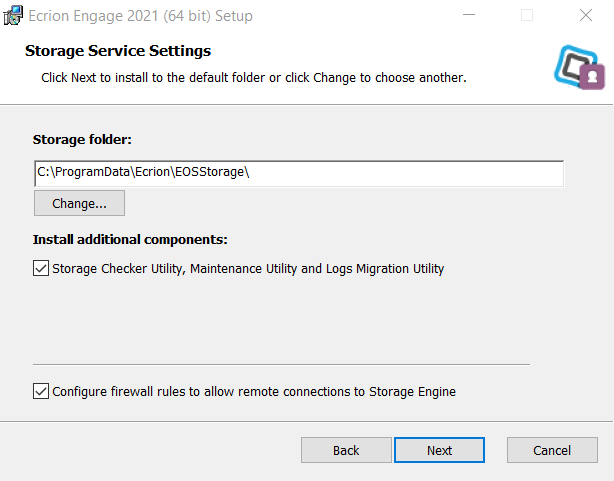
Step - Storage Service Settings
After you finish configuring the database(s), you must proceed to set up EngageCX Storage. For this scenario, the EngageCX Storage will be a local folder on the server. By default, it will be created at C:\ProgramData\Ecrion\, and the folder will be called EOSStorage. In case your EngageCX storage is remote, make sure to use UNC Paths to point the storage.
Optional storage tools are included with the installation setup. Users can choose to deploy them by checking the Storage Checker Utility, Maintenance Utility and Logs Migration Utility option.
Additionally, users can enable firewall rules to allow incoming remote requests. Notice that this option should remain un-checked for Single Instance installation. Enable this option only if the Storage is located on a separate server.

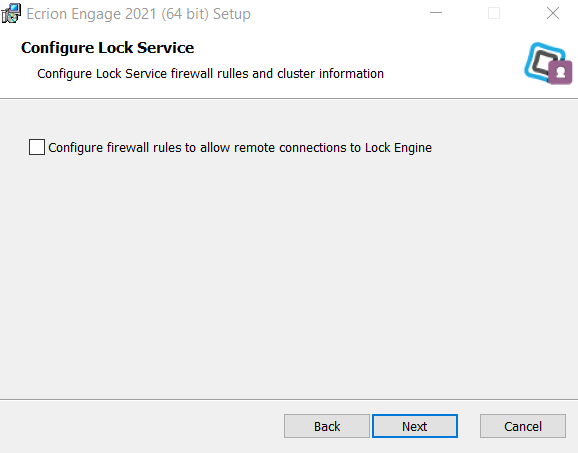
Step - Configure Lock Service
The Lock Service is a centralized service that provides distributed synchronization.
Additionally, users can enable firewall rules to allow incoming remote requests. Notice that this option should remain un-checked for Single Instance installation. Enable this option only if the Lock Service component is deployed on a separate/multiple machine(s). For more details on this, please view the Double or Complex Instances installation available in this guide.
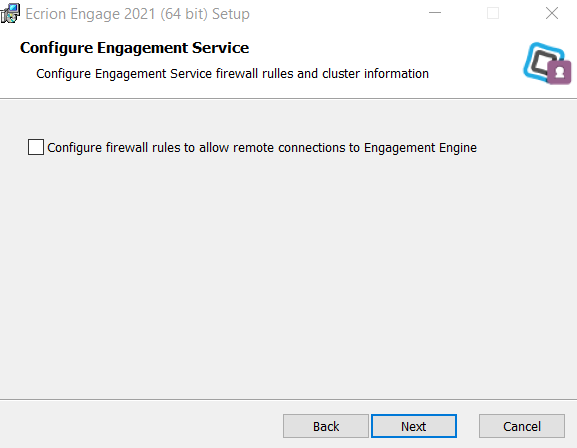
Step - Configure Engagement Service
The Engagement Service is a standalone service that registers the TCP ports. It has an independent log file. The service can work in High Availability mode, being dependable on the Lock Service.
Additionally, users can enable firewall rules to allow incoming remote requests. Notice that this option should remain un-checked for Single Instance installation. Enable this option only if the Engagement Engine component is deployed on a separate/multiple machine(s). For more details on this, please view the Double or Complex Instances installation available in this guide.
Step - Configure Workflow Service
The Workflow Service is a standalone service that improves the high volume document production and distribution.
Additionally, users can enable firewall rules to allow incoming remote requests. Notice that this option should remain un-checked for Single Instance installation. Enable this option only if the Workflow Engine component is deployed on a separate/multiple machine(s). For more details on this, please view the Double or Complex Instances installation available in this guide.

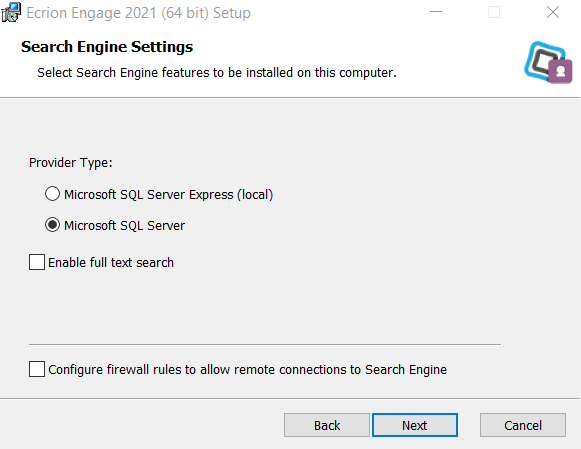
Step - Configure Search
The next step allows you to configure search, more specifically the search database. To proceed, you have two options:
- Use a previous configuration – only if you have installed EngageCX Platform before.
- Create a new SQL Connection – for this option, you will need to un-check
Use previous configuration. Next, you will have to choose a Provider Type out of two options:- Microsoft SQL Server Express (local) – this option will require you to enter:
- Select the MSSQL Instance.
- Enter the Database name previously created (Default database is EOSDB4)
- Select the Authentication Type: Windows or SQL Server, along with a username and the password. Note that the user must have db_owner rights to access the database.
- Microsoft SQL Server – this option will require you to enter:
- Server Name or IP Address of the machine where the Microsoft SQL Server is installed.
- Database name of your search database previously created (Default name is EOSDB4Search)
- Select the Authentication Type: Windows or SQL Server, along with a username and password. Note that the user must have db_owner rights. If it’s a Windows user (as opposed to a SQL Server user), then the user must be the same as the one used for the main EngageCX database.
- Optionally, enter the
Instance Name, if you have the Microsoft SQL Server installed as a name instance.
- Microsoft SQL Server Express (local) – this option will require you to enter:
The Enable full text search option should be checked only if you want to search inside your documents. Note that this option is available only if Microsoft SQL Server has the Full Text feature installed.
Additionally, users can enable firewall rules to allow incoming remote requests. Enable this option only if the SQL Server storing the EngageCX Search database is located on another machine.
Once you have provided all the necessary data, you can test the connection to ensure that all fields have been set up properly, by clicking the Test Connection button.
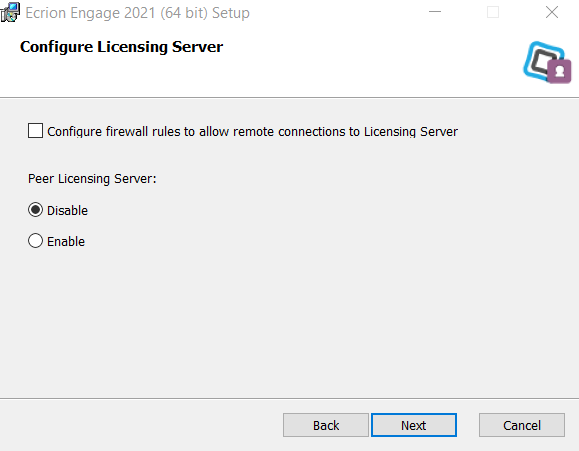
Step - Configure Licensing Server
The Licensing Server allows system administrators to install and manage all the EngageCX Product keys that enables various features and functions.
For single instance scenarios, the Peer Licensing Server option should be Disabled. To enable the Licensing Peer options and learn more, please see the Double Instance installation scenario.
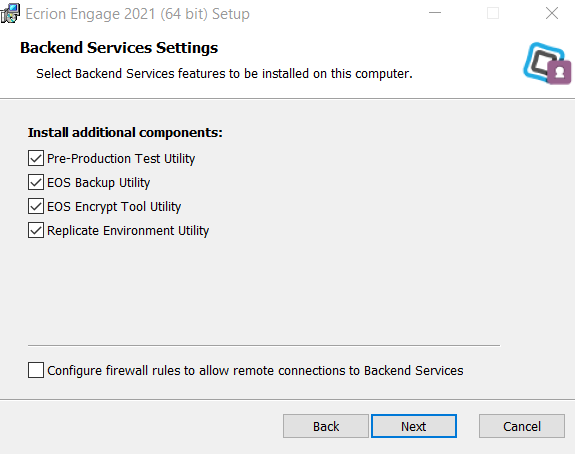
Step - Backend Services Settings
The Backend Services component is a Windows Service that automates various communication productions with jobs, schedules, triggers, etc. It also contains other important EngageCX services such as Health Check, Billing, Analytics, etc.
Warning
This component is a vital service, so you will need to ensure that it is installed and available when using the software.
During this phase of the Installation Wizard, you can choose the additional components that come with the Backend Services component:
- Pre-Production Test Utility - Performs a smoke check of all the functionality of the system.
- EOS Backup Utility - Performs a backup by creating supplementary exact copies of files and databases.
- EOS Encrypt Tool Utility - Performs encryption to protect your sensitive data and valuable information.
- Replicate Environment Utility - Performs replication on your development environment & personal configurations across machines and instances.
Additionally, users can enable firewall rules to allow incoming remote requests. Notice that this option should remain un-checked for Single Instance installation. Enable this option only if the Backend Services component is deployed on a separate machine. For more details on this, please view the Double or Complex Instances installation available in this guide.
Once you select the needed features, select Next to proceed to the next step.
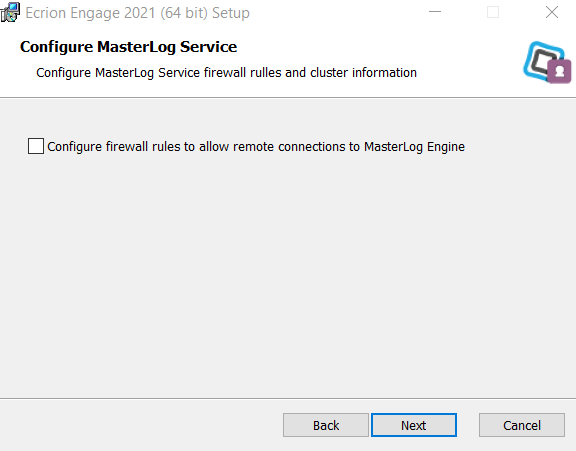
Step - Configure MasterLog Server
The MasterLog Service is a standalone service that provides a centralized log of all the EngageCX services.
Additionally, users can enable firewall rules to allow incoming remote requests. Notice that this option should remain un-checked for Single Instance installation. Enable this option only if the MasterLog Engine component is deployed on a separate machine. For more details on this, please view the Double or Complex Instances installation available in this guide.
Step - Enterprise Website Settings
The Enterprise Website is the Main User Interface component, which allows the user to create and manage all customer communications and corresponding assets. The website will be installed on the IIS server. During the setup, it may be necessary to check some of the options described below to accomodate your organization needs.
If you choose the Enterprise Website component, the settings below are mandatory to be configured. This information will be used to access the Enterprise website.
- Enterprise Website Name (By default, it is EOS4)
- Website Host Name; (By default, it is localhost. To enable remote access, update the box to the corresponding address).
- Enterprise Website Port (By default, it is 8094).
Optionally, you also have two options that can be checked/un-checked:
- Enable Web Site SSL - Makes the site also accessible via HTTPS (requires a preinstalled SSL Certificate)
- Configure firewall rules - Configures firewall to allow access to the Enterprise Website via the specified port(s).
If you enable the Web Site SSL option, make sure to provide the information below:
- Enterprise Website Secure Port - Select the port to use for HTTPS access; this must be different than the HTTP port (and ports used by the other websites). You may disable HTTP access to the website from IIS Manager after running the setup.
- SSL Certificate - Select an SSL Certificate for enabling HTTPS access; this must already be installed on the system, prior to launching the setup.
Note
To pick up a SSL certificate from a network share instead of using the local certificate store, check the Use Centralized Certificate Store feature available, then provide the website secure port to be used.
The IIS Log folder box allows users to set the Website log folder for the IIS logs.

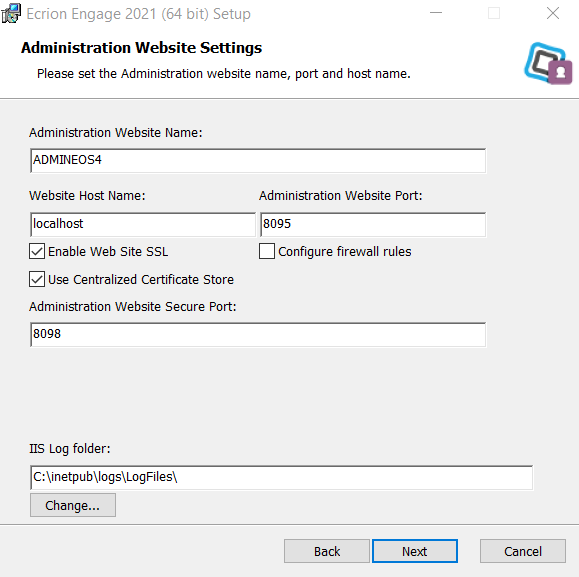
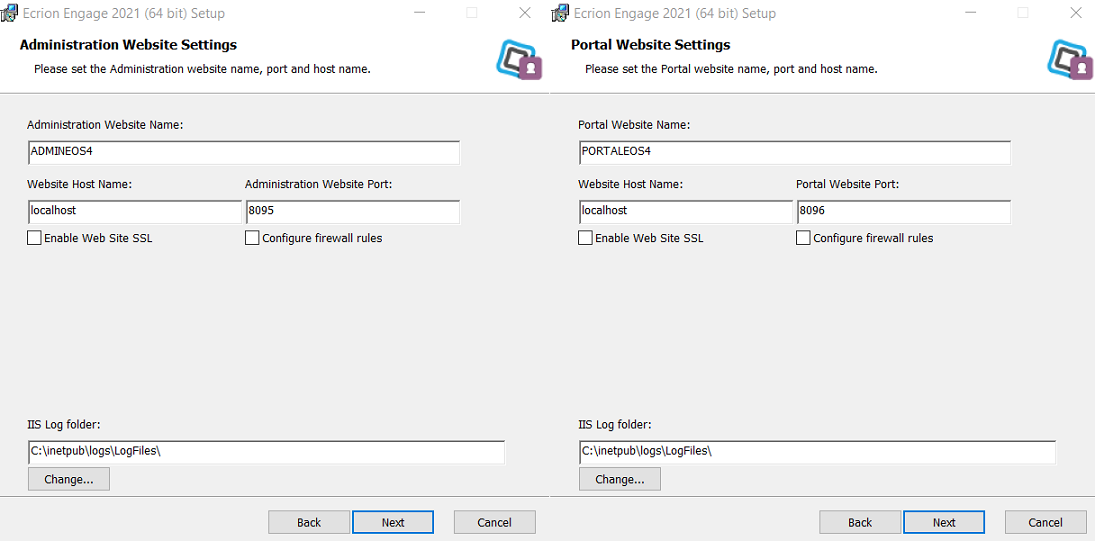
Step - Administration Website Settings
The Administration Website performs various administrative tasks over EngageCX environments (configuring worker servers and administration users, configuring environment capabilities, etc.). The website will be installed on the IIS server. During the setup, it may be necessary to check some of the options described below to accomodate your organization needs.
If you choose the Administration Website component, the settings below are mandatory to be configured. This information will be used to access the Administration website.
- Administration Website Name (By default, it is ADMINEOS4)
- Website Host Name; (By default, it is localhost. To enable remote access, update the box to the corresponding address).
- Administration Website Port (By default, it is 8095).
Optionally, you also have two options that can be checked/un-checked:
- Enable Web Site SSL - Makes the site also accessible via HTTPS (requires a preinstalled SSL Certificate)
- Configure firewall rules - Configures firewall to allow access to the Administration Website via the specified port(s).
If you enable the Web Site SSL option, make sure to provide the information below:
- Administration Website Secure Port - Select the port to use for HTTPS access; this must be different than the HTTP port (and ports used by the other websites). You may disable HTTP access to the website from IIS Manager after running the setup.
- SSL Certificate - Select an SSL Certificate for enabling HTTPS access; this must already be installed on the system, prior to launching the setup.
Note
To pick up a SSL certificate from a network share instead of using the local certificate store, check the Use Centralized Certificate Store feature available, then provide the website secure port to be used.
The IIS Log folder box allows users to set the Website log folder for the IIS logs.
You can also enable HTTPS traffic on this website and add firewall rules for incoming requests, in a similar fashion as the Enterprise Website.
Step - Portal Website Settings
The Portal Website allow customers to view their communications created with EngageCX software. This website will be installed on the IIS server.
During the setup, it may be necessary to check some of the options described below to accomodate your organization needs.
If you choose the Portal Website component, the settings below are mandatory to be configured. This information will be used to access the Portal website.
- Portal Website Name (By default, it is PORTALEOS4)
- Website Host Name; (By default, it is localhost. To enable remote access, update the box to the corresponding address).
- Portal Website Port (By default, it is 8096).
Optionally, you also have two options that can be checked/un-checked:
- Enable Web Site SSL - Makes the site also accessible via HTTPS (requires a preinstalled SSL Certificate)
- Configure firewall rules - Configures firewall to allow access to the Portal Website via the specified port(s).
If you enable the Web Site SSL option, make sure to provide the information below:
- Portal Website Secure Port - Select the port to use for HTTPS access; this must be different than the HTTP port (and ports used by the other websites). You may disable HTTP access to the website from IIS Manager after running the setup.
- SSL Certificate - Select an SSL Certificate for enabling HTTPS access; this must already be installed on the system, prior to launching the setup.
Note
To pick up a SSL certificate from a network share instead of using the local certificate store, check the Use Centralized Certificate Store feature available, then provide the website secure port to be used.
The IIS Log folder box allows users to set the Website log folder for the IIS logs.
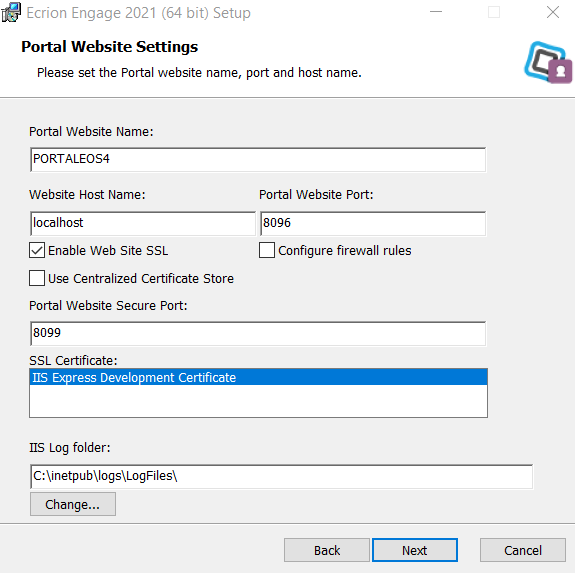
You can also enable HTTPS traffic on this website and add firewall rules for incoming requests, in a similar fashion as the Enterprise Website.
Step - Dependent Services Settings
This step allows customers to manage the addresses of the machines where you installed the EngageCX components.
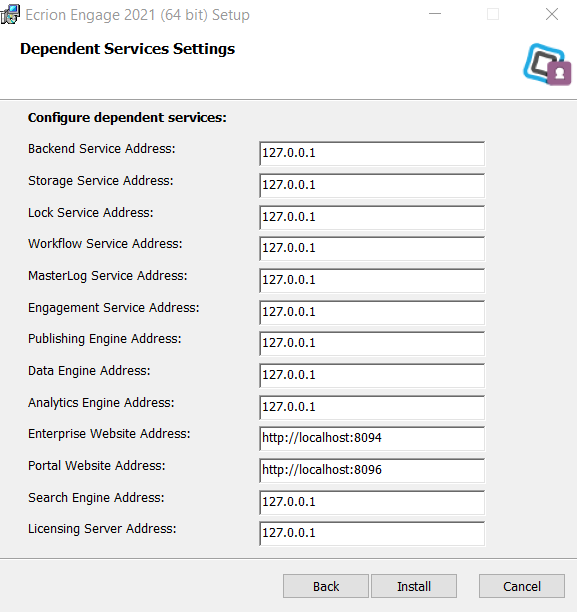
Once you finish configuring the components, you can click the Install button, located in the bottom region of the Setup Wizard window, and the setup will proceed to install the EngageCX software.
Step – Installing EngageCX Platform and Completed Screen
The final steps of the Installation Wizard allow you to see the progress of the installation and, once completed, you can view the Readme file of the EngageCX Software.
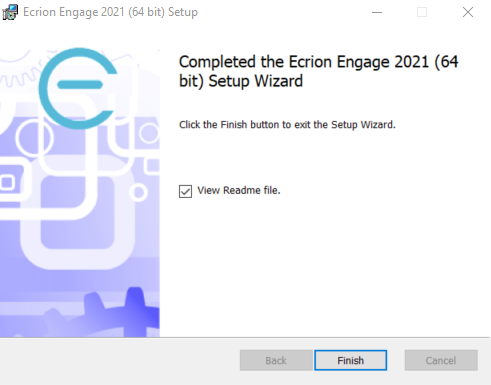
Complete the installation by selecting the Finish button.
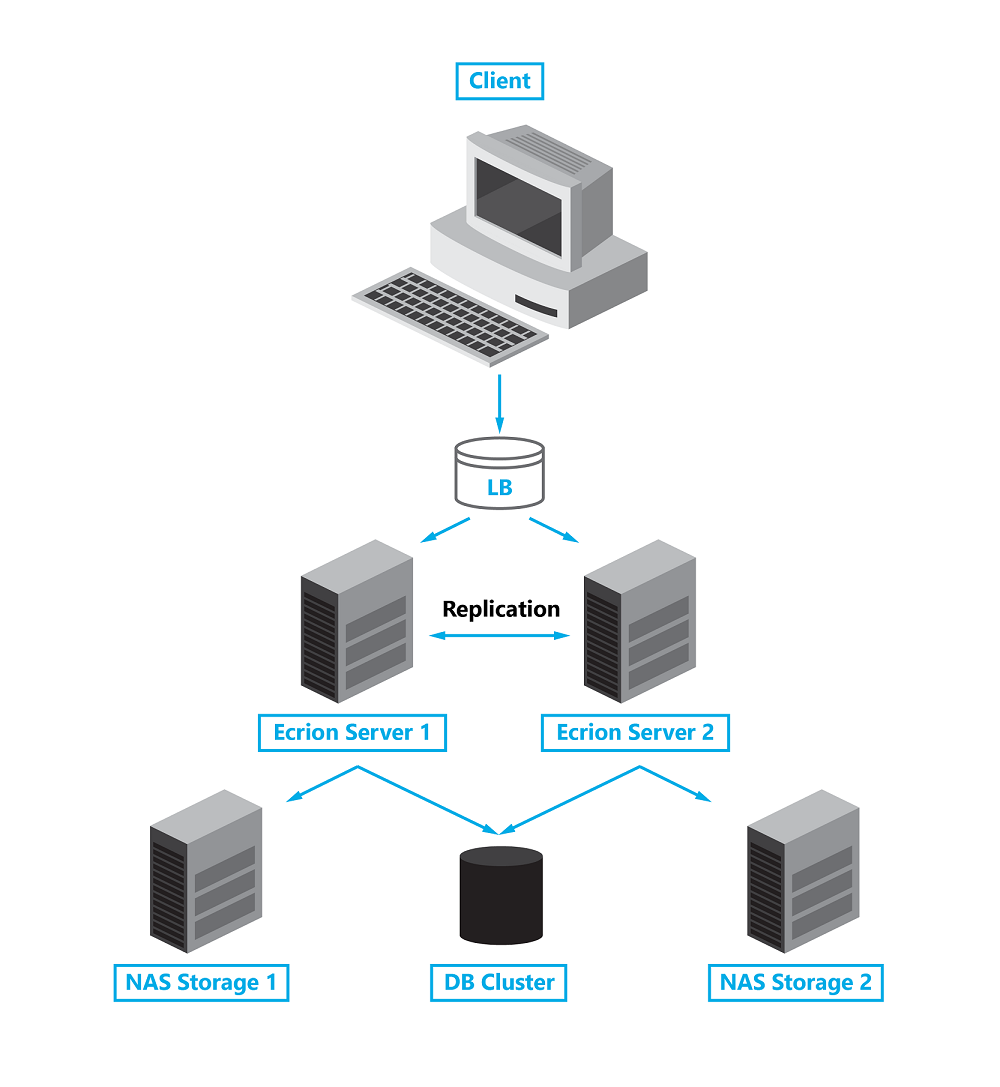
Double Instance
This section describes how to set up HA using two servers, each with a full instance of EngageCX deployment (except the database). The instances in this topology are configured to synchronize both storage and their background activity (triggers, schedules, health check, search data crawling, etc.).
Conventions
For the example below, we will use the following conventions:
- Server 1: EngageCXServer1 (with the IP Address: X.X.X.X)
- Server 2: EngageCXServer2 (with the IP Address: Y.Y.Y.Y)
Overview
- Both server nodes must meet the system requirements. See Basic Installation Requirements.
- Prepare the SQL Database cluster. See EngageCX Database.
- Make sure that both servers have the appropiate ports opened. See Ports Availability.
- Run the EngageCX setup and complete the installation process on each of the server nodes, by ensuring the HA Configuration from below.
HA Configuration
Particular configuration is required for setting up High Availability successfully.
1- Running the Setup
While running the Engage setup, make sure that the following options are enabled. The settings are required for both nodes.
- Step - Configure Publishing Engine: Enable
Configure firewall rules to allow remote connections; - Step - Configure Data Engine: Enable
Configure firewall rules to allow remote connections; - Step - Configure Analytics Engine: Enable
Configure firewall rules to allow remote connections; - Step - Database Settings:
- Note that in this scenario both EngageCX instances must point to the same database.
- Step - Storage Service Settings: Enable
Configure firewall rules to allow remote connections; - Step - Configure Lock Service: Enable
Configure firewall rules to allow remote connections; - Step - Configure Engagement Service: Enable
Configure firewall rules to allow remote connections; - Step - Configure Workflow Service: Enable
Configure firewall rules to allow remote connections; - Step - Configure Search:
- Enable
Configure firewall rules to allow remote connections; - Note that in this scenario both EngageCX instances must point to the same Search database.
- Enable
- Step - Configure Licensing Server:
- Enable
Configure firewall rules to allow remote connections; - Enable
Peer Licensing Server; - Enter the IP Address of opposite EngageCX server used in the
Peer Licensing Server Addressbox.
- Enable
- Step - Backend Services Settings: Enable
Configure firewall rules to allow remote connections; - Step - Configure MasterLog Server: Enable
Configure firewall rules to allow remote connections; - Step - Enterprise Website Settings:
- Enable
Configure firewall rules to allow remote connections; - To ensure remote access to the Enterprise website, it might be necessary to replace localhost with * (i.e.: to accept all connections) on the
Website Host Namebox;
- Enable
- Step - Administration Website Settings:
- Enable
Configure firewall rules to allow remote connections; - To ensure remote access to the Administration website, it might be necessary to replace localhost with * (i.e.: to accept all connections) on the
Website Host Namebox;
- Enable
- Step - Portal Website Settings:
- Enable
Configure firewall rules to allow remote connections; - To ensure remote access to the Portal website, it might be necessary to replace localhost with * (i.e.: to accept all connections) on the
Website Host Namebox;
- Enable
- Step - Dependent Services Settings:
- Verify that the correct IP Addresses and Ports are set up for your Engage Deployment.
- If a Load Balancer is added between the two EngageCX Server Nodes, it might be necessary to configure the Load Balancer IP Address in the services boxes.
2- Updating the Configuration Files
- After the setup completed to install, make sure to stop the EngageCX Services and Websites, in order to proceed with the server synchronization config:
- One easier way of stopping EngageCX Services would be from Windows Task Manager\Services. EngageCX is using the following services:
EngageCX Analytics Engine,EngageCX Data Engine,Engagement Windows Service,EngageCX Licensing Server Service,EngageCX Lock Windows Service,EngageCX Omni System 4 Service,EngageCX Publishing Engine,EngageCX Storage Windows Service,EngageCX Workflow Windows Service; - One easier way of stopping EngageCX Websites would be from ISS Manager. EngageCX is using the following websites:
ADMINEOS4,EOS4,PORTALEOS4;
- One easier way of stopping EngageCX Services would be from Windows Task Manager\Services. EngageCX is using the following services:
- On EngageCXServer1, access the main configuration file (i.e. EOS4.config) and add the lines below, based on your needs:
| EngageCX Server 1 (IP Address: X.X.X.X) | |
|---|---|
| ClusterNodeName=EngageCXServer1ClusterServiceEnabled=true | Enable HA Clustering and set up a unique name for the server. |
| StorageFolder={Path_To_EngageCXServer1_Storage_Folder}StorageEncrypted=true | Enable Storage encryption and configure the path to the storage location. |
| ESSPeerAddress=Y.Y.Y.YTriggerPeerAddress=Y.Y.Y.YSchedulerPeerAddress=Y.Y.Y.YBackgroundPeerAddress=Y.Y.Y.YBackupPeerAddress=Y.Y.Y.Y | Set up the IP Addresses for the HA Peer services. |
- On EngageCXServer2, access the main configuration file (i.e. EOS4.config) and add the lines below, based on your needs:
| EngageCX Server 2 (IP Address: Y.Y.Y.Y) | |
|---|---|
| ClusterNodeName=EngageCXServer2ClusterServiceEnabled=true | Enable HA Clustering and set up a unique name for the server. |
| StorageFolder={Path_To_EngageCXServer2_Storage_Folder}StorageEncrypted=true | Enable Storage encryption and configure path to the storage location. |
| ESSPeerAddress=X.X.X.X TriggerPeerAddress= X.X.X.XSchedulerPeerAddress= X.X.X.XBackgroundPeerAddress= X.X.X.XBackupPeerAddress=X.X.X.X |
Set up the IP Addresses for the HA Peer services. |
- When the Peer Licensing property is enabled during the setup, you will be able to notice the following configurations inside the LicensingServer.config file.
StorageClustered=true
ClusterSynchronizationEnabled=true
LicensingPeerServerAddress=<Peer_Server_IP_Address>
Note
To specify how much time a peer should wait for a response from another peer until the connection will fail through the parameter below, add in the Licensing.config file:
ClusteredPeerConnectionTimeout=<.
- Once the above configurations have been applied on both EngageCXServer1 and EngageCXServer2, save and close the main config files updated (i.e. EOS4.config, LicensingServer.config).
- Then, start the EngageCX services and websites.
3- Testing the Configuration
Once the above setup is completed, is best practice to check the following and ensure the HA configuration is working properly.
- On both servers, open the EOS4.log file (by default, located here: C:\ProgramData\EngageCX\Log), and wait until the storage synchroniation is finished. This can be checked by opening the EngageCX log file and look after the information, as stated in the picture below. Information on how to enable logging can be found here.

- Access EngageCXServer1 and install your domain product keys (HA Experience or HA Converse keys). See Licensing page. Once installed, access EngageCXServer2 and verify if installed keys are available on the second server.
- On EngageCXServer1, create an environment and add some projects to it, then access EngageCXServer2, and verify if the newly created environment and assets are in synchronized.
Complex Deployments
EngageCX Platform provides a scalable architecture that can accommodate various scenarios. This section describes how to install EngageCX Platform across multiple servers.
Briefly, when installing EngageCX components across multiple servers, you need to consider some of the following:
- Run the executable on each server you want to deploy EngageCX software;
- On the Product Features Selection step, select only the components that you want to install on the server you run the executable;
- Check the
Configure firewall rules to allow remote connectionsfor each component. - On the Dependent Services Settings step, configure the Host Name and Port Number for each component to ensure that your components are connected and can communicate.
- On the Licensing Server step, configure the IP Address of the Peer Licensing Server component or of the Load Balancer IP Address.
Example: Below we will describe a scenario in which we will install the EngageCX websites on a server (e.g. FrontEnd Server), the EngageCX Database is placed on a separate server (e.g. SQL Server) and the other components (Publishing Engine, Data Engine, Analytics Engine, Licensing Engine, Backend Engine, Storage Engine, Lock Engine) are installed on a separate server (e.g. BackEnd Server).
SQL Server
When configuring the EngageCX Database on the SQL Server, you will have to ensure the following:
- Create a new Database to use it for the EngageCX software.
- The database needs to be created under the Microsoft SQL Server tool 2008 or later.
- After the database is created, you need to make sure that the user under which the database authentication will be made has at least Database Admin rights (db_owner). For Windows Authentication, the Network Service account must have permissions to log on as a service.
EngageCX Back End Server
Run the EngageCX executable on the Back-End Server to start the installation. The steps below highlight the changes that you need to perform within the Installation Wizard, for this scenario. For more details regarding the installation process, please see the Single Instance chapter of this guide.
- Start the Installation Wizard and accept the End-User License Agreement, then click
Next. - On the Destination Folder step, you can either change the default installation location (C:\Program Files\EngageCX\Engage) or let the default settings, then click
Next. -
On the Product Features Selection dialog, select all components other than websites: Publishing Engine, Data Engine, Analytics Engine, Search Engine, Storage Engine, Lock Engine, Backend Services, Licensing Server and Print Info Service.
-
On the Set Encryption Key step, check Override Encryption Key to override the default encryption key with another one used to encrypt the TCP communications, Storage data, etc., then click
Next.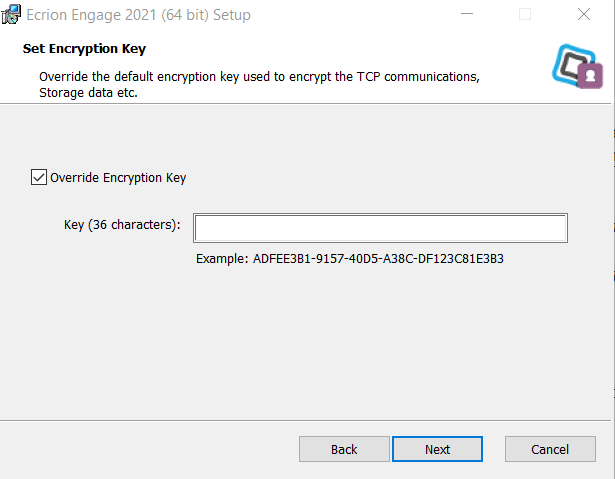
-
On the Configure Publishing Engine step, check Configure firewall rules to allow remote connections to Publishing Engine, then click
Next.
-
On the Configure Data Engine step, check
Configure firewall rules to allow remote connections to Data Engine, then clickNext.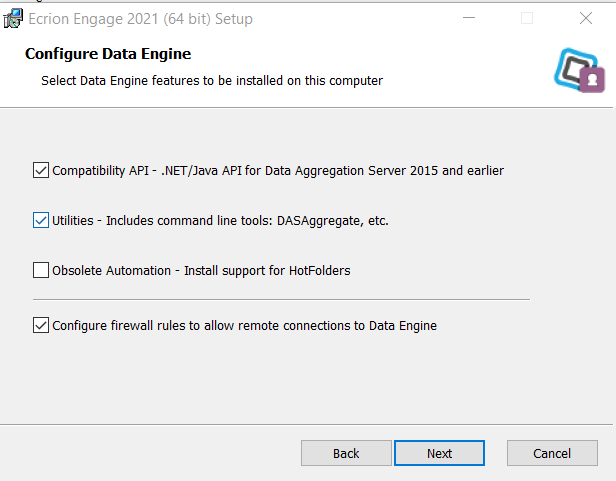
-
On the Configure Analytics Engine step, check
Configure firewall rules to allow remote connections to Analytics Engine, then clickNext.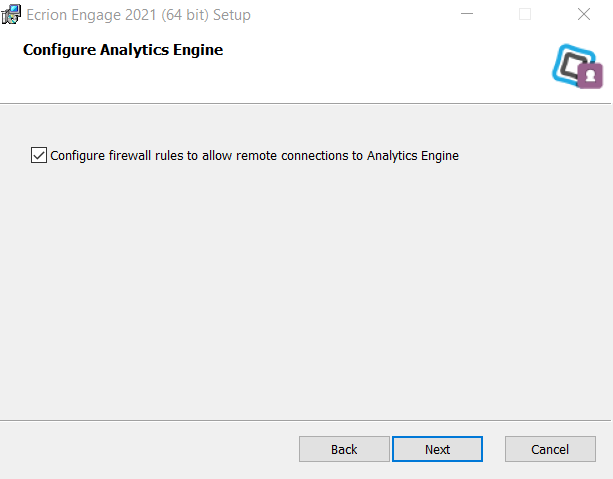
-
On the Database Settings step, make sure to establish a reliable connection to the SQL Server. You will need to select the
Provider Type, add theServer Name,Database Nameand login credentials for SQL or Windows Authentication. Make sure the user provided has permissions to read/write/list in the specified database.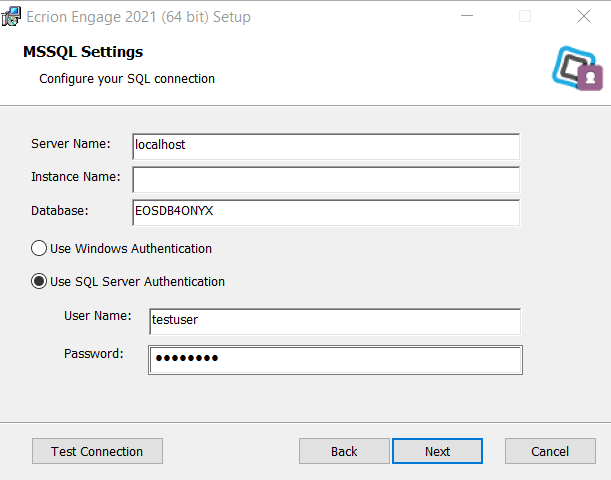
-
On the Storage Service Settings dialog, add a path to the storage folder. If using NAS Storage, make sure to use network paths. (e.g. \\ServerName\EngageCXStorage).
-
On the Configure Lock Service step, check
Configure firewall rules to allow remote connections to Lock Engine, then clickNext.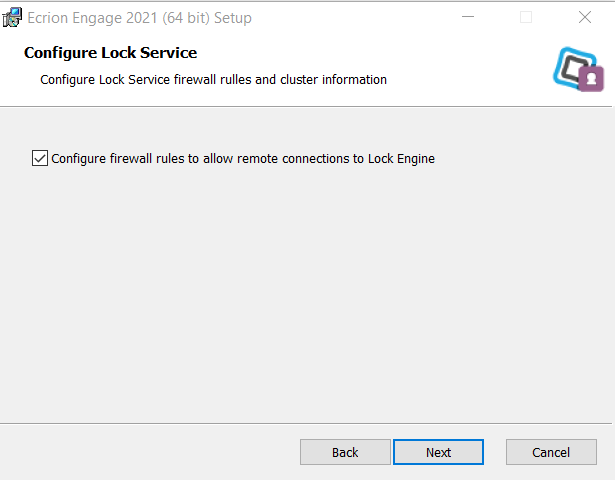
-
On the Configure Engagement Service step, enable firewall rules to allow incoming remote requests by checking
Configure firewall rules to allow remote connections to Lock Engine, then clickNext.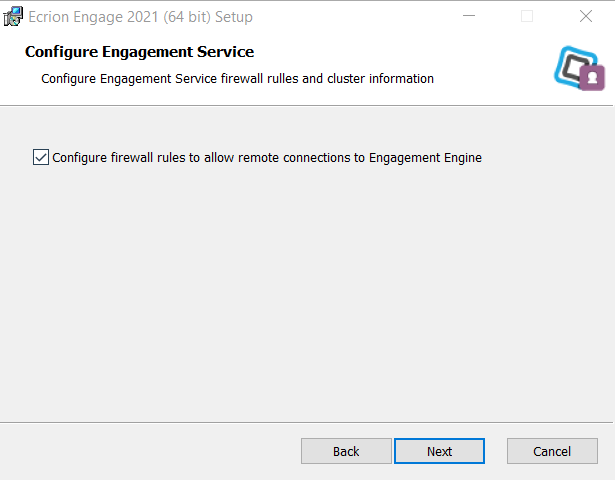
-
On the Configure Workflow Service step, enable firewall rules to allow incoming remote requests by checking
Configure firewall rules to allow remote connections to Workflow Engine, then clickNext.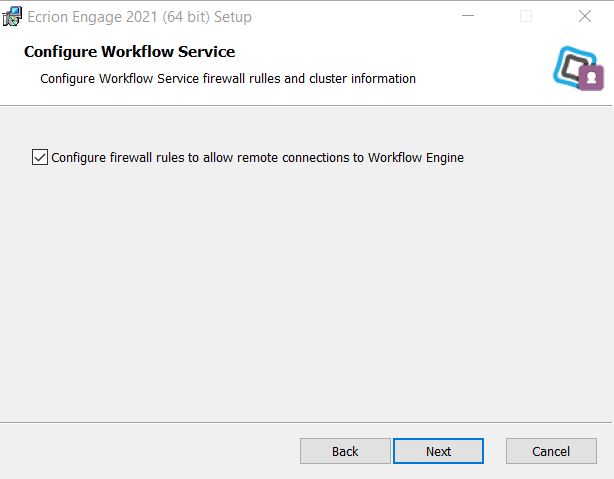
-
On the Search Engine Settings step, make sure to establish a reliable connection to the SQL Server that contains your Search Database. You will need to select the
Provider Type, add theServer Name,Database Nameand login credentials for SQL or Windows Authentication. Make sure the user provided has permissions to read/write/list in the specified database.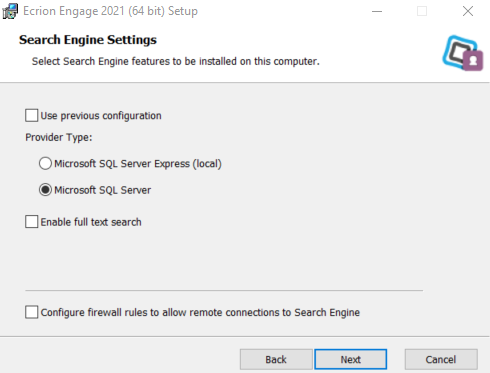
-
On the Configure Licensing Server step, check
Configure firewall rules to allow remote connections to Licensing Server, then clickNext. In case you have a HA deployment for the Licensing Server, then enable thePeer Licensing Server Addressand enter the IP Address of the Peer Licensing Server in the empty box. For more information, please check Double Instance scenario.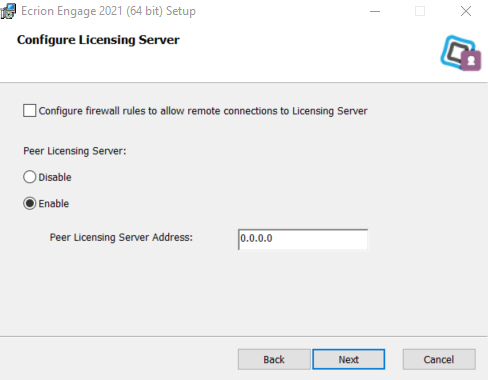
-
On the Backend Services Settings step, check
Configure firewall rules to allow remote connections to Backend Services, then clickNext.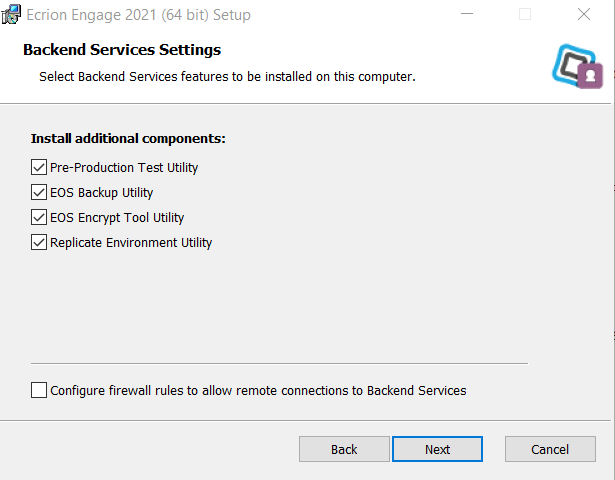
-
On the Configure MasterLog Service step, enable firewall rules to allow incoming remote requests by checking
Configure firewall rules to allow remote connections to MasterLog Engine, then clickNext.
-
On the Dependent Services Settings make sure to update the
Host Names/IP Addressesfor the EngageCX websites. In our case, the host name will be the EngageCX Front-End Server.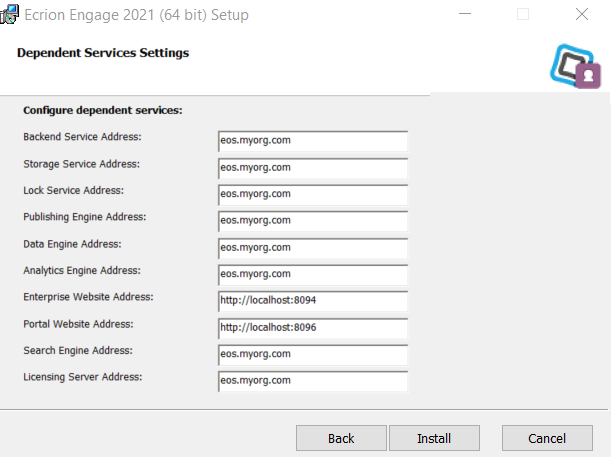
-
Once you’re ready, select the
Installbutton to start the installation process.
EngageCX Front End Server
Run the EngageCX executable on the Front-End Server to start the installation. The steps below highlight the changes that you need to perform within the Installation Wizard, for this scenario. For more details regarding the installation process, please see the Single Instance Installation chapter of this guide.
- Start the Installation Wizard and accept the
End-User License Agreement, then clickNext. - On the Destination Folder step, you can either change the default installation location (C:\Program Files\EngageCX\Engage) or let the default settings, then click
Next. -
On the Product Features dialog, select only the front-end components:
Enterprise Website,Admin WebsiteandPortal Website.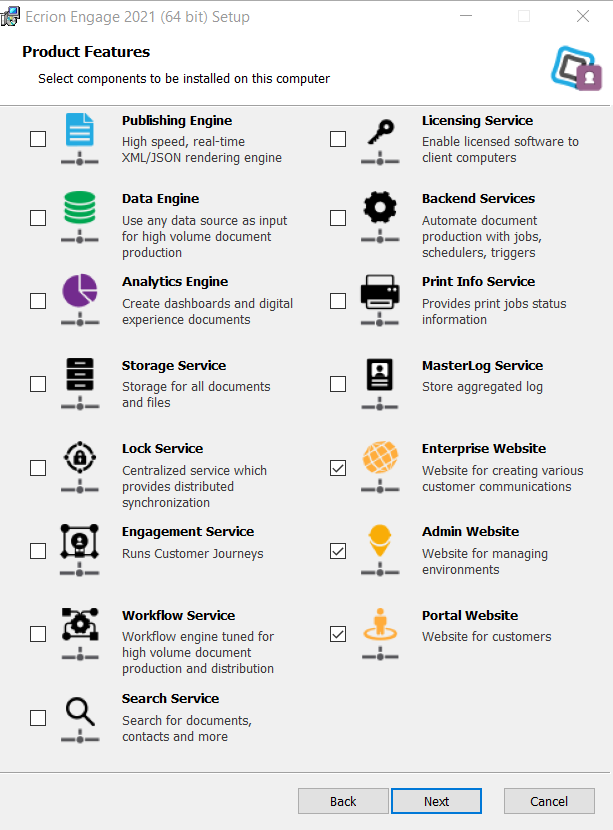
-
On the Set Encryption Key step, check Override Encryption Key to override the default encryption key with another one used to encrypt the TCP communications, Storage data, etc., then click
Next. -
On the Database Settings step, make sure to establish a reliable connection to the SQL Server. You will need to select the
Provider Type, add theServer Name,Database Nameand login credentials for SQL or Windows Authentication. Make sure the user provided has permissions to read/write/list in the specified database.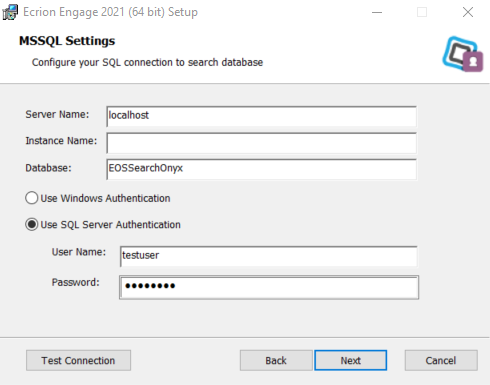
-
On the Enterprise Website Settings window, you will be prompted to enter the Website Name, the Port Number and the Host Name. Please make sure to check the
Configure firewall rules option. If unchecked, you will need to disable the firewall on both servers or create firewall rules for the EngageCX ports, to make sure the EngageCX components can communicate with each other.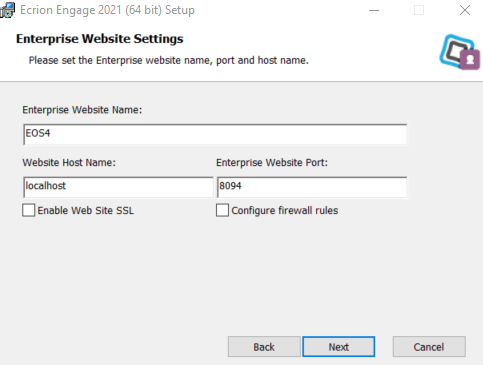
-
Repeat the step above for the Administration Website and Portal Website Settings steps.
-
On the Dependent Services Settings step, make sure to update the Host Names/IP Addresses for the EngageCX Services. In our case, the EngageCX Back-End Server should be added for the Backend Service, Storage Engine, Publishing Engine, Data Engine, Analytics Engine, Lock Engine, Search and Licensing Server Addresses.

-
Once you’re ready, select the
Installbutton to start the installation.
When the installation is done on both servers, sign in to the Sysadmin Website and install all the necessary product keys. For more details, please visit Licensing. Ultimately, access the System Status page from the Sysadmin Website and verify if the services are working properly.
Post-Installation
After a successful installation using the EngageCX installer, you will need to follow these additional steps to ensure your machine is configured properly. Please select the area you are interested in from the table below.
| Update Initial Configuration |
| Update IIS Configuration |
Changing Initial Configuration
Some settings like database, storage, ports or SSL are configured during installation. To modify these settings, we recommend running the installer again.
The installer will automatically detect previous database/storage configurations and offer to use them. We recommend using this option if you want to review and modify the settings for your database and storage.
If you need to specify database and storage explicitly, read below. Note that this is NOT recommended when there is a previous configuration available.
- If you point the installer explicitly to a database previously used, the installer will upgrade the database to the current version while preserving its contents.
- If you point the installer explicitly to a storage folder previously used, the installer will use the contents of that folder without deleting them.
Note
The database and storage are deeply linked with each other and cannot function properly if they are out of sync. It is critical that the selected database and storage have been used by EngageCX Platform in the same configuration before and these have not been altered since the last time they were used.
IIS Manager Configuration
Updating Bindings for Website Remote Access
If you want to access one of the EngageCX Platform Websites remotely, you will need to follow these steps for each EngageCX Website.
- Open IIS Manager.
- From the Connections Tree View, navigate to the EngageCX Website exhibiting the issue.
- On the right-side pane, select
Bindings. - Edit the existing binding, and change
localhostto*(to accept all connections) or specify an IP Address. - Click
OKto save the changes.
Note
If you do this, the website will be accessible from the intranet if the firewall allows it. Make sure that this is the intended functionality and that website access (especially for System Administration) is properly secured before making the change.
Enabling Secure Connections
Enabling HTTPS can be done in two ways:
- Automatically, by re-running the installer. For more information, please access the Enabling HTTPS Automatically section of the same guide.
- Manually, by changing bindings in IIS and updating the main configuration file. For more information, please access the Enabling HTTPS Manually section of the same guide.
Note that both these methods require that a valid and appropriate SSL certificate is installed on the server hosting the website(s) that you wish to enable HTTPS for.
Note
In a multi-server setup, regardless which of the methods described below (automatic or manual) is used, the steps must be performed on all servers in the multi-server setup. This includes HA scenarios.
Enabling HTTPS Automatically
To enable HTTPS automatically, simply re-run the installer and choose Enable Web Site SSL for each of the websites that you wish to make accessible through HTTPS. When ticking the box, make sure to select the correct certificate from the list that appears.
Enabling HTTPS Manually
Please follow the steps below to learn how to enable the HTTPS manually, after the installation.
- First, the appropriate bindings in IIS must be added:
- Open IIS Manager.
- From the Connections Tree View, navigate to the EngageCX Website that you wish to enable HTTPS.
- On the right-side pane, select
Bindings. - Add a new binding or edit the existing binding and change
httptohttps. - Click
OK.
- Afterward, the corresponding host URL must be updated in Domain Settings.
- For the Enterprise Website, update:
Enterprise Website: https://<hostname>:<port> - For the Sysadmin Website, update:
Sysadmin Website: https://<hostname>:<port> - For the Portal Website, update:
Customer Portal Website: https://<hostname>:<port>
- For the Enterprise Website, update:
Usually, this only means changing http to https in the configuration file, with the hostname and port (if present) left the same.
- After making these changes, perform the following actions so that the new configuration values to be loaded:
- Restart the EngageCX service: open Windows Task Manager and restart the EngageCX Omni System 4 Service.
- Restart the IIS service either from the IIS Manager tool or by opening an administrator command and running the iisreset command.
Note
This procedure can also be applied in reverse, to change from HTTPS to HTTP.
Uninstallation
Below you can find details on how to remove EngageCX from your computer.
Uninstall Procedure
Please follow the steps below to learn how to uninstall the EngageCX product from the computer.
- On the computer that runs the EngageCX software, log in as a local or domain administrator.
- Open
Control Panel. - Select
Uninstall a programfrom the Programs area. - In the Uninstall or change a program window, select
EngageCX (Engage) 2021. - Click
Uninstallfrom the toolbar. - A confirmation message appears. Select
Yesto remove the EngageCX software from your machine. - A warning message appears. Click
Yesto continue, then wait until the software finishes the un-installation.

Upgrading
For instructions on upgrading an existing installation, please see the Upgrade Manual.
Getting Help
As the success of your business relies on your customers, EngageCX helps you increase your client’s engagement by offering a solid foundation for creating and delivering successful communication between them. This document provides a good start for understanding how EngageCX should be installed on your machine and/or configured depending on different types of deployment. If you want to discuss the best deployment or integration options around your company's individual needs, please contact our EngageCX Professional Services Team today. We'd love to hear from you!