EngageCX Create Installation Guide
Overview
This guideline provides step by step instructions for installing EngageCX Create solution on one single server or across multiple servers. For more information, please skim over the following lines if you want to install the EngageCX Create for the first time.
Get Latest Release
In this section there will be described how to access the latest release currently in use for the latest features and updates.
Accessing the Latest Solution Release
Follow the steps below to learn how to download the latest EngageCX Create solution release.
- Start by accessing your Licensing Account and click
Sign in. - In the Welcome page of your Licensing Account, navigate to the
Benefitstab from the top toolbar. - Next, scroll down to the Downloads section and find the EngageCX product you want to download. Select the
EngageCX Createsolution. - From the pop-up window, choose the product version you want to download. For EngageCX Create, you can select the bit version you need (32 or 64 bit) to initiate the download. Once the download is complete, run the EngageCX Create executable and follow the on-screen instruction.
Pre-Installation
Before proceeding to install the EngageCX Create software, it is recommended to take a look over some prerequisites in order to ensure the properly conditions that lead to a successful installation. For more details regarding a specific area of requirements, please access the topic you need from the table below.
| .NET Framework 4.5 | Operating System | Hardware Requirements |
NET Framework
The .NET Framework 4.5 is required to be able to run the EngageCX Create setup. The .Net Framework 4.5 can be downloaded from the Microsoft website, from this download link.
For important information about this release, see the Readme File.
Operating System
Find in the table below the minimum and recommended operating system specifications for EngageCX Create installation.
| Minimum | Recommended |
|---|---|
| Windows Vista SP2 | Windows Server 2012 R2 x64 and up |
Hardware Requirements
The table below lists the minimum and recommended hardware specifications that must be addressed prior to the EngageCX Create installation.
| Minimum | Recommended |
|---|---|
| 1 CPU/4 Cores i5 @ 2 GHZ | 2 CPU/8 Cores XEON @ 3 GHZ |
| 4 GB of RAM | 16 GB of RAM |
| 10 GB disk space | 1 TB disk space |
Ports Available
Before installing the EngageCX Create, we recommend to ensure that some ports are not in use on your server.
EngageCX Services Default Ports
In the table below, there are the default ports available for the Create solution used by EngageCX Services. These ports can be configured from the PublisherSvc.config configuration file. For distributed configurations, these ports need to be opened in Windows Firewall.
| Default Port | Protocol | Parameter | Description |
| 50100 | HTTP | HTTPPort | HTTP port used to listen for incoming requests. |
| 50101 | HTTPS | HTTPSPort | HTTPS port used to listen for incoming requests. |
| 40035 | TCP | - | Licensing Engine port used to listen for incoming requests |
Installation
Installer Description
The installation files are named according to the version of the product. Generally, the setup name has the following structure: Product Name - Architecture - Build Version - Build Number.
In the example below, you can identify the details mentioned as follows:
- Product Name: EngageCX Create
- Bit Version: x64
- Build Version: 12.4.13
- Build Number: 8878
Single Installation
To open the installation wizard, double-click on the .exe file and wait for the Setup to initialize:
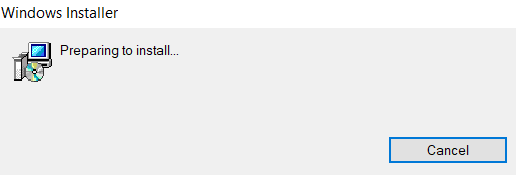
When the setup finished preparing the install, the Welcome Screen will appear. Follow the steps described below to complete the installation.
Step - Welcome Screen
The welcome screen provides details on what product is about to be installed on your machine, as well as two options, to revert changes or to proceed with the installation of the EngageCX Create software.
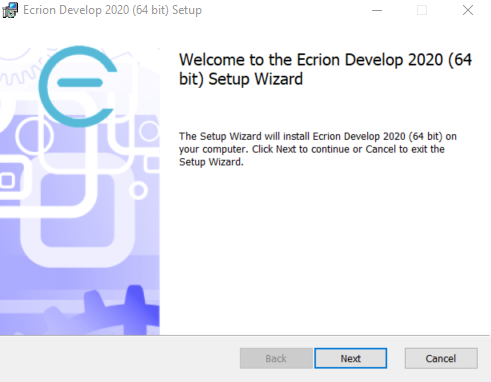
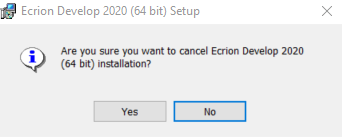
If you wish to cancel the installation, then press the Cancel button.
You will be prompted to confirm your decision, in order to prevent accidental canceling:
To proceed with the installation, select the Next button, located in the bottom region of the window.
Step - End-User License Agreement
In order to continue with the installation of EngageCX Create, you will need to carefully read the terms and conditions for this software.
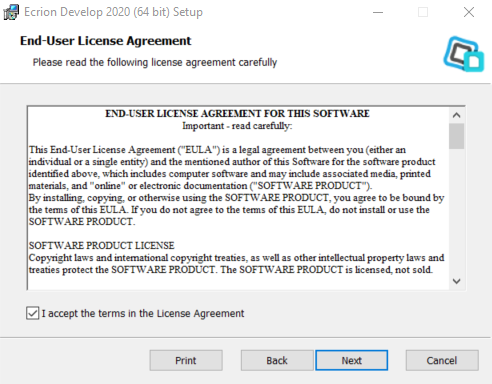
Afterwards, check the I accept the terms in the License Agreement checkbox and click Next.
Note
The Next button is grayed out until the above checkbox is selected.
Step - Destination Folder
This step in the Setup Wizard offers the possibility of setting the location where the EngageCX Create software will be installed. By default, the EngageCX software will be installed at: C:\Program Files\Ecrion\EngageCX_Product.
To change the default path, select the Change button on the middle-left side of the window and provide a new destination folder for the EngageCX Create installation.
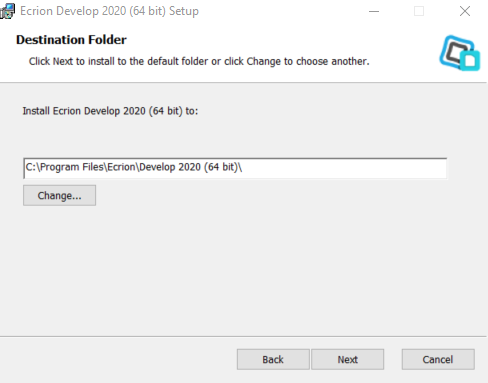
Once you have the folder set, select the Next button to continue with the installation.
Step - Product Features Selection
EngageCX Create provides a suite of components which can be chosen during this step of installation. Notice that each component is provided with a short description on its functionality.
By default, all two components are selected. You can decline the installation of a component by de-selecting the associated check-box. Not selecting an option will render the user unable to finish the installation.
- Create Engine provides high speed, real-time XML/JSON rendering engine capabilities.
- Licensing Engine provides licensing server information for customers.
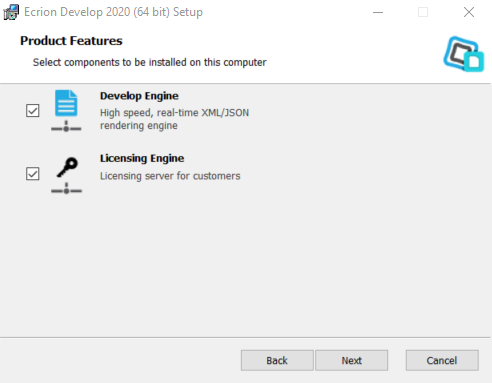
Once you select the needed products, select Next to proceed with the required settings configuration for each feature.
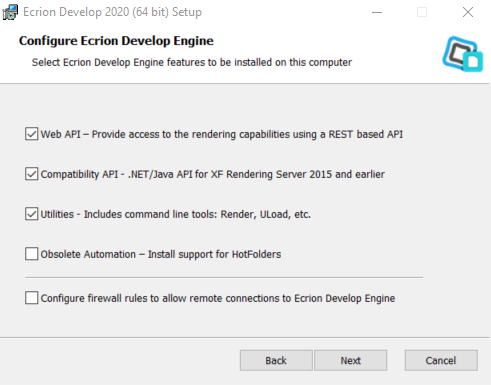
Step - Configure EngageCX Create Engine
The Configure Engine step allows you to enable access to the EngageCX REST API page and provides several backwards-compatibility options.
Command line tools that can be used for rendering different input file formats to the desired output are also provided:
- Render – A command line tool for EngageCX Create that sends out rendering requests to the EngageCX Service locally or remotely.
- ULoad – A command line tool to EngageCX Create that helps you measure the system’s performance.
During this phase of the install, you can select the Obsolete Automation – Install support for Hot Folders option that will allow you to monitor one or multiple folders and process automatically the documents arriving into those folders.
Here, you can also select to add firewall rules to allow incoming remote access.
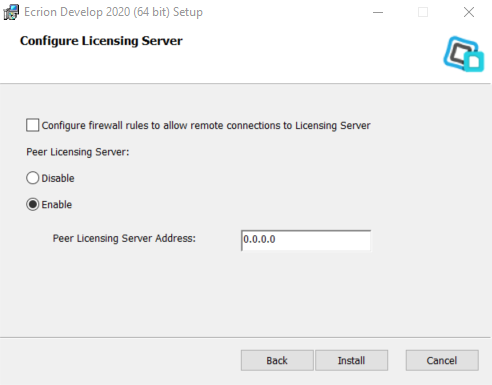
Step - Configure Licensing Server
The Licensing Server allows system administrators to install and manage all EngageCX Product keys.
This step enables the user to add firewall rules to allow incoming remote requests.
In EngageCX Create, you can choose to install the Licensing Engine component on a single machine, or distribute it on multiple machines in an high availability scenario. Select one of the options below to continue:
Note
EngageCX Create provides a 24 hours grace period when, the engine will not stop the rendering process in case anything happens to the Licensing Engine component.
Install Requirements for a Single Licensing Node
This type of deployment assumes that you will be installing one Licensing Engine component on one server. This will not require any additional configuration during the install.
By default, the Peer Licensing Server option will be disabled. Otherwise, make sure to check the Disable option, then select Next.

Install Requirements for a Dual Licensing Node
This type of deployment assumes that you will be installing two Licensing Engine components one two separate machines. The requirements for this type of install are:
- Select the
Enableoption in the Configure Licensing Server step; - Enter the IP Address of the opossite Licensing Engine component in the
Peer Licensing Server Addressbox. - Once you are ready, select
Installto complete the software installation. - It might be necessary to configure firewall rules to allow remote connections to the Licensing Server.
Info
The two Licensing components can be also connected through a Load Balancer. If a Load Balancer is used, the IP Address configured in the Peer Licensing Server option should point to the Load Balancer server.
If you already have installed the Licensing Server component on your machine for a single installation type, and want to update to multiple components options without uninstall, you will need to:
- Access the LicensingServer.config file. In a default installation, it will be located at C:\ProgramData\Ecrion;
- Update the config file as below:
StorageClustered=true
ClusterSynchronizationEnabled=true
LicensingPeerServerAddress=<Peer Licensing Server IP Address>
- Save the config file
- A restart of the
Licensing Server Servicemust be required.
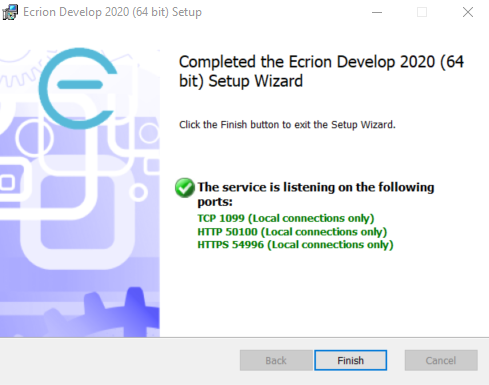
Step - Completed Setup Wizard
The final step of the Installation Wizard allows you to see the progress of the installation and, once completed, you can view the services and their corresponding ports.
Complete the installation by selecting the Finish button.
Multiple Workers
EngageCX Create allows you to configure additional Publishing Engine components to boost throughput. This type of setup is also called multiple workers deployment. It is achieved when you distribute multiple Publishing Create Engine components on different servers, having all pointing to one central Licensing Engine component, or to the Load Balancer connecting the Licensing Engines. This way, each worker will share the limits of the key(s) installed on the Licensing Engine. For instance, if the Licensing Engine has installed a product key with 1K documents volume limit, when multiple workers are setup, the volume will be synchronous distributed to each engine worker.
Figure below shows a topology using four Publishing Create Engine components as multiple workers, all pointing to one single Licensing Engine. The topology can be shrinked or extended to the number of workers needed for each organization.

Installing Components
Follow the steps below to learn how to install each component on a different machine.
- Run the EngageCX Create setup on each of the machine.
- Follow the on-screen instructions to install the solution. Note that when arriving at the Product Features step, you must check only the component that needs to be installed and uncheck the other one. For example, to install only the Create component, make sure to check only
Create Engine. - Repeat these steps on each machine, depending on how many instances your organization requires.
Connecting Workers
Follow the steps below to learn how to connect the workers with the Licensing Server. Please keep in mind that the instructions below must be done on each worker machine.
- Go to EngageCX Create application data folder. In a default installation, it should be located at C:\ProgramData\Ecrion.
- Open the PublisherSvc.config file in a text editor.
- When the Licensing Engine is installed on the same machine as the EngageCX Create workers, notice that the
LicensingServerURLparameter is set to 127.0.0.1. If multiple workers are configured, make sure to update theLicensingServerURLparameter with the corresponding IP Address of the Licensing Server machine as below:
LicensingServerUrl=<Licensing_Engine_IP_Address>
- Save the configuration file. It is recommended to perform a restart of the EngageCX Create Engine service to update the changes.
Getting Help
For more information, please access the product documentation by using the links below:
-
EngageCX Create API Guide
For more details on how to use the REST API Inspector, access the API Guide.
-
EngageCX Create Sysadmin Guide
For more details on how to build custom templates, access the Sysadmin Guide.