Your EngageCX Organization
Getting Started
When you sign in to your EngageCX Account, you can see and manage your organizational info, settings and preferences to make your EngageCX experience work better for you.
In order to access your organization, you have to follow the steps below:
- Authenticate into your EngageCX Account.
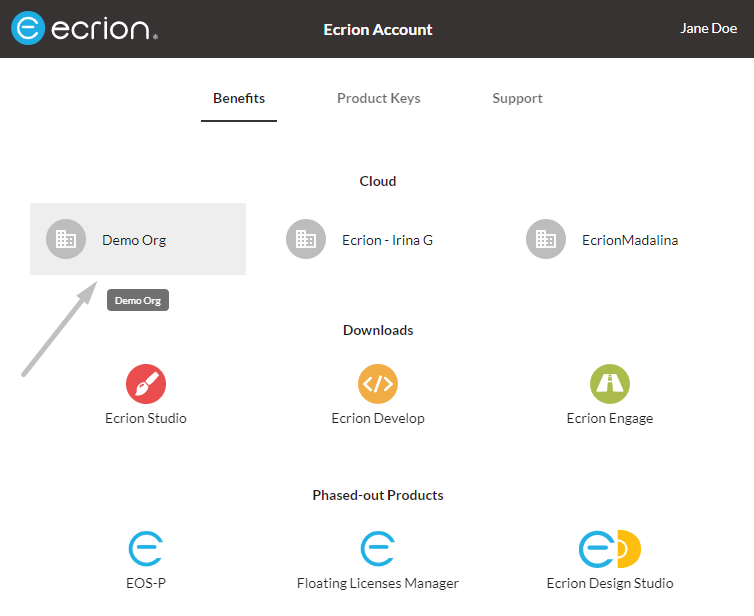
- Access the
Benefitstab and click on your organization. If there is no organization defined under the Cloud section, you must create one.
Setting Up Organization
This section covers various administrative operations, for example, creation, management and removal of an organization and workspaces within to better organize your working environment. Organization management plays a vital role in holding all components together for your Cloud experience.
Creating New Organization
Follow the steps below to create an organization.
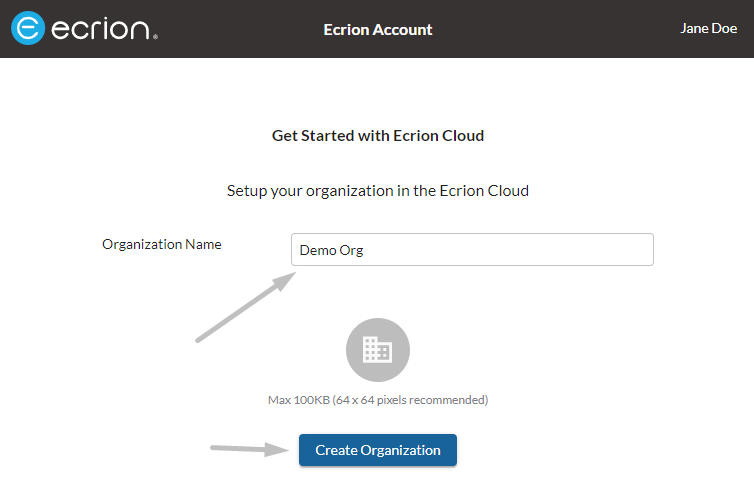
- Start by selecting
Create EngageCX Cloudenvironment from your Account\Benefits tab. - Provide the name of your organization.
- Optionally, upload your organization logo by clicking on the enterprise icon.
- Once you're ready, click
Create Organization.
Maintaining Your Organization
After creating an organization, EngageCX Account offers you the possibility to personalize your account, change your name and add a customized photo that will be displayed once you are logged in.
Updating Ecrion Account Profile
Follow the steps bellow to learn how to edit your EngageCX Account profile.
- Starting from the EngageCX Cloud environment welcome page.
- Click on your
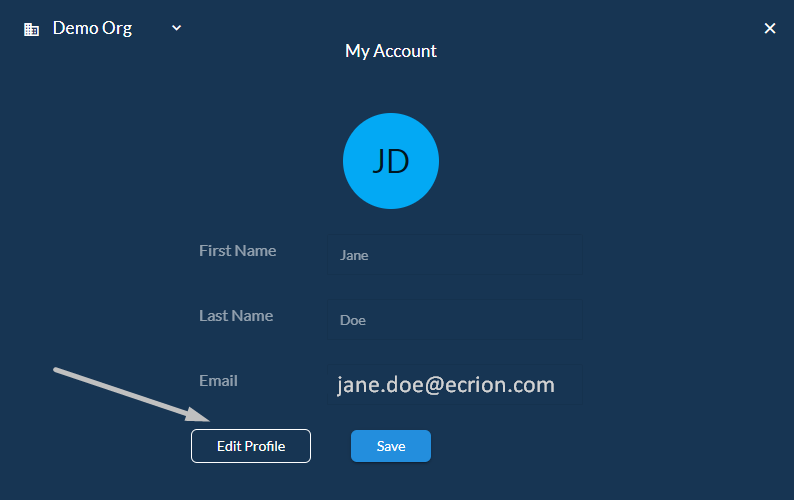
Accountname from the right-corner side of the page. - Select
My Accountfrom the sidebar. - If you want to upload a photo from your computer, click on the default blue avatar. Browse for the image you intend to use for your account and select
Open. Once you're ready, selectSave. - Select
Edit Profileto make the fields editable.- Edit the fields you want from your profile and then click
Update.
- Edit the fields you want from your profile and then click
- Finally, your profile has been updated, but your information will be refreshed at your next login.
If neither an avatar nor a name have not been personalized for the account, the default blue avatar and the initials of your name will be displayed.
Updating Organization Details
Follow the steps below to update your organization information:
- Starting from the EngageCX Cloud environment welcome page.
- Click on your
Accountname from the right-corner side of the page. - Select
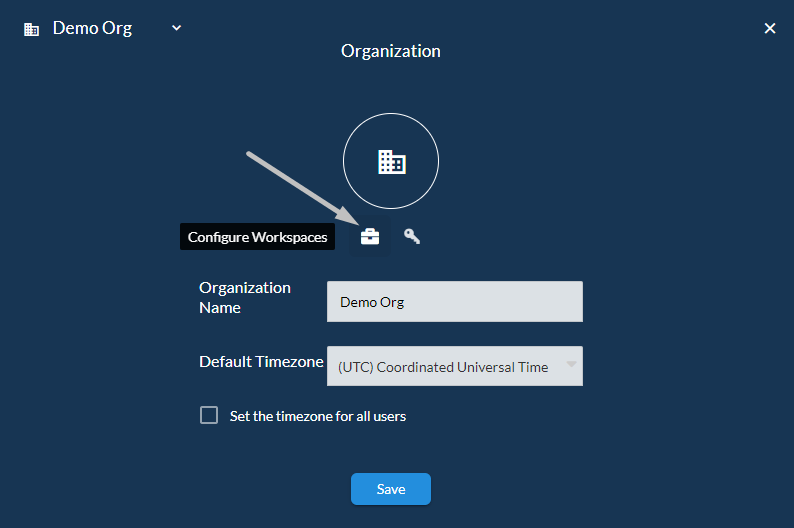
Organizationfrom the sidebar. - Edit the fields you want for your organization.
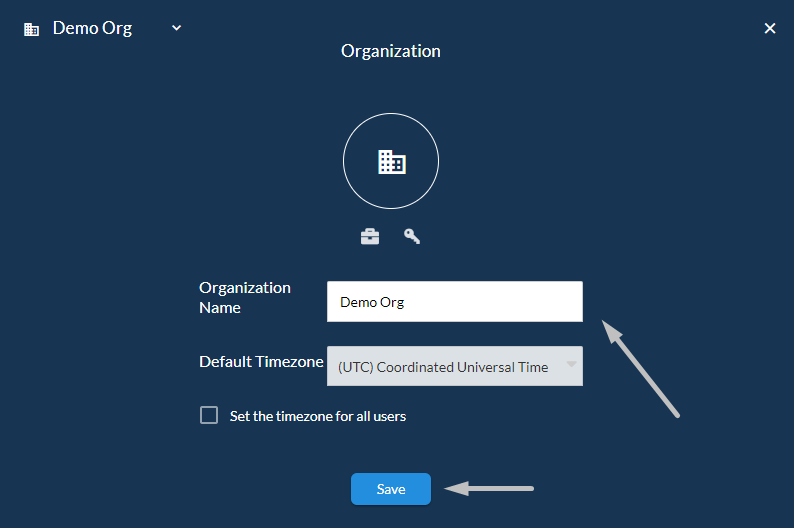
- Edit your
Organization name. - Select the
Default Timezonefrom the drop-down list. Your account time zone serves as the default time zone for all the documents and automatic processes enhanced in your organization. - Enable the
Set the timezone for all usersoption to set the default timezone for all the users that access the current organization.
- Edit your
- If you want to upload the organization logo from your computer, click on the enterprise icon. Browse for the image you intend to use for your company and select
Open. Once you're ready, selectSave. - Once you're ready, click
Save.
Configuring Workspaces
Workspaces enable collaboration and storage of all assets involved in your customer communication management processes. These are logical divisions of organizations, usually associated with departments within a company.
The purpose of a workspace is to allow you to better organize your assets into meaningful categories and can also provide restricted access, so that certain users or groups will only see the workspaces you allow them to see.
Follow the steps below to configure workspaces defined in your organization:
- Click on your
Accountname from the right-corner side of the page. - Select
Organizationfrom the sidebar. - Click
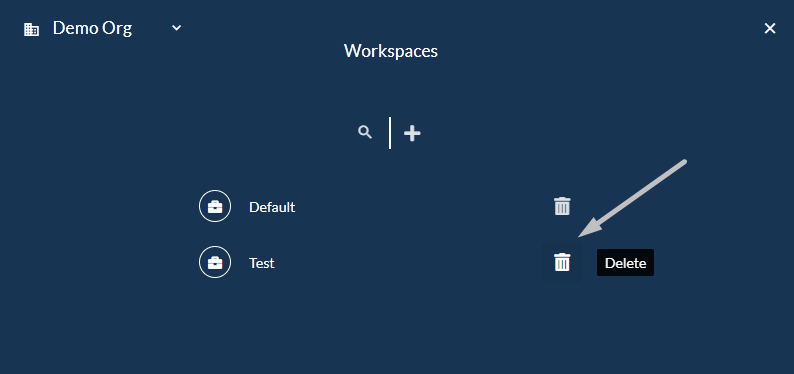
Configure Workspacesto set up the existing workspaces in the organization. - A list with all existing workspaces will be displayed. By default, the Default workspace will be automatically added to your organization.
- From the Workspaces page you can search, add, edit or remove workspaces from your organization.
Adding Workspaces
Workspace names should be meaningful and scoped to a specific group of users. If you are working on exclusive independent scopes of projects, multiple workspaces could make sense. The name must not contain special characters, but can include spaces. For example, Front Office, Operations, Bank Office, QA, Development, Production Projects, etc.
Note
A user must belong to a Group that has Manage Organization permissions in order to create a new Workspace.
Follow the steps bellow to learn how to create a new workspace in your organization.
- Starting from the Workspaces page, select the
Add( ) button above the workspaces list. - Provide a meaningful name for the new workspace and click
Create. - The workspace will be displayed in the list.

Deleting Workspaces
Follow the steps bellow to learn how to delete an existing category of apps.
- Access the Workspaces page.
- If you want to remove a workspace from the list, select the
Delete( ) button next to the corresponding workspace. Before permanently delete the selected workspace, a confirmation will be required. - The removal of one workspace can be performed also by using the Edit Workspace functionality.
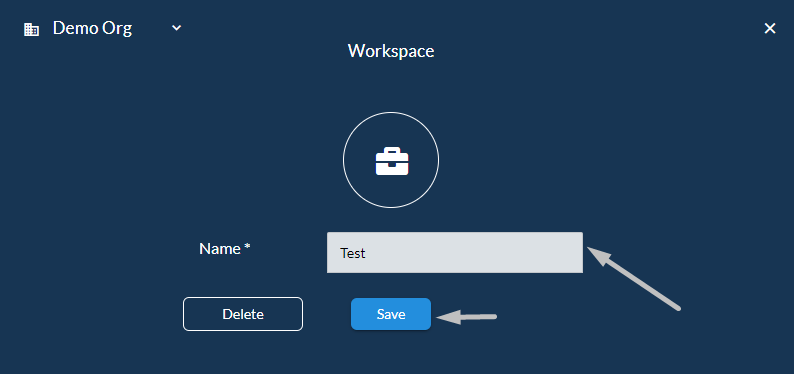
Editing Workspaces
Follow the steps bellow to learn how to edit an existing workspace.
- Starting from the Workspaces page, select a workspace which you want to edit from the list.
- If you want to rename the workspace, change the initial name and select
Save. - If you want to remove the workspace, select
Delete. Before permanently delete the selected workspace, a confirmation will be required.
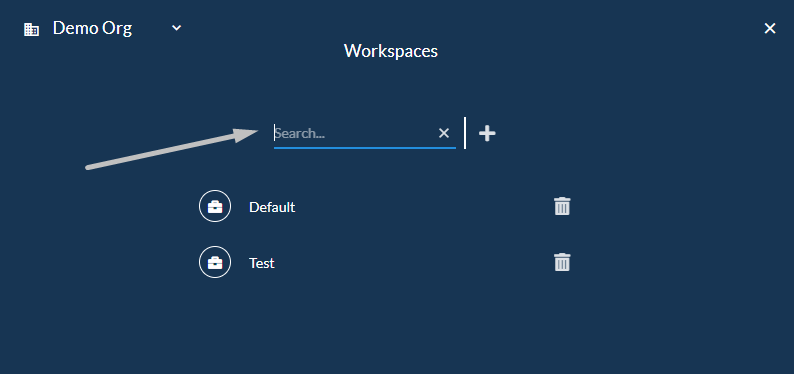
Searching Workspaces
Follow the steps bellow to learn how to search through existing workspaces.
- Access the Workspaces page.
- A list with the existing workspaces will be displayed. If you want to search for a specific workspace in the list, you can use the
Searchfeature ( ). - Type in the
Searchbox the full or just a part of the name of the workspace and hitENTER.
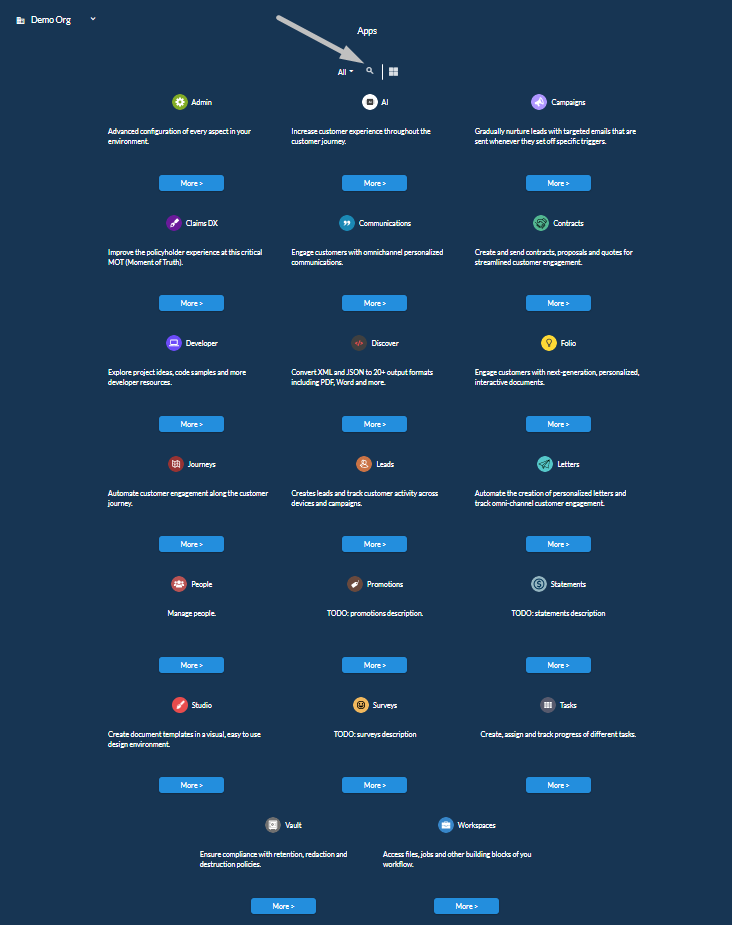
Managing Apps
The EngageCX Apps, by default, are displayed in a grid menu which makes navigation easier to understand by the users. These can be grouped in categories, but there is also the possibility to create your own category.
| App | Description |
|---|---|
| Documents | |
| Communications | Engage customers with omnichannel personalized communications. |
| Tasks | Create, assign and track progress of different tasks. |
| Experience | |
| Journeys | Automate customer engagement along the customer journey. |
| People | Manage people within the organization. |
| Promotions | Increase revenue with transaction-driven, contextual Ads. |
| Developer | |
| Admin | Advanced configuration of every aspect in your environment. |
| Workspaces | Access files, jobs and other building blocks of you workflow. |
Exploring Apps
Follow the steps bellow to learn how to explore applications available on your account.
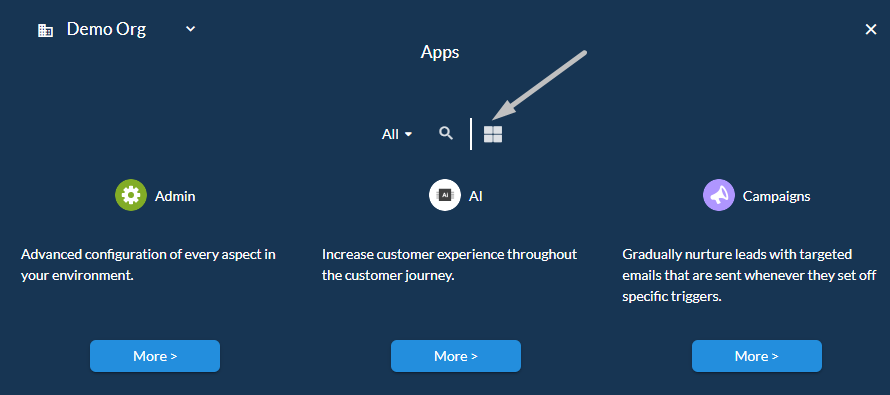
- Starting from the Cloud Organization welcome page, click on your
Accountname. - Select
Explore Appsfrom the sidebar. - A view will all the available apps will be displayed, along with a brief description of each.
- If you want to search for a specific app in the list, you can use the
Searchfeature ( ) above the grid apps menu.
Working with Apps
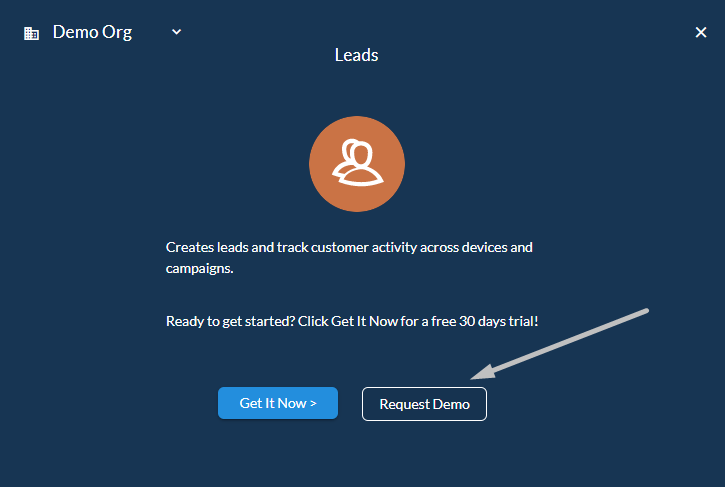
Besides the ordinary installation that supposes to have a corresponding license, each app can be used for a limited period of time of 30 days trial before being actually purchased. In this way, the prospects get the most out of their free product trial by facilitating their understanding.
- Get It Now: Users can test the desired app by using
Get It Nowfeature for 30-days period. For more details on how to obtain a trial of an app, visit the Requesting a Trial section. - Request Demo: This feature allows visitors and qualified leads to raise their hand and say they want to try the product. Users will be redirected to a Request a Demo Today landing page where they are required to complete a form and submit the request. Afterwards, users will receive by email further notice regarding the demo they have asked for. For more details on how to obtain a demo of an app, visit the Requesting a Demo section.
Requesting a Trial
Follow the steps below to learn how to obtain a trial of an EngageCX App.
- Starting from your EngageCX Cloud Organization welcome page, click on
Manage Apps. This button can be accessed only if there is no app installed within the organization.- Otherwise, click on your
Accountname and selectExplore Appsfrom the right sidebar.
- Otherwise, click on your
- EngageCX Apps will be displayed in a Grid Menu. Identify the app you intend to obtain a trial for and click
More >. - Select
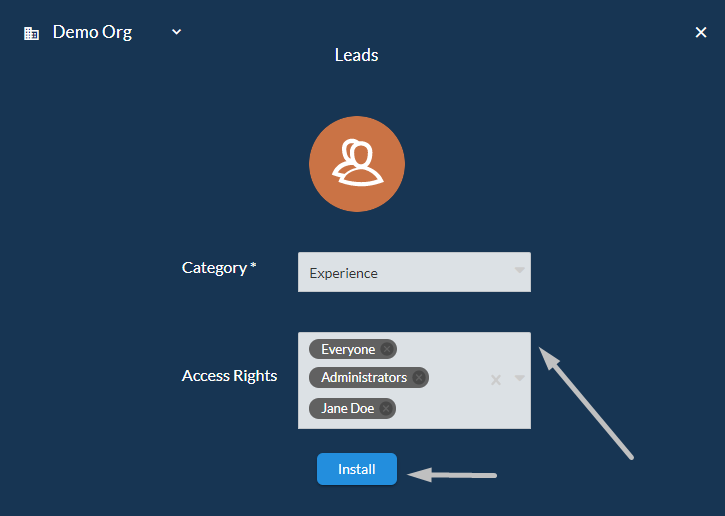
Get It Now >to activate the app under the current organization for 30 days. - Choose the
Categoryin which you want to include the app. For more details regarding this, please visit the Group Apps in Categories section of the same guide. - Enable the access rights for the groups or users that currently exist in your organization (e.g. Administrator, Everyone, your current user).
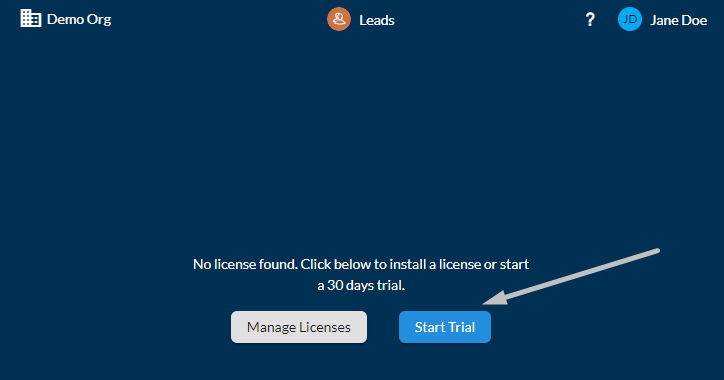
- Once you're ready, click
Installto start the installation process of the app. - To activate the trial, access the installed app from the Cloud organization welcome page and click on
Start Trial.
Requesting a Demo
Follow the steps below to learn how to request a demo of an EngageCX App.
- Starting from your EngageCX Cloud Organization welcome page, click on
Manage Apps. This button can be accessed only if there is no app installed within the organization.- Otherwise, click on your
Accountname and selectExplore Appsfrom the right sidebar.
- Otherwise, click on your
- EngageCX Apps will be displayed in a Grid Menu. Identify the app you intend to request a demo for and click
More >. - Select
Request Demoto submit a request. - Complete the form with the required fields.
- Once you're ready, click
Request Demoto submit the request.
Install Apps
EngageCX Account offers a view of all the apps available from your organization that can be quickly installed and ready to use.
Follow the steps below to learn how to install an EngageCX App.
- Starting from your EngageCX Cloud Organization welcome page, click on
Manage Apps. This button can be accessed only if there is no app installed within the organization.- Otherwise, click on your
Accountname and selectExplore Appsfrom the right sidebar.
- Otherwise, click on your
- EngageCX Apps will be displayed in a Grid Menu. Identify the app you intend to install and click
More >. - Select
Get It Now >to install the app under the current organization. - Choose the
Categoryin which you want to include the app. For more details regarding this, please visit the Group Apps in Categories section of the same guide. - Enable the access rights for the groups or users that currently exist in your organization (e.g. Administrator, Everyone, your current user).
- Once you're ready, click
Installto start the installation process of the app. - To activate the app, access the installed app from the Cloud organization welcome page and click on
Manage Licenses. For more details regarding apps licensing, please visit the Managing Licenses section of the same guide.
Managing Licenses
Follow the steps below to learn how to assign a license that enables access to the app.
- Starting from the Cloud Organization welcome page, access the installed EngageCX App for which you have a corresponding license.
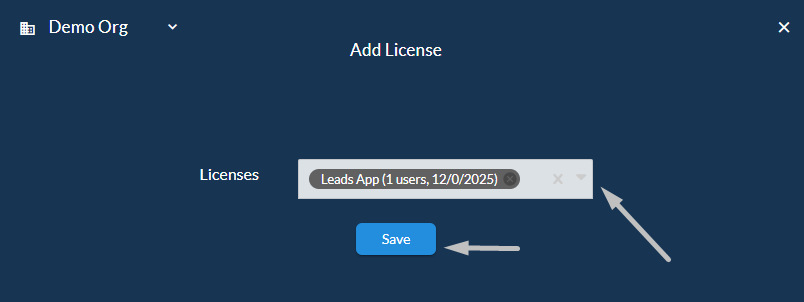
- Select
Manage Licensesto activate the full product. - Select the
Add( ) button to add a license. - Select from the available drop-down list the license corresponding to your installed application (e.g. Leads App(1, expiration_date)).
- Once you're ready, select
Save.
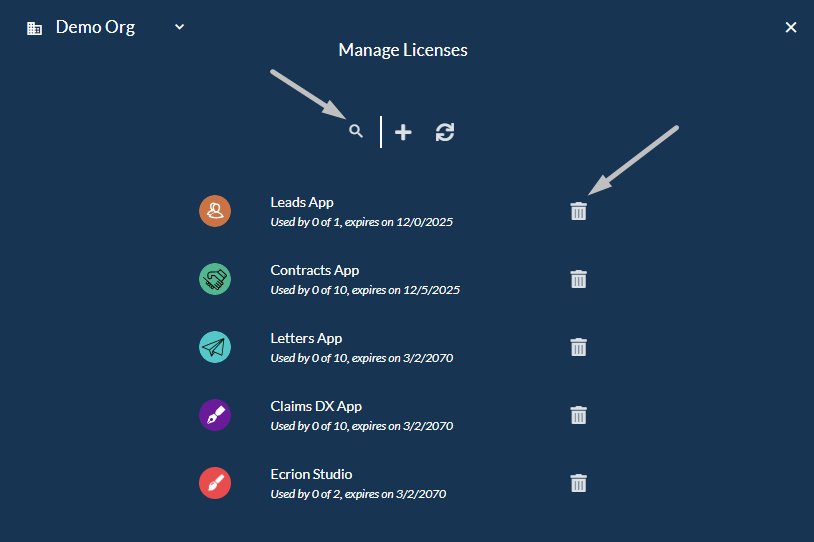
Once you've finished adding all the necessary licenses in the organization, the following options are available to work with:
Delete( ) - use this option to release a license. Before permanently delete the selected license, a confirmation will be required.Search( ) - use this option to search for a specific license, in case of many items. Type in theSearchbox the full or just a part of the name of the license and hitENTER.
Note
By default, the first licensed user that will benefit from the license assignation will be the current user. In case you want to add other licensed users, please visit the Managing Licensed Users section of the same guide.
Managing Licensed Users
Follow the steps below to learn how to view the licensed users that have access to the app.
- Starting from the EngageCX Cloud Organization welcome page, access an installed app.
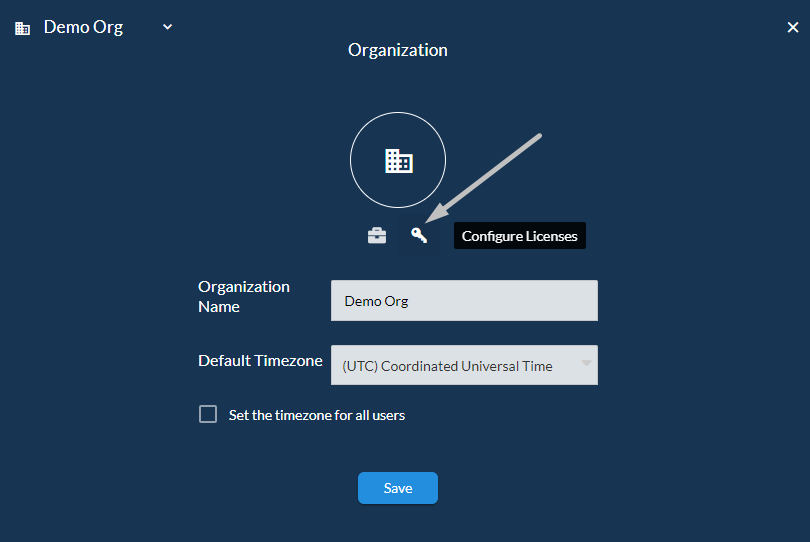
- Click on your
Accountname from the right-corner side of the page. - Select
Organizationfrom the sidebar. - Click on the
Configure Licensesbutton. - Choose the license of the app for which you intend to see the licensed users.
- The information beneath the name of the app notifies you how many available positions you might have in order to add new licensed users (e.g. 0 of 10).
Group Apps in Categories
EngageCX Apps can be filtered through some pre-defined categories that group together for Featured, Installed app suggestions for the users. Besides these categories, there are also other obvious types of apps, purpose-based such as Design Software, Digital Experience or Productivity.
Categories are used primarily for setting up the Ecrion Apps browse tree and facilitating the search for a specific app, even if users do not know exactly the app name. By properly categorizing of the Ecrion Apps, users will be able to find the app more quickly, which increases the number of downloads.
Creating Categories
Follow the steps bellow to learn how to add a new category to better organize your apps.
- Starting from the Grid Apps Menu, select
Categories( ). - Select the
Add( ) button to create a new category of apps. - Provide a meaningful name for the new category of apps and click
Create. - The created category will be displayed in the list.
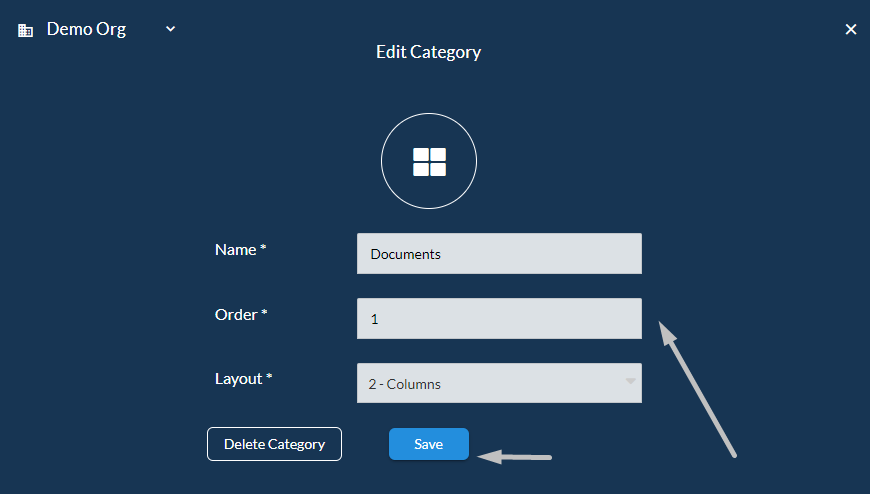
Editing Categories
Follow the steps bellow to learn how to edit an existing category of apps.
- Starting from the Grid Apps Menu, select
Categories( ). - Select a category which you want to edit from the list.
- Update the required information of the category:
Name- provide a new name for the category.Order- provide a number representing the order of the installed app in the welcome page. For example, if you set the order1for a category, that category will be displayed as the first column.Layout- choose the number of columns based on which the category could extend. For example, if you set the layout2-columnsfor a category, that category will display the apps within on two columns layout.
- If you want to remove the category, select
Delete Category. Before permanently delete the selected category, a confirmation will be required. - Once you're ready, click
Save.
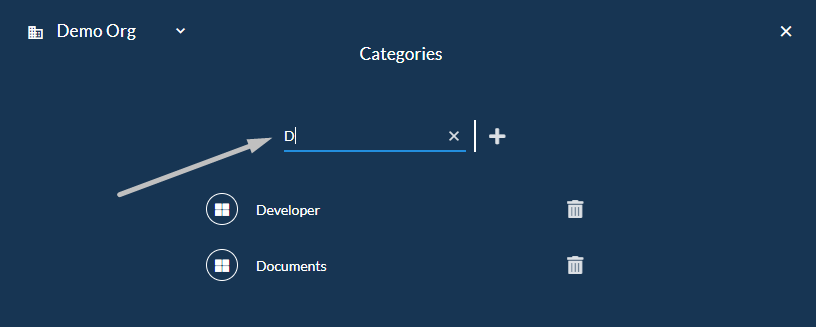
Searching Categories
Follow the steps bellow to learn how to search through existing categories.
- Starting from the Grid Apps Menu, select the
Categories( ) button above the grid. - A list with the existing categories will be displayed. If you want to search for a specific category in the list, you can use the
Searchfeature ( ). - Type in the
Searchbox the full or just a part of the name of the needed category and hitENTER.
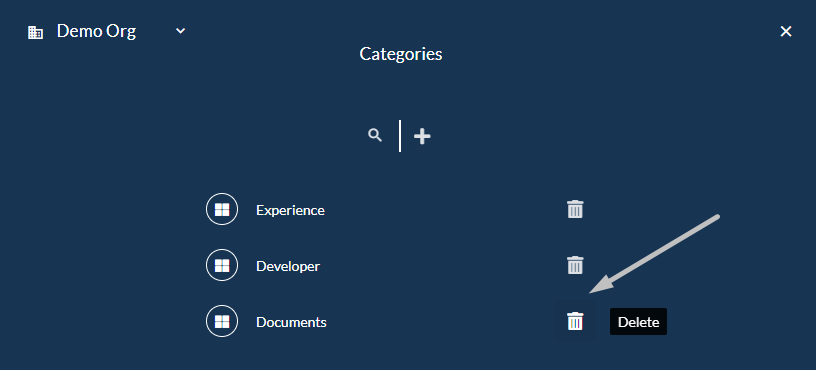
Deleting Categories
Follow the steps bellow to learn how to delete an existing category of apps.
- Starting from the Grid Apps Menu, select
Categories( ). - If you want to remove a category from the list, select the
Delete( ) button next to the corresponding category. Before permanently delete the selected category, a confirmation will be required. - The removal of one category can be performed also by using the Edit Category functionality.
Managing Users and Groups
Managing Users feature allows you to configure access control for users or groups and also to create new entities of them both. Ecrion Account gives you the ability to make your resources accessible or limited, to users and groups, as you want to.
Configuring both users or groups allows setting up the organization or workspaces permissions depending on the access rights that you would like to give.
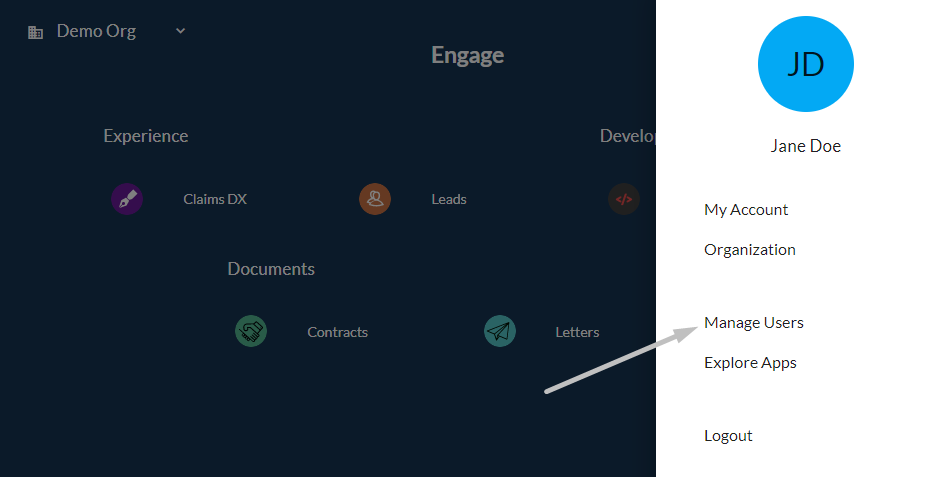
Adding New Users
Follow the steps bellow to learn how to create a new user into your organization environment.
- Select
Manage Usersfrom the right sidebar menu. - By default, your own user will be created once you've created an Ecrion Account. This user cannot be deleted.
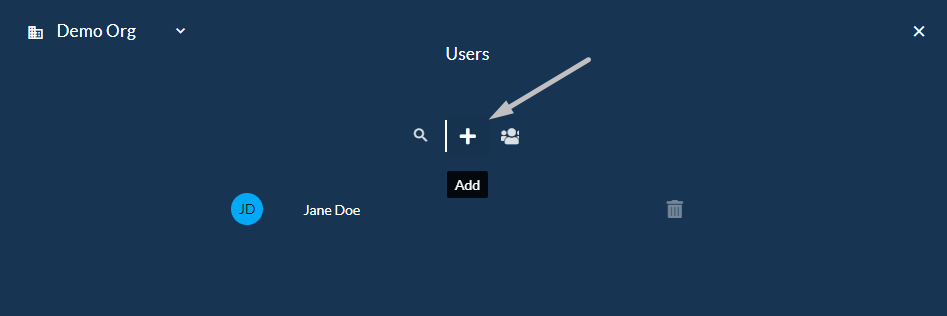
- To add a new user, click
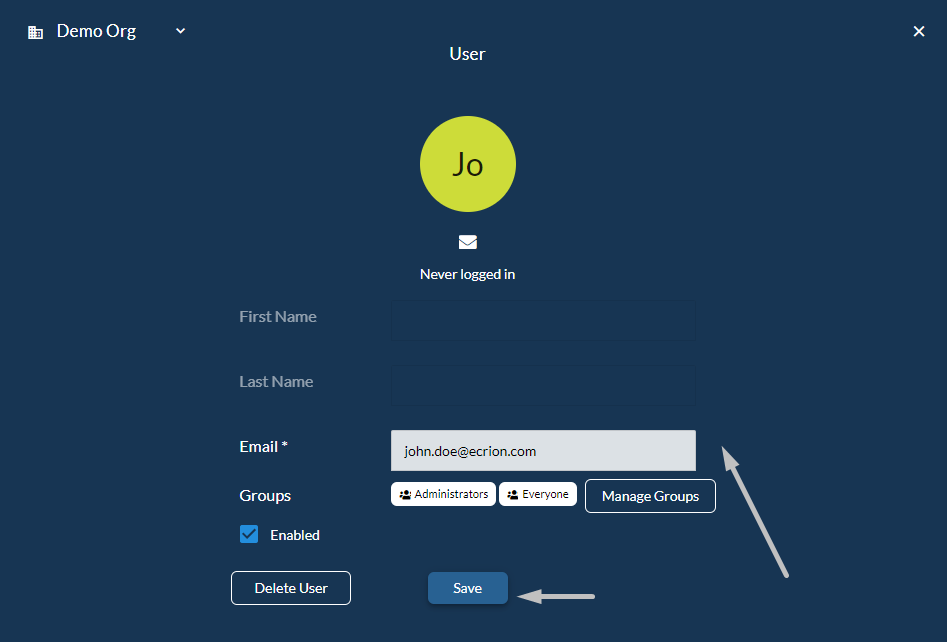
+. - Provide the required fields to create a new user entity:
Email: provide an email address.Groups: assign the user to an available group from the drop-down list. When a user is added to a group, it will inherit all the group's permissions.
- Check the
Enabledoption to give the user access to the current organization. - Enable the
Send an email invitationoption to send an message that notifies the new user by email. - Once you're ready, click
Create.
Editing Users
Follow the steps bellow to learn how to edit an existing user.
- Select
Manage Usersfrom the right sidebar menu. - Select a user which you want to edit from the list.
- Edit the fields you want from the user information.
- If you want to remove the user, select
Delete User. Before permanently delete the selected user, a confirmation will be required. - Once you're ready, click
Save.
Searching Users
Follow the steps bellow to learn how to search through existing users.
- Select
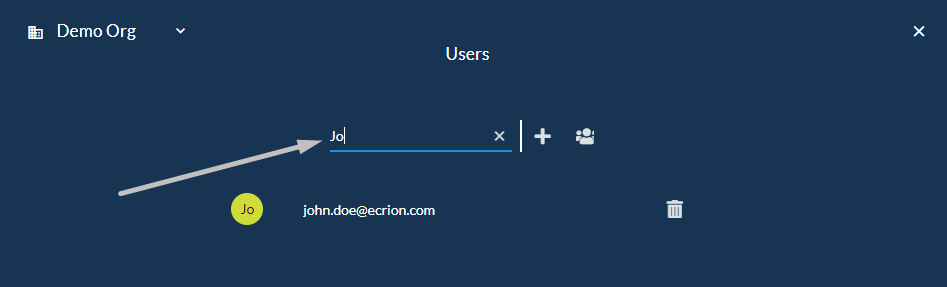
Manage Usersfrom the right sidebar menu. - A list with the existing users will be displayed. If you want to search for a specific user in the list, you can use the
Searchfeature ( ). - Type in the
Searchbox the full or just a part of the name of the needed user and hitENTER.
Adding New Groups
Follow the steps bellow to learn how to create a new group into your organization environment.
- Select
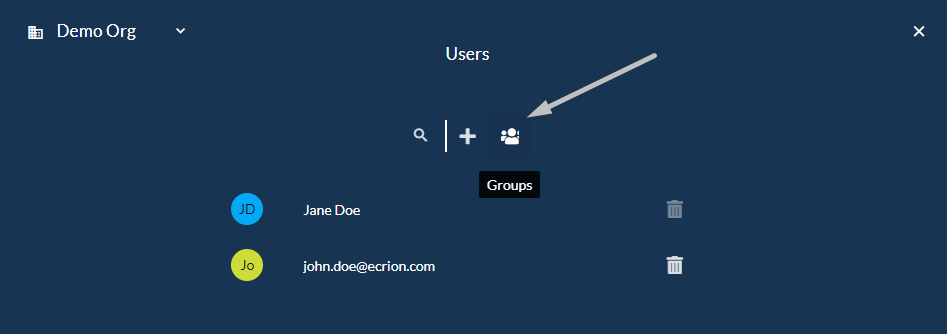
Manage Usersfrom the right sidebar menu. - Click
Groupsto manage the groups within the current organization. - To add a new group, click
+. - Provide the required fields to create a new group entity:
Name: choose a name for the group (e.g. Developers).Workspaces: choose the workspace(s) which the group will have access to.
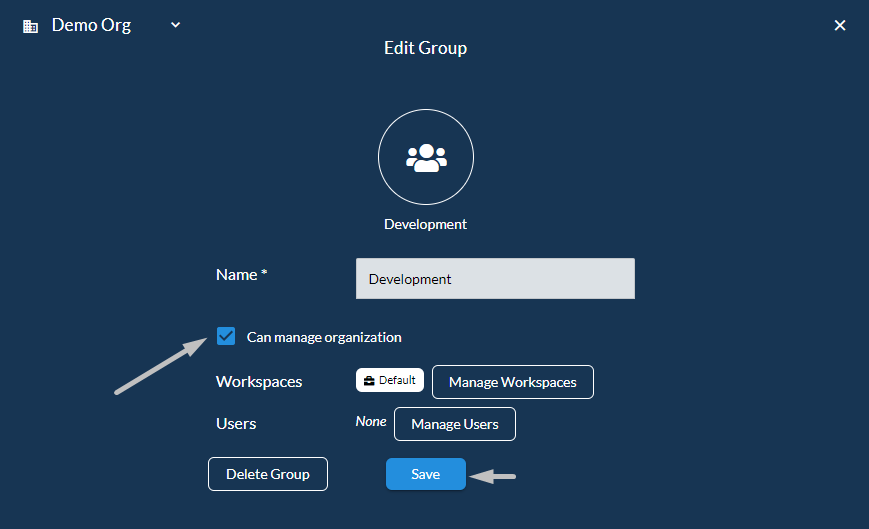
- Enable the
Can manage organizationoption to give to all the members of the group management privileges. - Once you're ready, click
Create.
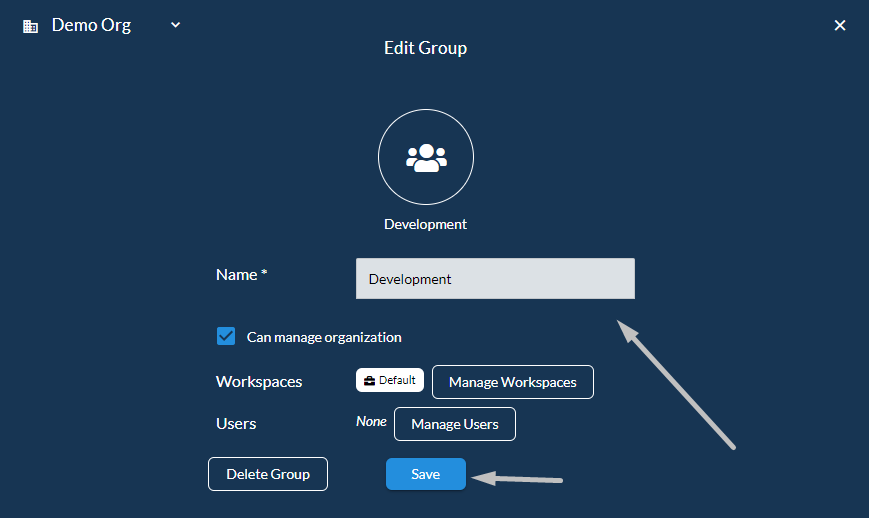
Editing Groups
Follow the steps bellow to learn how to edit an existing group.
- Select
Manage Usersfrom the right sidebar menu. - Click
Groupsto manage the groups within the current organization. - Select a group which you want to edit from the list, excepting the default groups - Administrators and Everyone - that cannot be removed.
- Edit the fields you want from the group information and then click
Save. - If you want to remove the group, select
Delete Group. Before permanently delete the selected group, a confirmation will be required.
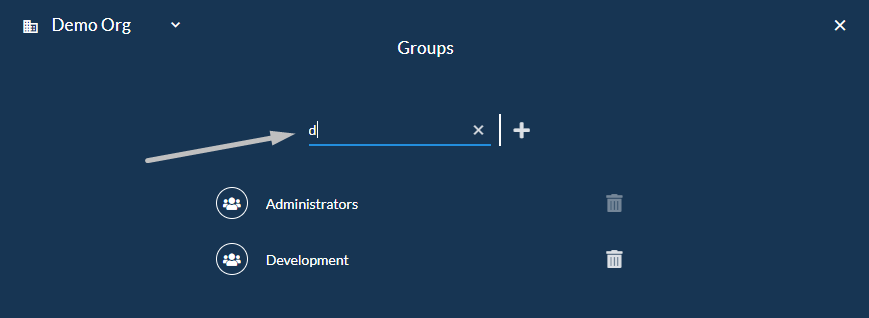
Searching Groups
Follow the steps bellow to learn how to search through existing groups.
- Select
Manage Usersfrom the right sidebar menu. - Click
Groupsto manage the groups within the current organization. - A list with the existing groups will be displayed. If you want to search for a specific group in the list, you can use the
Searchfeature ( ). - Type in the
Searchbox the full or just a part of the name of the needed group and hitENTER.
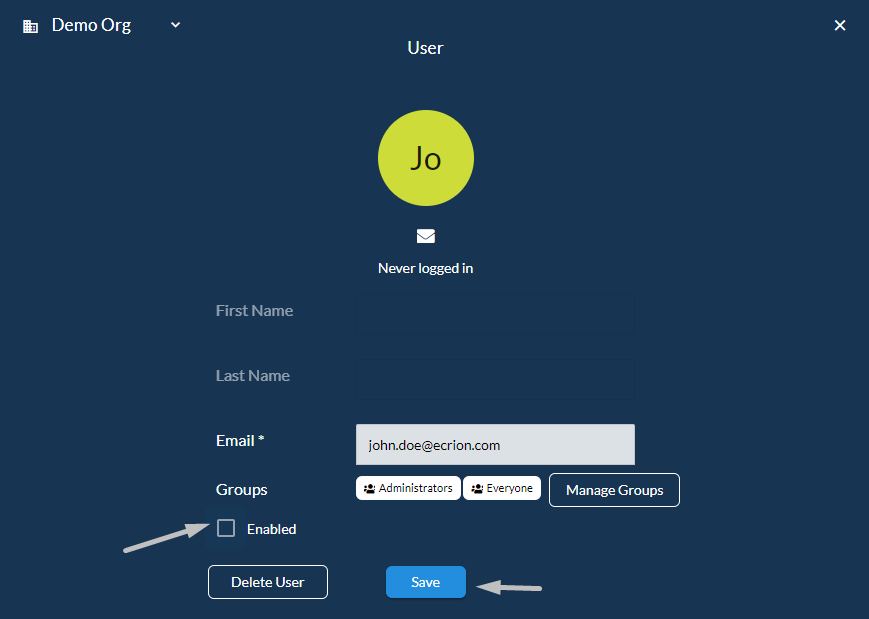
Disabling Access to an Existing User
Follow the steps bellow to learn how to disable access to a user.
- Select
Manage Usersfrom the right sidebar menu. - Click on a user from the available list.
- Disable the
Enabledoption to remove the access to the current organization. - Once you're ready, click
Save.
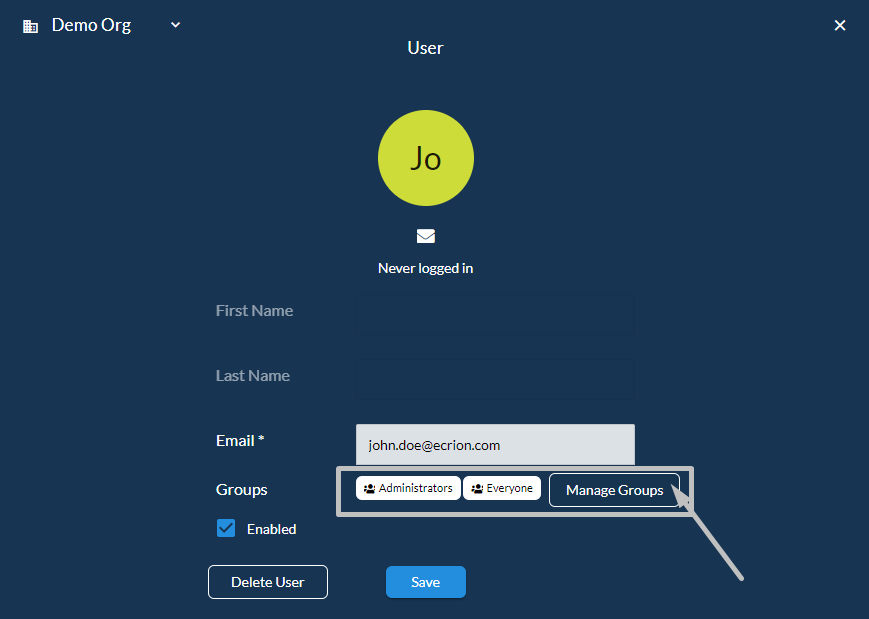
Editing User Permissions
Note
When a user is added to a group, it will inherit all the group's permissions.
Follow the steps bellow to learn how to include a user to a group.
- Select
Manage Usersfrom the right sidebar menu. - Select a user which you want to edit from the list.
- Click
Manage Groupsnext to the group in which the user is already included, if any. - Select the
Add( ) button to include users in another group. - Select the group you want to add from the available drop-down list and then click
Add. The user will inherit all the permissions that the group has. - If you want to remove the access of a user to a group, from the list of groups, click the
Remove( ) button next to the corresponding group.
Managing Organization Permissions
Follow the steps bellow to learn how to set up organization permissions for a group.
- Select
Manage Usersfrom the right sidebar menu. - Click
Groupsto manage the groups within the current organization. - Select a group from the available list where you want to add organization permissions.
- Enable the
Can manage organizationoption to give all the members in the current group managing organization privileges. - Once you're ready, click
Save.
Setting Up Workspace Permissions
Follow the steps bellow to learn how to set up workspace permissions for a group.
- Select
Manage Usersfrom the right sidebar menu. - Click
Groupsto manage the groups within the current organization. - Select a group from the available list where you want to add workspace permissions.
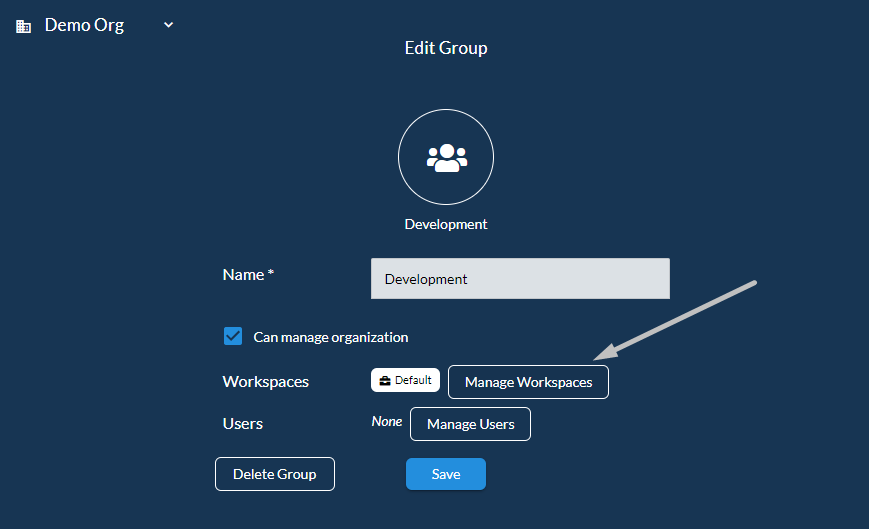
- Click
Manage Workspacesnext to the workspaces already enabled for this group, if any. - Select the
Add( ) button to add the workspace in the current group. - Select the workspace you want to add from the available drop-down list and then click
Add. If you want to add a workspace which is not defined yet in your organization, please visit the Add Workspace section first. - If you want to remove a workspace which has been already included in the group, from the list of group workspaces, click the
Remove( ) button next to the corresponding workspace.
Deleting a User
Follow the steps bellow to learn how to delete an existing user.
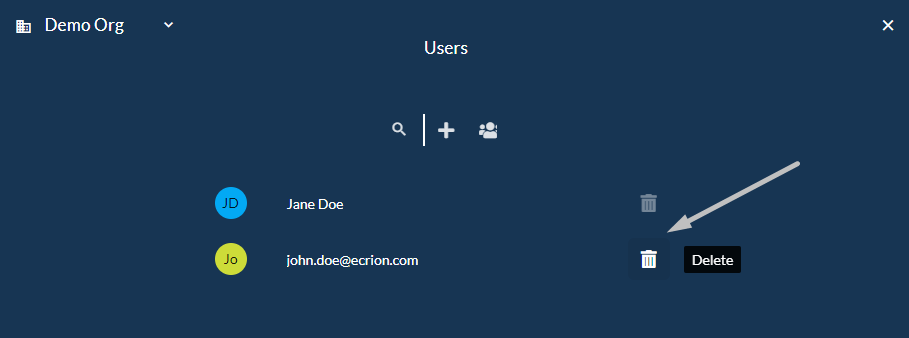
- Select
Manage Usersfrom the right sidebar menu. - If you want to remove a user from the list, select the
Delete( ) button next to the corresponding user. Before permanently delete the selected user, a confirmation will be required. - The removal of one category can be performed also by using the Edit User functionality.
Note
The removal cannot be performed on the default user's level.
Deleting a Group
Follow the steps bellow to learn how to delete an existing group.
- Select
Manage Usersfrom the right sidebar menu. - Click
Groupsto manage the groups within the current organization. - If you want to remove a group from the list, select the
Delete( ) button next to the corresponding group. Before permanently delete the selected group, a confirmation will be required. - The removal of one group can be performed also by using the Edit Group functionality.
Note
The removal can not be performed on the default workspace's level.
