Communications App Guide
Overview
NorthStar CCM Communications enables companies to manage the entire flow of communicating with customers at scale.
Using Communications, you create personalized letters, invoices, statements, brochures, emails and any other type of business communication interactively, in batch or on-demand. Additionally, the app allows companies to deliver omnichannel via print, email, SMS and more, according to customer preferences, in order to drive better relationships with their audience.
With NorthStar CCM Communications, organizations can ensure consistency, reduce operating costs and improve customer experience for long-term, profitable engagement.
This guide covers all the information you might need while using Communications. For a detailed understanding of the capabilities in the Communications App, please skim over the functionalities detailed within this guide.
Getting Started
The Communications app engages customers with omnichannel personalized communications. If you’re ready to take communications experience to the next level, follow the instructions in this section to find out more.
Installing the App
Follow the steps below to learn how to install the app.
- Starting from the NorthStar CCM home screen, click your account name in the top-right corner and select
Explore Apps. - Identify the
Communicationsapp in the Grid Apps Menu and clickMore >button. - Select
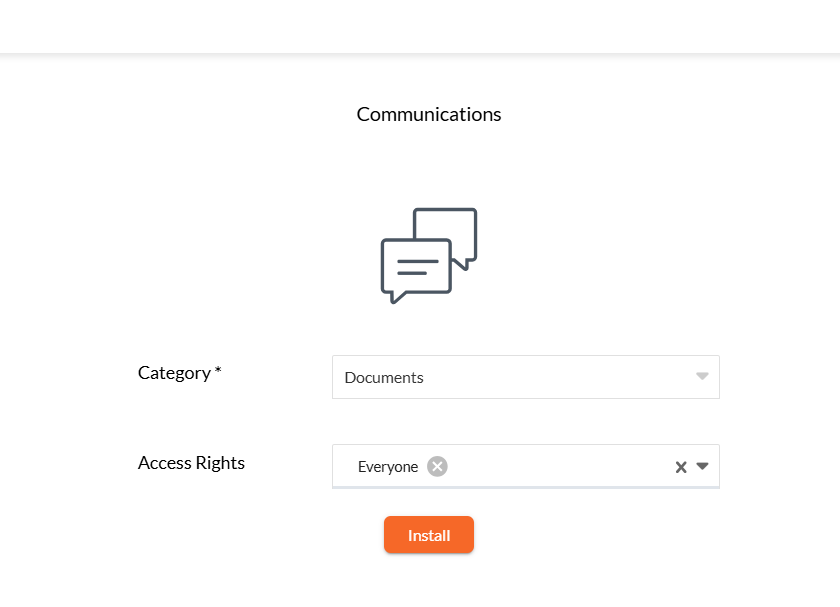
Get It Now >, then fill in the form fields as below:- Category: Choose the category where you want to include this App to;
- Access Rights: Use the drop-down list to configure the App permissions for your existing users or groups.
- Once ready, select
Install.
Note
If the user does not have the corresponding App keys installed, after the installation, you will be automatically redirected to install the licenses. To continue with this, select Manage Licenses, then click the Add button to install the product keys. .
Communications Interface
This section provides a detailed tour of the most common components that add interactivity to the Communications Interface. Find below the touchpoints for the users as they navigate throughout the app and learn how to make full use of them.
(A) Navigation Bar - appears at the top of the app screen and it is split into 3 sections - left, center and right.
- In the left side, there is the Organization name, from where you can access the Cloud Organization welcome page and view the installed apps.
- In the center of the navigation bar, there is the Name of the app from where you can redirect to the main Communications view whatever page you are visiting at the moment.
- In the right side of the navigation bar, there is the Help Center that offers options for support, access to the EngageCX Documentation, user feedback, etc. Next to the Help Center, there is also the Account Name that enables a list of right sidebar options, such as organization, account, users configurations or exploring the available apps.
(B) Toolbar - displays the main views of the application you are currently working with.
- Communications - a view with all the existing communications displayed in detail mode.
- Projects - a view with all the existing projects displayed in a detail mode.
- Channels - a view with all the existing channel queues in your organization displayed in a detail mode.
- Analytics - a view with all the existing dashboards displayed in a detail mode.
(C) Sidebar - contains the views for displaying the communications data; it has to states: hidden or locked, that can be set up by clicking on the Shrink ( ) or Expand ( ) buttons. It contains many options that are listed in the left sidebar for filtering the communications in the page content:
- All - displays a view with all existing communications.
- My Communications - displays a view only with the communications that have been created by the current user.
- Scheduled - displays a view with the scheduled communications only.
- Triggered - displays a view with the triggered communications only.
- In Progress - displays a view only with the communications that are currently in progress.
- Succeeded - displays a view only with the succeeded communications.
- Errors - displays a view only with the failed communications.
- By Folder - displays all the communications by folders in the sidebar.
- By Project - displays all the communications by projects in the sidebar.
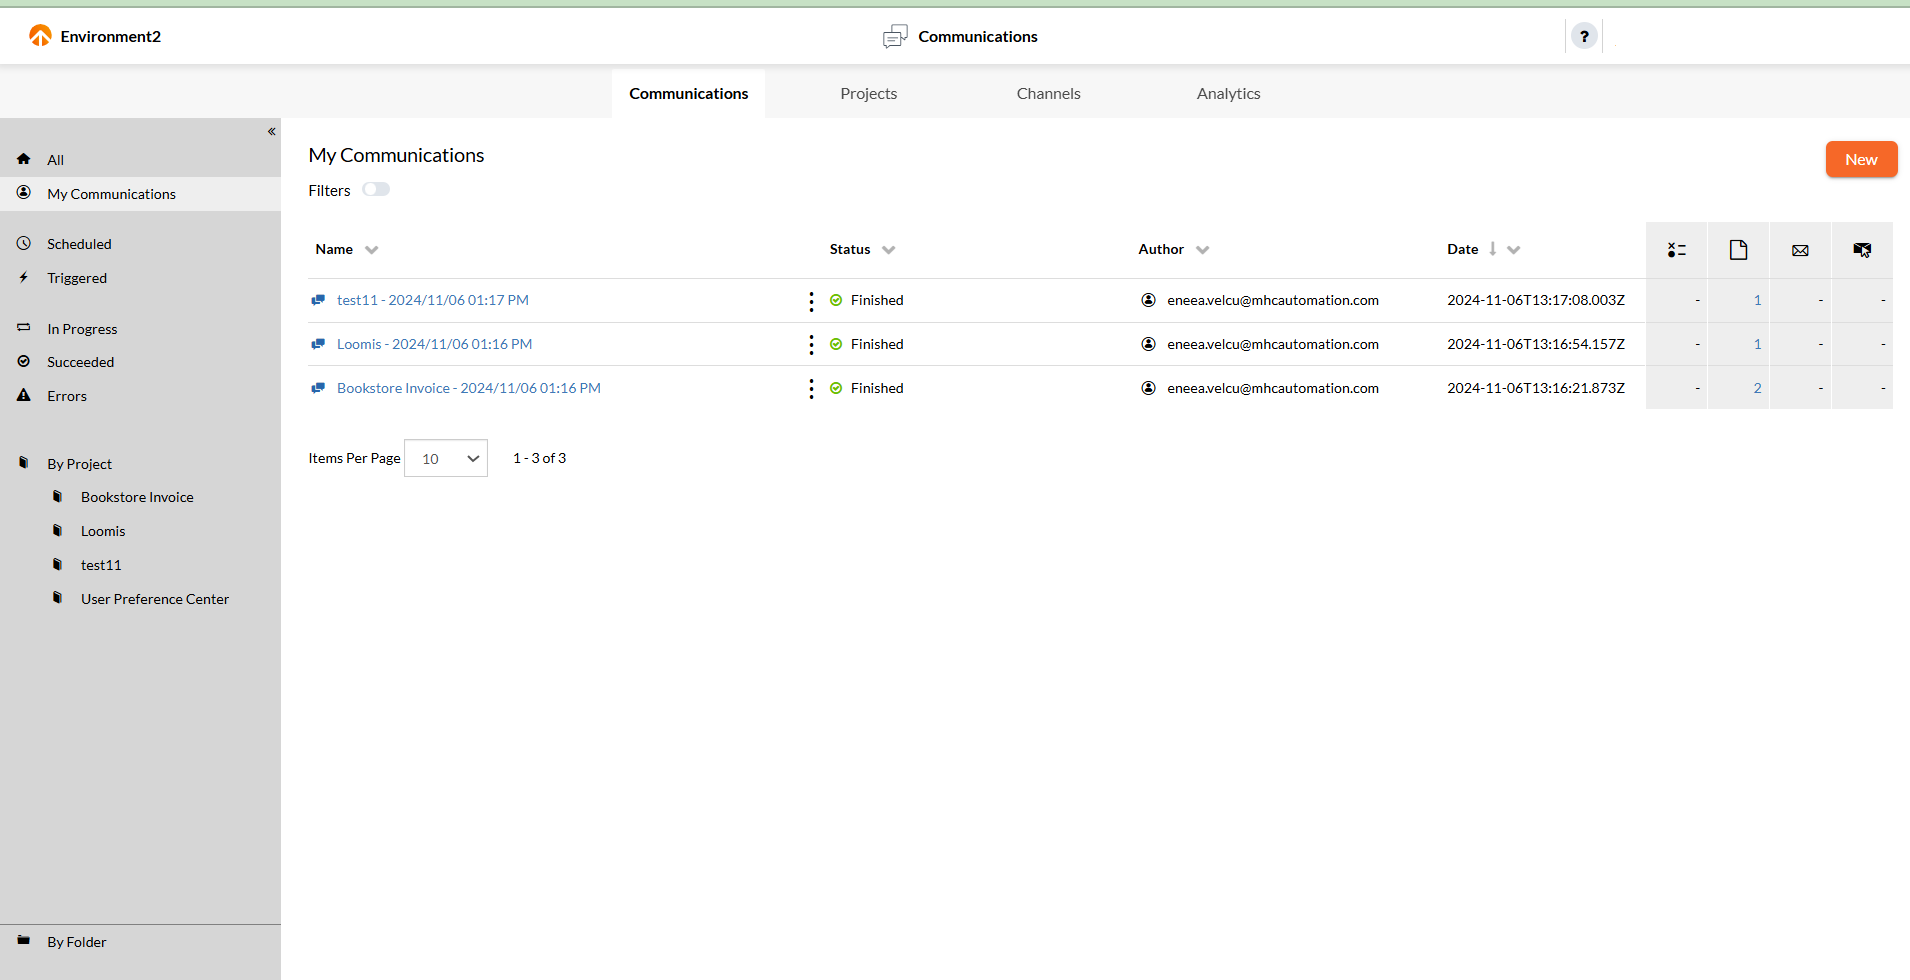
(D) Page Content - is the dedicated region that you will use to easily navigate through your communications and find the associated information, such as the name of the communication, its status, its author, the date and the number of documents that are being produced (Forms, Documents, Sent Emails and Clicked Emails).
Communications App Basics
Communications are used to organize the interactions with your customers and manage the flow of information for one-to-one, group or mass communication.
Communications
Communications allow you to generate and deliver documents to any output type using the projects you have created (contracts, letters, claims, etc.).
Once a project is submitted, its associated communication will appear on a list within the Communications page. The communications list quickly summaries important details, such as the communication names that are being run within the environment, their status, the user who initializes it and the start date. The number of documents that are being produced according to their types are displayed in the right-columns, like: Forms, Documents, Sent Emails and Clicked Emails.
If multiple communications are present on the list, you can use the sidebar to focus on them. You can use it to look up for communications filtered By Project or By Folder. Additionally, you can find a communication by simply selecting from the default views, to check up on communications that are succeeded, finished with errors, or still in progress.
Furthermore, Communications app provides other two custom views, from where users have the ability to inspect and run batch communications in an automated fashion: Scheduled and Triggered.
For more information regarding different features in the Communications view, please visit a corresponding section from below:
| Running a New Communication |
| Communication's Job Overview |
| Scheduled Communications |
| Triggered Communications |
| Embedding Communications |
|Filtering Communications| |Sorting Communications| |Contextual Communications Options|
Running a New Communication
Follow the steps below to learn how to run a communication.
Note
Prior of running a new communication, make sure that your have a Project configured. To learn more, please visit the Projects section.
- Start by accessing the
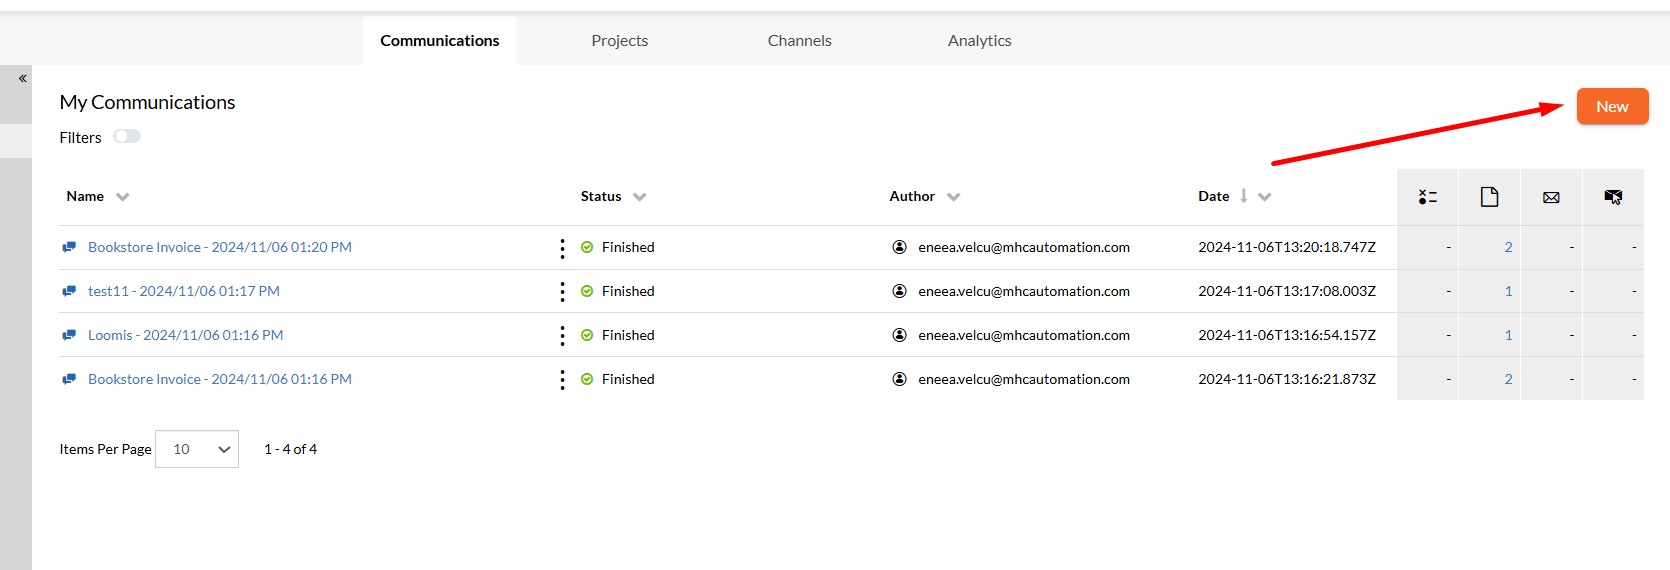
Communicationstab on the toolbar. - Select the
Newbutton from the right-corner of the page. - Select a project you intend to run from the available ones. Navigate through the Projects pages or use the Search bar at the top-right to quickly find a specific project. Additionally, you can either use the sidebar in the left side to find a specific destination folder of your project or make use of the
Search > By Folderfor a more precise result. Once selected, clickContinue.- If the communication has parameters you will be prompted to fill them in. Once you're ready, click
Continue. - If the communication has form fields you will be prompted to enter data manually before running a document production. Once you're ready, click
Submit.
- If the communication has parameters you will be prompted to fill them in. Once you're ready, click
- Once you're ready, click
Run.
Communication's Job Overview
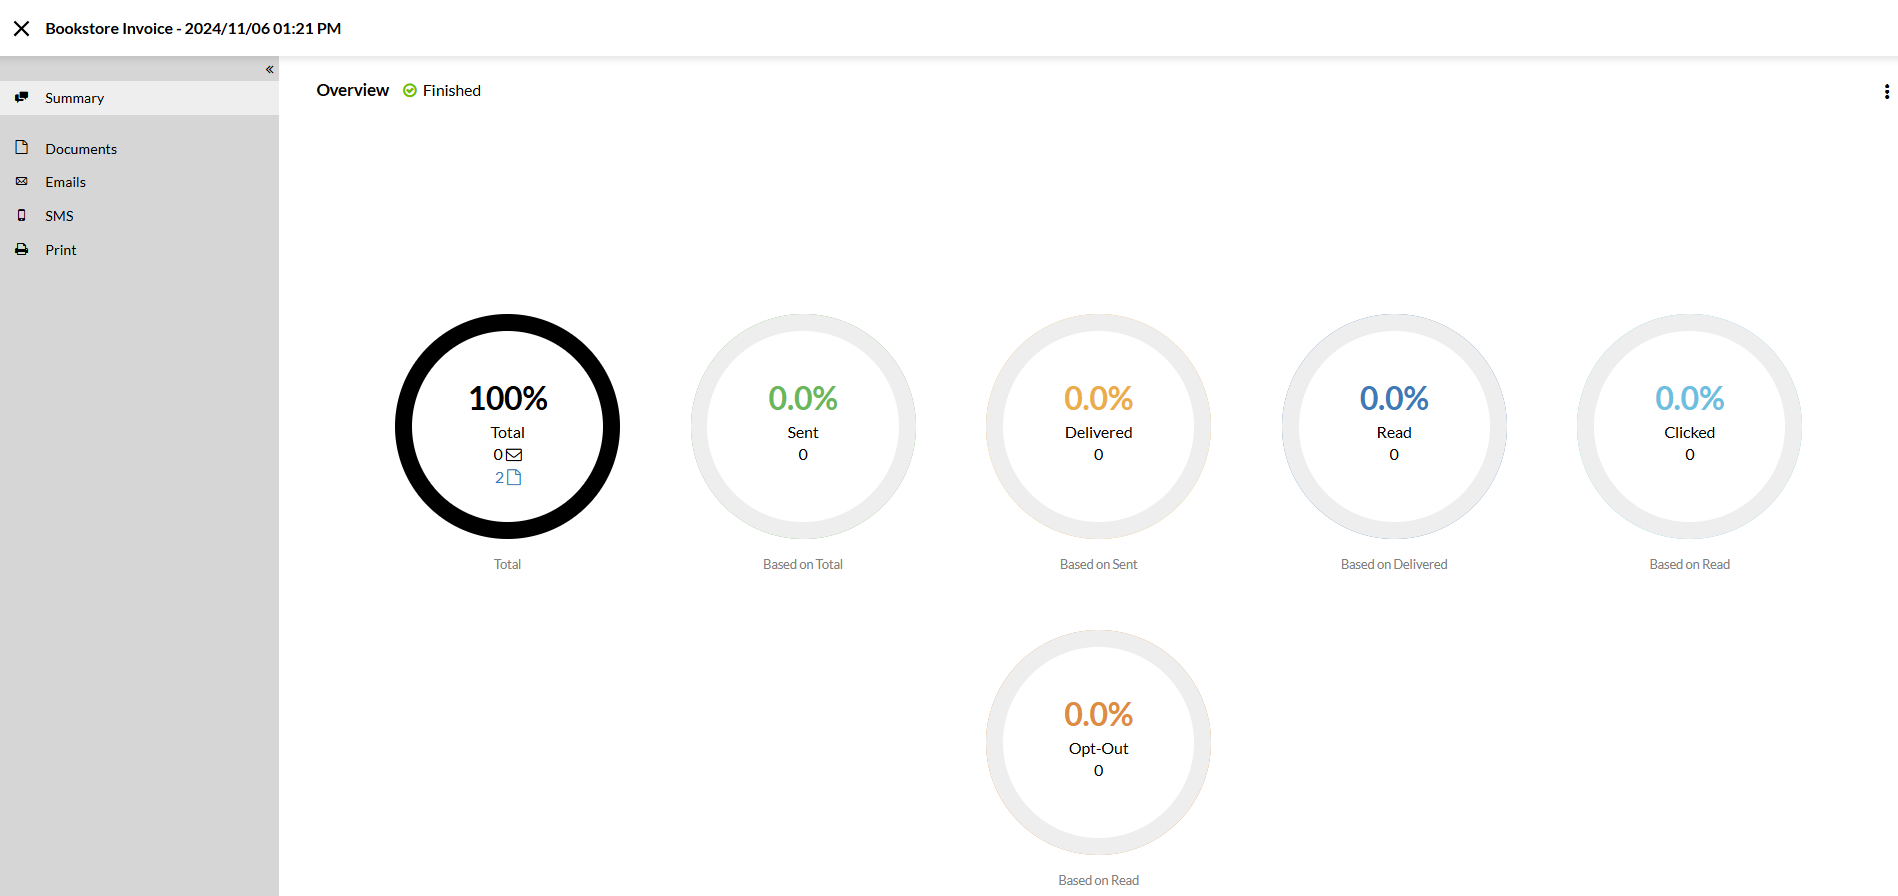
For a more detailed view of the generated outputs, select a communication you are interested in from the Communications page. You will be redirected to an Overview page summing-up the documents that are being produced, delivered or read by the recipients.
-
You can select
Documentsfrom the sidebar to view all the documents or emails that are being generated for the selected project. -
Select the
Emailstab from the sidebar to view all the delivered correspondence. Use the down-arrow from the top-left side to filter your emails, by displaying only the one clicked, delivered, failed, opt-out, pending, read, sent or suspended. -
Select the
SMStab from the sidebar to display all the SMS tickets sent through the EngageCX Platform associated with the project selected. Use the down-arrow from the top-left to filter your tickets by displaying only the one who failed, running or sent. -
You can select
Printfrom the sidebar to view all the print streams that are being generated for the selected project. -
In case your project run has failed, go to the
Logtab from the sidebar to view a job log corresponding to the current communication alongside the message and timestamp of each of them.
Scheduled Communications
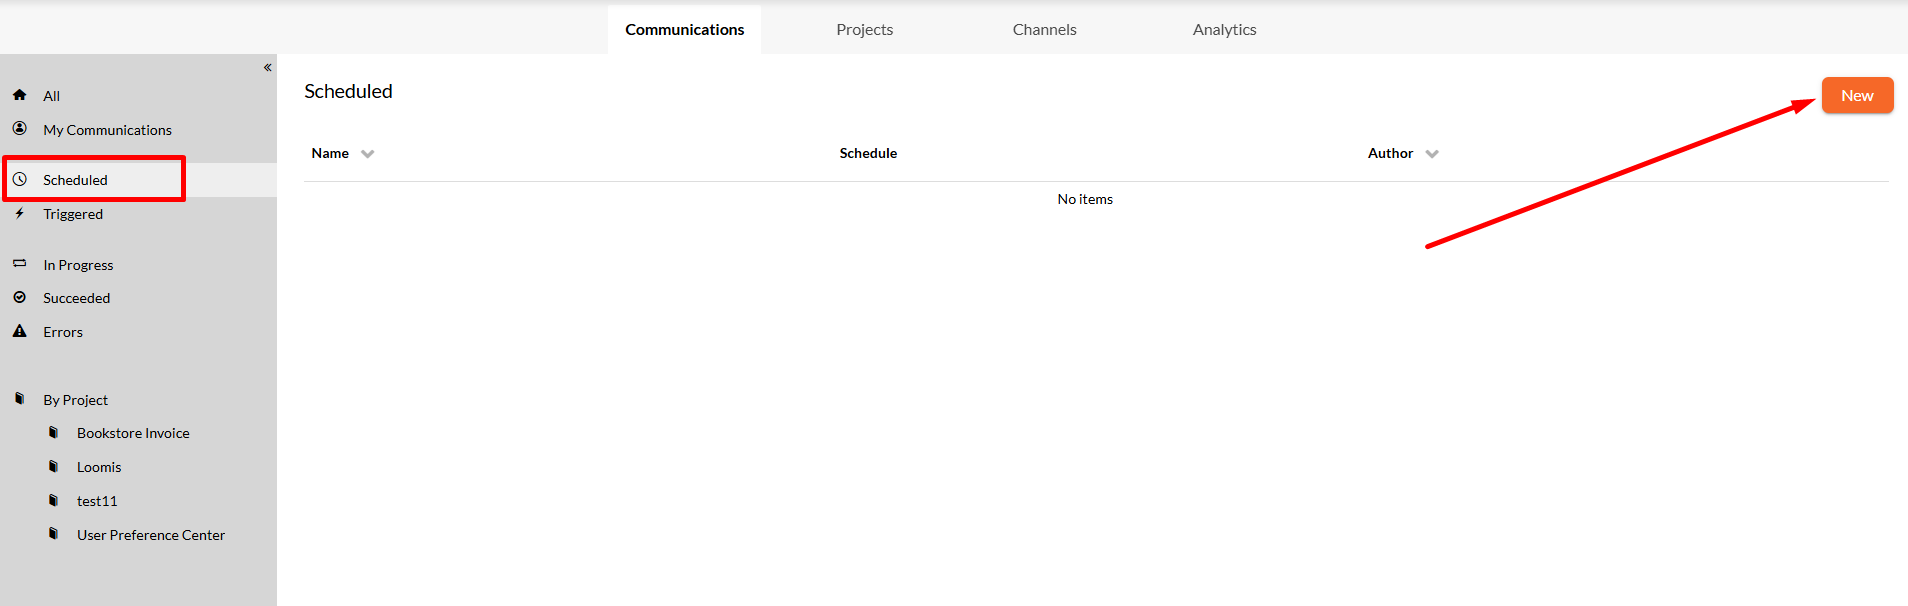
By selecting the Scheduled tab in the sidebar, the app will provide a filtered view of all the communications that have been scheduled earlier. On this page, you can either view information about existing scheduled communications, including the project name, the last time the communication was run and the author that scheduled the communication, or you can create new schedules.
Scheduling a Communication
The Communications app provides the ability to automatically schedule your communications based on the availability of the project resources, to start at a specific time. You can schedule projects to run hourly, daily, weekly, monthly, or even number of minutes, on certain days of the week, several times a month, etc. Follow the steps below to learn how to schedule a communication.
- Starting from the
Scheduledview from the sidebar, select theNewbutton from the right-corner of the page. - Choose the communication project you intend to set a schedule for and click
OK. - Select
New Scheduleto configure your schedule. - In the Schedule dialog, select the appropriate options to set up your schedule:
- Choose the time frame you would like to schedule the project for, by selecting the available tabs (Hourly, Daily, Weekly or Monthly).
- Configure the timing of the schedule.
- Toggle on or off the
Enabledoption to activate/deactivate the schedule. - Select
Configure Parametersbutton to modify the already defined parameters(if exist) from the workflow that need to be set before the project runs.
- Once you're ready, click
Save.
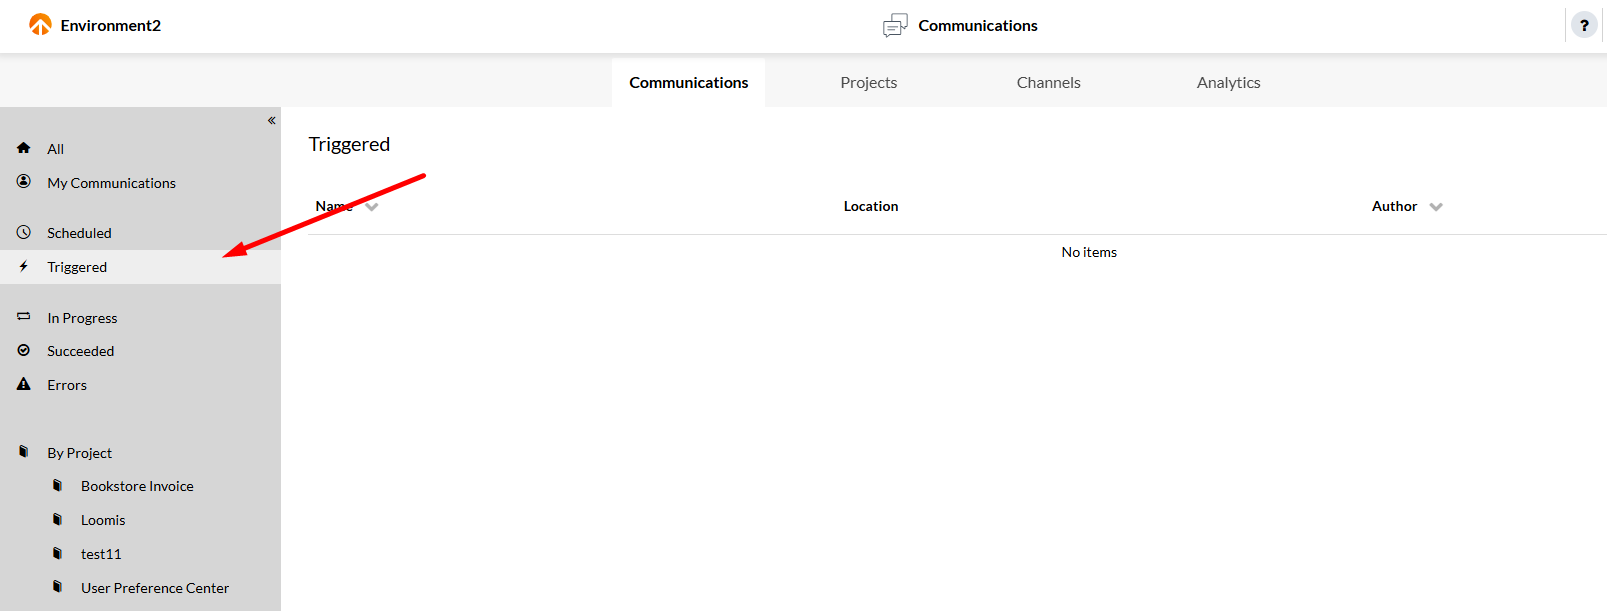
Triggered Communications
Triggers allow you to configure the start of specific projects as an automatic response to an action. In the Triggered page, you can inspect all the projects that have been triggered and/or create new triggers. The supported methods for triggering projects are Hot Folders and Microsoft Message Queues (MSMQ).
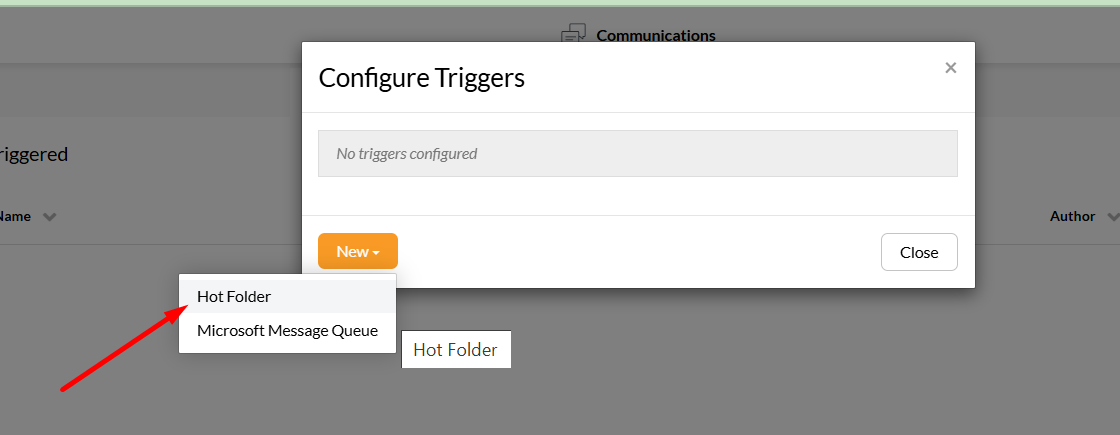
Configuring Hot Folders
Follow the steps below to learn how to configure a hot folder trigger for your communication.
- Starting from the
Triggeredview from the sidebar, select theNewbutton from the right-corner of the page. - Choose the communication project you intend to set a trigger for and click
OK. - Select
New > Hot Folderto configure your trigger. - Fill in the form with the required fields:
Path: provide the path of the folder containing the external resources.Hot Folder Type: Select the type of the Hot Folder: Machine Physical Folder or SFTP Folder. If you choose SFTP Folder, you will need to select an SFTP Connection to use. If none is available, you will have to configure an SFTP Connection.File Pattern: Provide the file pattern of the data source that the Communications app should be monitoring the folder for. You can use wildcards like '*' to make the pattern more generic.Pooling Interval: The number of seconds between 2 consecutive attempts to check for new files.Enabled: On or off theEnabledoption to activate or deactivate the current Hot Folder trigger.Configure Parameters: Configure the parameters (if any) from the workflow that need to be set before the project runs.
- Once you're ready, click
OK.
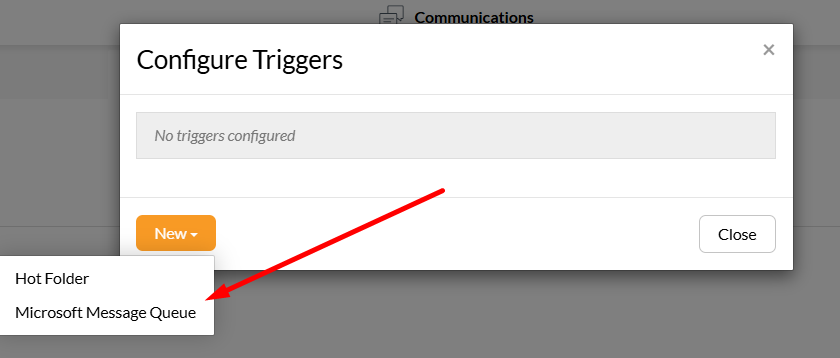
Configuring Microsoft Message Queues
An MSMQ trigger monitors the Microsoft Message Queue. Each time an entry is added, the app will parse it using either a binary or XML formatter and use the result as the input. The formatter to use is specified by the user when creating or editing the trigger. Follow the steps below to learn how to configure a MSMQ trigger for your communication.
- Starting from the
Triggeredview from the sidebar, select theNewbutton from the right-corner of the page. - Choose the communication project you intend to set a trigger for and click
OK. - Select
New > Microsoft Message Queueto configure your trigger. - Fill in the form with the required fields:
Path: Provide the path of the MSMQ.Formatter Type: Choose the Formatter Type to be used: BinaryFormatter or XmlFormatter.Pooling Interval: The number of seconds between 2 consecutive attempts to check for new files.Enabled: On or off theEnabledoption to activate or deactivate the current MSMQ trigger.Configure Parameters: Configure the parameters (if any) from the workflow that need to be set before the project runs.
- Once you're ready, click
OK.
Workflow Settings for Triggers
One of the common scenarios to use triggers is when you want to use input data in your projects from external sources. Setting up an EngageCX trigger process does not necessary mean that the project workflow will use the external data to generate documents.
When building your project workflow, you will need to reference the trigger file in your dynamic expressions. This can be accomplished by setting the Source parameter value in the Get Data step to the Trigger File Standard parameter. Or simply enter the following flag {PARAM:TriggerFile} inside the complex expression. This will resolve the path of the trigger file.
Note
For more details regarding how to set up settings for a workflow, please visit the Workflow Settings section of the Workflow Editor.
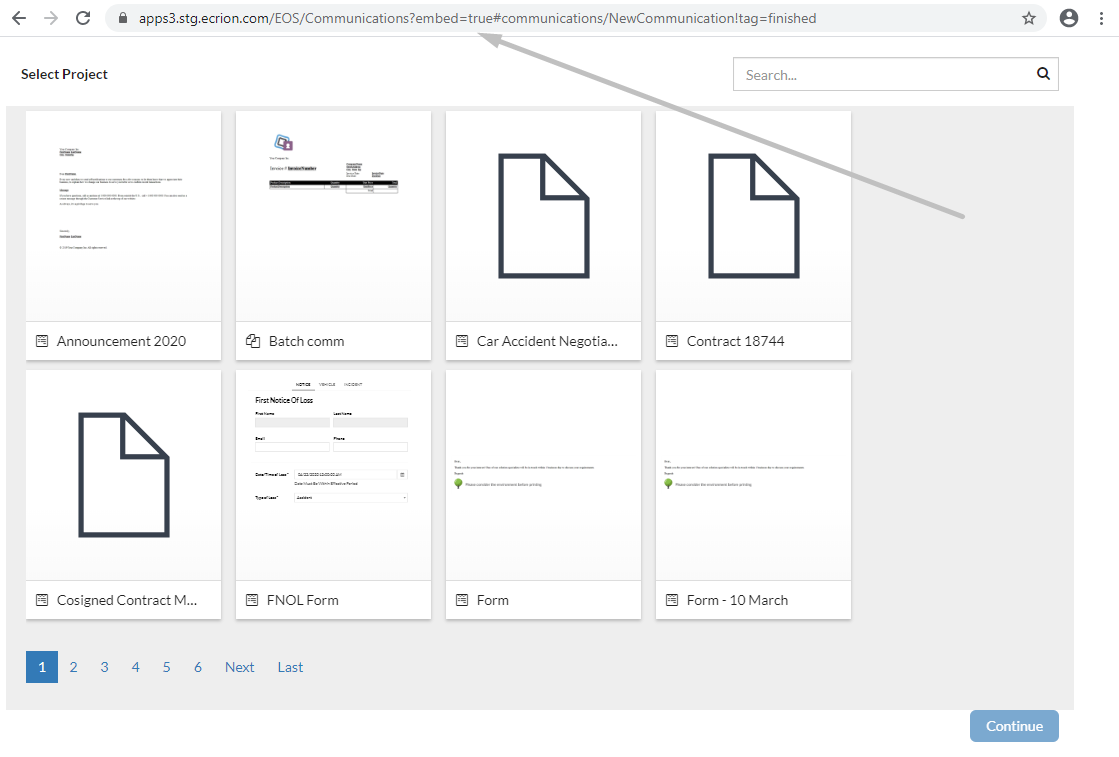
Embedding Communications
Due to embedded communications in the Communications app, one user can easily find a project by certain tags specified in a dedicated URL, and then run the communication and see the generated documents.
The format of the URL should be something like this:
http://ecrionserver:portnumber/EOS/Communications?embed=true#communications/NewCommunication!tag=tagName
where the key parameters needed to be used are highlighted below:
embed=true: if you want the communication to be integrated within the URL. (Required)tag: the filter(s) based on which the communication projects are sorted (e.g. tag=tagName). If no tag is specified, all the communications will be displayed in the New Communication UI.workItem: the data input file that will be passed to the communication's job (WorkspaceName:WorkspacePath, e.g. workItem=Default:Design\Uploads\Proposal1234123.xml). If this parameter is not specified within the URL, the communication will use the default file defining the corresponding workflow.
Note
Any kind of parameter (e.g. contactId, communicationId, or any other parameter found in the communication workflow) can be added within the URL, if there is a need to be passed as a job parameter. For example, to specify the contactId, the URL should be as follows: http://ecrionserver:portnumber/EOS/Communications?embed=true#communications/NewCommunication!tag=tagName&contactId=EOS_Contact
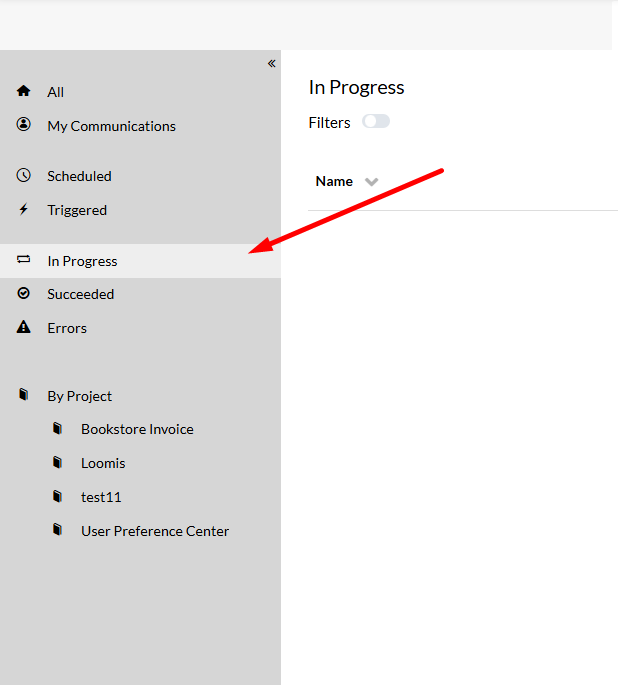
Filtering Communications
Starting from the Communications page, you can filter the entities listed within.
- To filter the communications information displayed, select from the left sidebar a filter based on which you want to filter the results (e.g. In Progress).
Communication Filters
Filters can be very useful for viewing a specific range of communication information, allowing you to display only the data you are interested in and hide the rest.
| Name | Description |
|---|---|
| Status | Verifies the current status of the communication project that has been running. |
| Type | Verifies the communication type. |
| Author | Verifies the author that has run the communication. |
| Not Older Than | Verifies the date when the communication has finished running by setting a lower limit. |
| Name | Verifies the communication name. |
| Project Name | Verifies the project name of the communication being stored. |
| Start Date | Verifies when the communication has started. |
| End Date | Verifies when the communication has finished. |
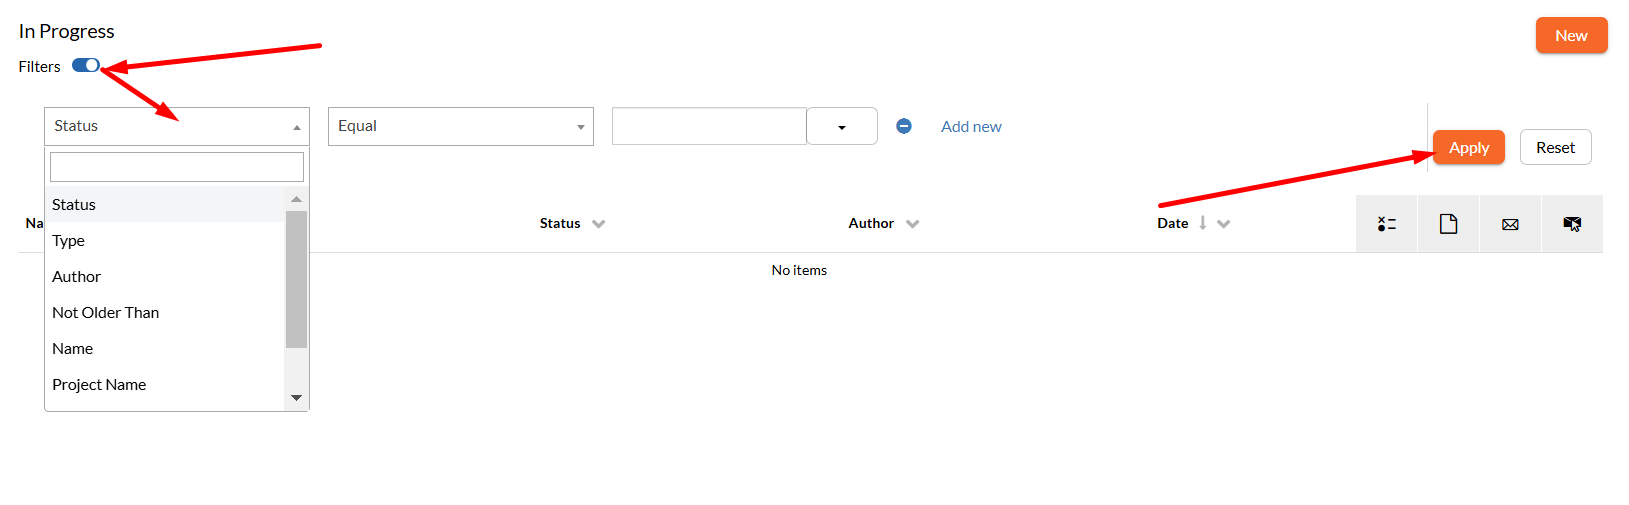
Configuring Filters
Follow the steps below to learn how to add a new filter for your communications.
- Starting from the Communications page, enable
Filtersto apply a filter for the available communication entries. - Select the communication's operator (e.g. Project Name) based on which the filter will test for from the available drop-down list.
- Choose an operand (e.g. Contains) to execute the filter from the second drop-down list.
- Select the second operator (e.g. contract) to test the communication data when executing the filtering expression.
- Once you're ready, click
Apply.
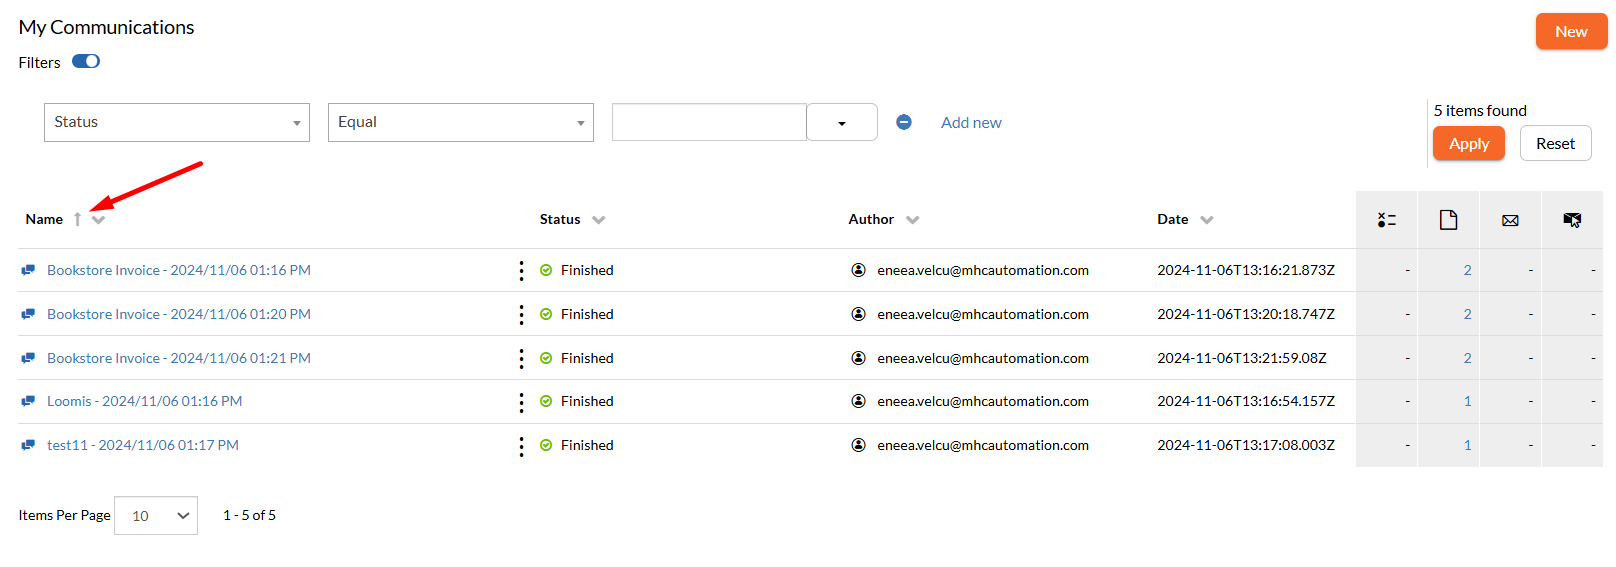
Sorting Communications
Starting from the Communications page, you can sort the entities listed within by using the available column-headers, such as Name, Status, Author or Date.
- To sort the communications information displayed, select a column-header (e.g. Name) and the list will sort the results in ascending ( ) or descending ( ) order.
- If multiple sorting criteria are applied, such as Name, Status, and Date, the high-priority is received by the last criteria set.
Contextual Communications Options
Follow the steps below to explore the options from the contextual menu of a communication.
- Access the
Communicationstab from the toolbar. - Select the
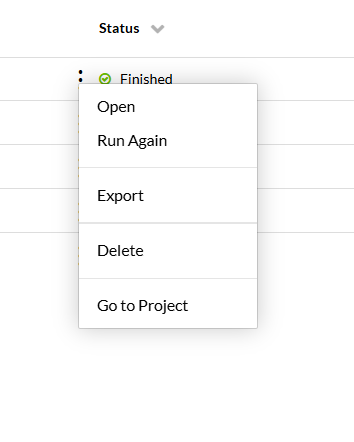
More Actions( ) button of a communication from the Page Content. - From the contextual menu displayed, you can select the following options, according to your needs:
- Open: Use the
Openbutton to be redirected to the Communication Overview page, from where you can see a more detailed view of the documents that are being produced, delivered and read by recipients. - Export: Use the
Exportbutton to download the corresponding job together with input and log files, if needed. - Delete: Use the
Deletebutton to permanently remove the current communication instance along with the documents produced. <!-- Create New Version*: Use theCreate New Versionbutton to generate a new version of the communication by filling up a new form version for it. Once you select this option, the Status of the Communication will change to Waiting for input. Select the communication to fill in the form fields, then submit it. Note that the option is available only for the projects with input data that fills up manually. - Download Form Data: Use the
Download Form Databutton to download the XML file containing the last saved form data entered at the run time. Note that the option is available only for the Projects with input data that fills up manually.--> - Go to Project: Use the
Go to Projectbutton to access the Project Details page. This will allow you to view all the assets and their dependencies required to build the communication outputs. - Run Again: Use the
Run Againbutton to initialize and run a new instance of the selected communication. Note that the option is visible only for projects with input data that fills up automatically.
- Open: Use the
Projects
Projects represent a central part of the EngageCX apps. These allow you to manage and organize your particular files, together with their dependencies. In a nutshell, it can be seen as a Project Manager, as it is the place where you will plan and draw the map of each project individually. Project files are the ones used when running communications through EngageCX. For example, if you are responsible for running a communication project in Communications, this is the right place to create and add the required project's assets.
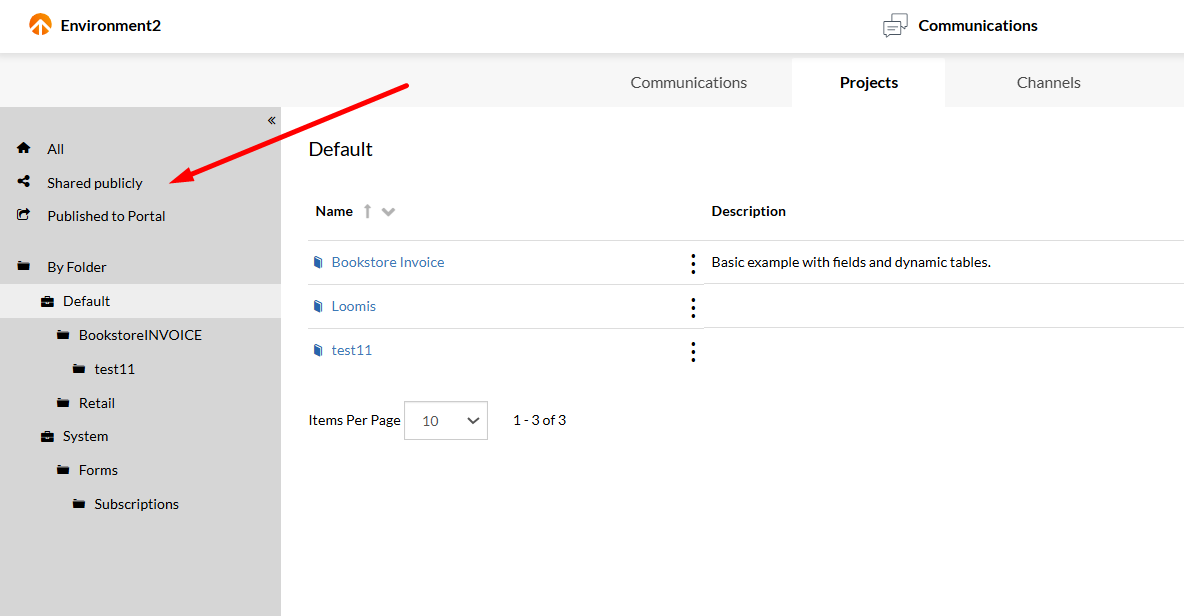
Once the Projects page opens, you can easily navigate through your documents by selecting from the default views from the sidebar, such as Shared publicly, to filter only the projects that have been shared across the environment, or Published to Portal, to see only the projects files that have been published to the Customer Portal. To view all the existing projects, select the All tab in the sidebar. In case you know the destination folder of your project you can navigate through the By Folder view tree and narrow the results.
For more information regarding different features in the Projects view, please visit a corresponding section from below:
Creating Projects
Projects must be consistent and specific to an area of your work. When creating new projects try to avoid internal codenames that have less to do with what the project is about. Keep in mind that most of the projects are shared with others and they do not have to struggle in understanding the scope of them.
There are some restrictions on using special characters within the names of the projects, therefore project names cannot contain any of the following: '|' (vertical bar), '/' (slash), '\' (backslash), ':' (colon), '*' (asterisk), '"' (double quote), '<' (less than), '>' (grater than), '.' (full stop) and '?' (question mark). For example, some relevant names could be Retail, Financial, Insurance, Telecom, etc.
Creating Projects from Scratch
Follow the steps below to learn how to create a new project from scratch.
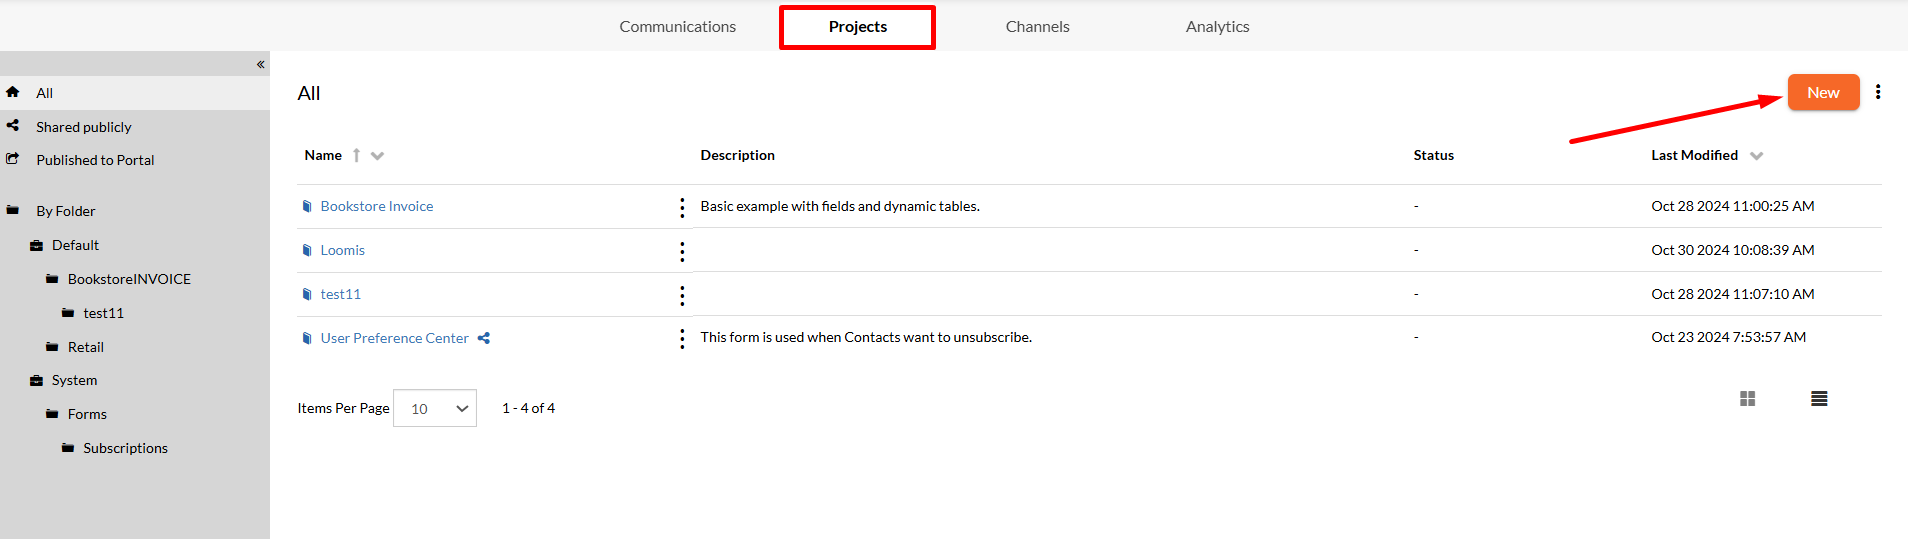
- Access the
Projectstab on the toolbar. - Select the
Newbutton from the right-corner of the page. - Choose a template as a starting point before customizing as you need, then click
Next. Projects provide six options as a starting point:Blank: Empty template to configure the project and all its assets from scratch.Invoice: Templates that generates a single invoice from data. <!--*Letter: Basic letter template for showcasing authoring editor capabilities.Lead Generation Form: Template for storing contact information after submitting a form.Email Blast: Templates that are part of an email marketing strategy, avoiding designing each email from scratch every time you want to send a new blast.Analytics Dashboard: Templates that contains dashboard widgets.-->
- Fill out the form with the following required fields:
Name: enter a friendly name for your project.Description: optionally, provide more information about the project you want to create.Folder: selectBrowseto navigate through the environment and choose a destination for the project to be stored.Options: depending on the template you have selected, you might have the ability to enable/disable the options below:Users must fill out a form: when this option is selected, users have the ability to enter input data manually before running a communication project.Produce multiple documents at a time in batch: when this option is enabled, multiple documents are automatically produced from one single input data.
- Once you're ready, click
Finish.
Creating Projects from Word Documents
Using a Word document as the basis for a project is an easy way to automatically create a template and a form for correspondence produced communications.
Before importing a Word Document, highlight the sections with yellow to automatically generate fields for the communication form. After importing the Word Document, Communications will create a template (.epr file), a form (.efd file) containing the highlighted fields, an email body (.epr file) and a workflow (.wk4 file) to produce documents.
Follow the steps below to learn how to create a new project from a Word document.
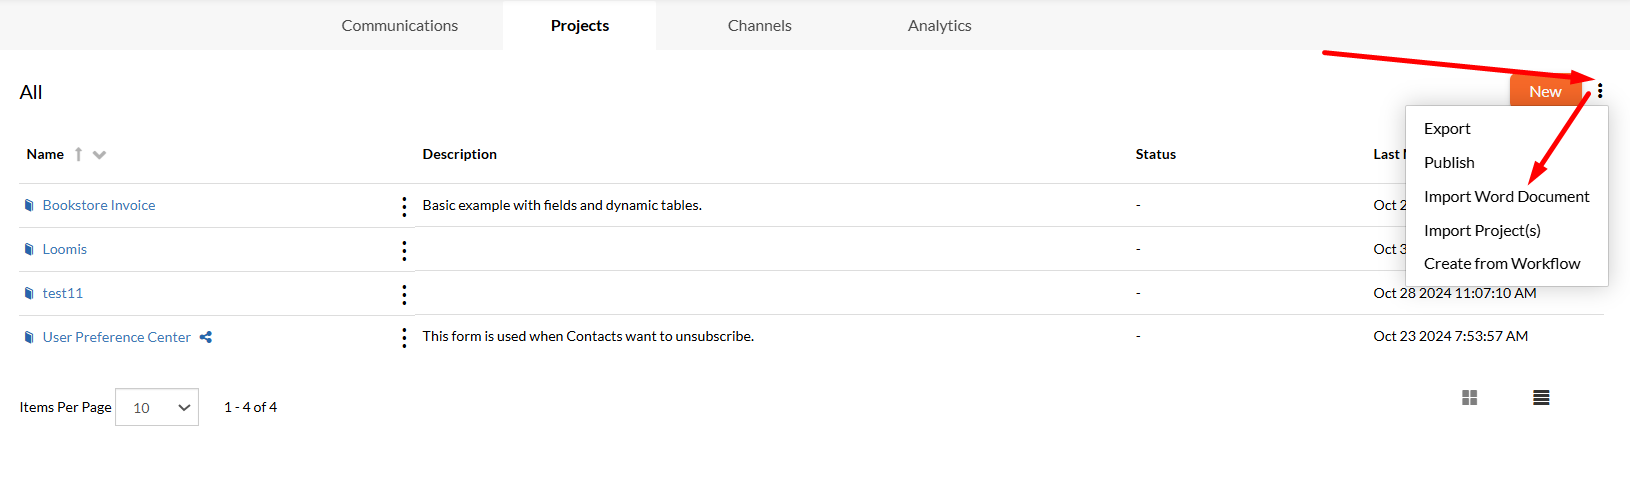
- Access the
Projectstab on the toolbar. - In the Projects page, select the
More Actions( ) button from the right corner of the page, then choose theImport Word Documentoption from the contextual menu. - Fill out the form with the following required fields:
- Select the
Choose Filebutton and browse for a .docx file to upload. - Choose the workspace in which this Word document should be stored.
- Select the
- Once you're ready, select
Importto successfully upload the file.
Creating Projects from Workflows
Workflows can be created from projects. In case you have already created a workflow, you can simply create your project in a plain manner. Follow the steps below to learn how to create a new project from a workflow.
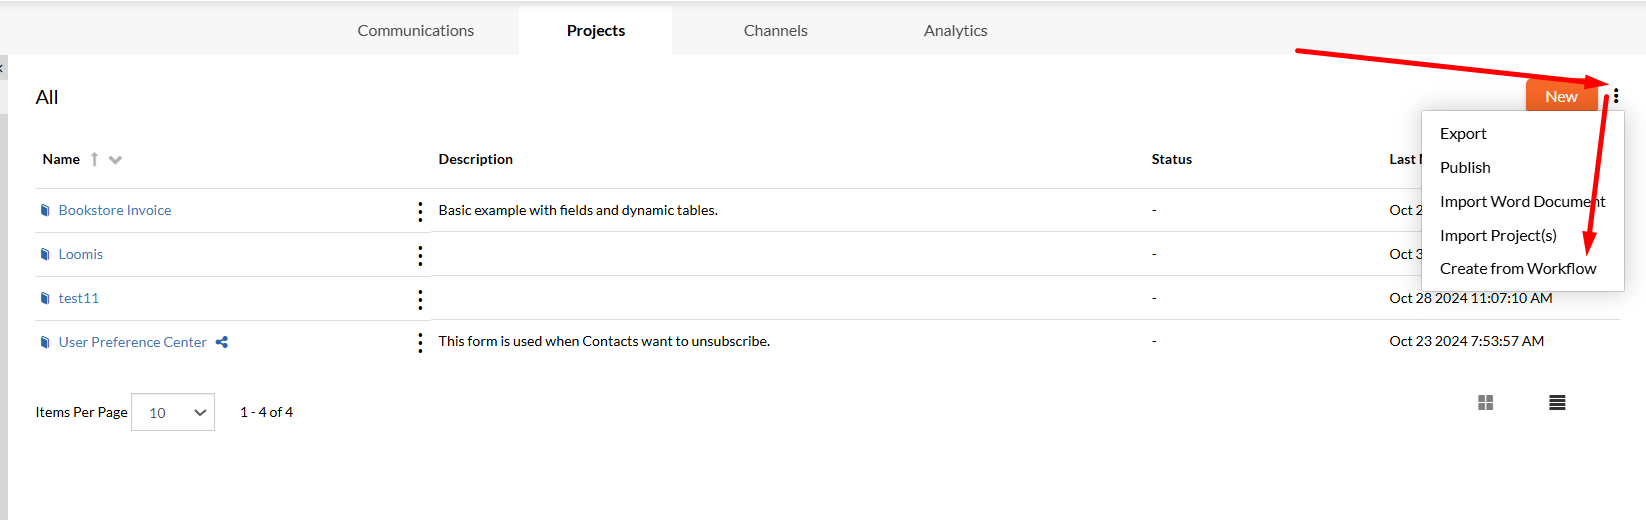
- Access the
Projectstab on the toolbar. - In the Projects page, select the
More Actions( ) button from the right corner of the page, then choose theCreate from Workflowoption from the contextual menu. - Fill out the form with the following required fields:
Type: use the drop-down list to select a project type. It can beInteractive, where users can manually enter the input,Batch, that uses a single input to generate multiple documents automatically,On-Demand, in case you need to generate documents in real-time, orAnalytics Dashboard, for projects containing dashboard widgets.Name: provide a friendly and unique name for your project.Description: optionally, add additional project details into the rich text box.Workflow: selectBrowseand choose the workflow you want to use.
- Once you're ready, click
OK.
Importing Existing Projects
The website allows you to import projects' archives created and exported from older versions or within other organizations, without losing configurations. Follow the steps below to learn how to import a project.
- Access the
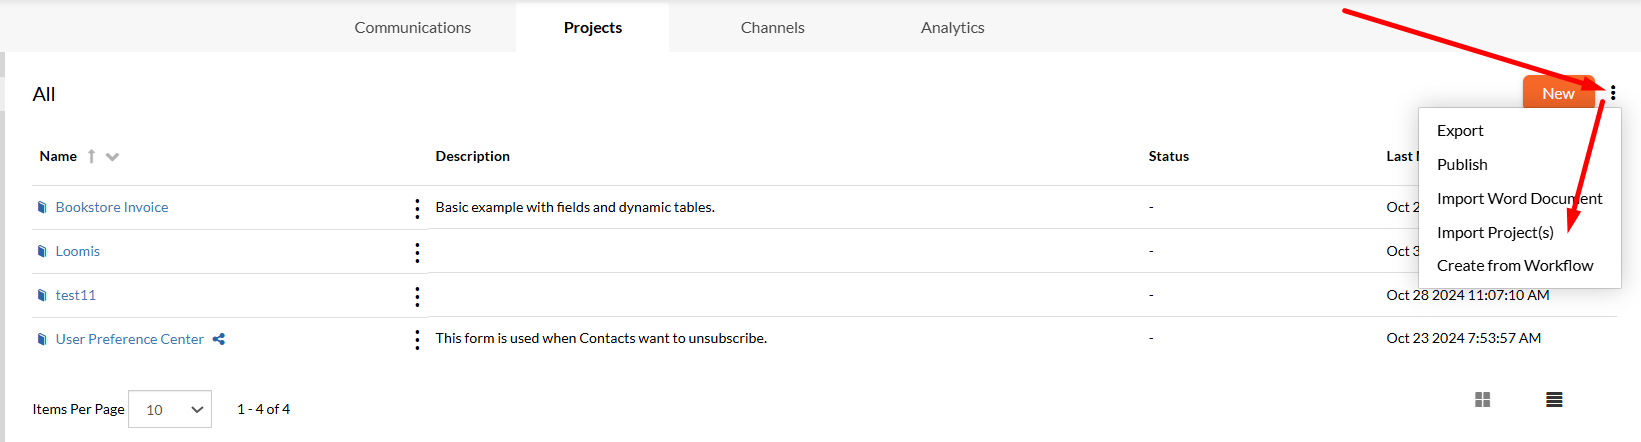
Projectstab on the toolbar. - In the Projects page, select the
More Actions( ) button from the right corner of the page, then choose theImport Projectoption from the contextual menu. - Fill out the form with the following required fields:
- Select the
Choose Filebutton and browse for a .zip archive to upload. - Choose the workspace in which this project should be stored.
- Select the
- Once you're ready, select
Importto successfully upload the archive.
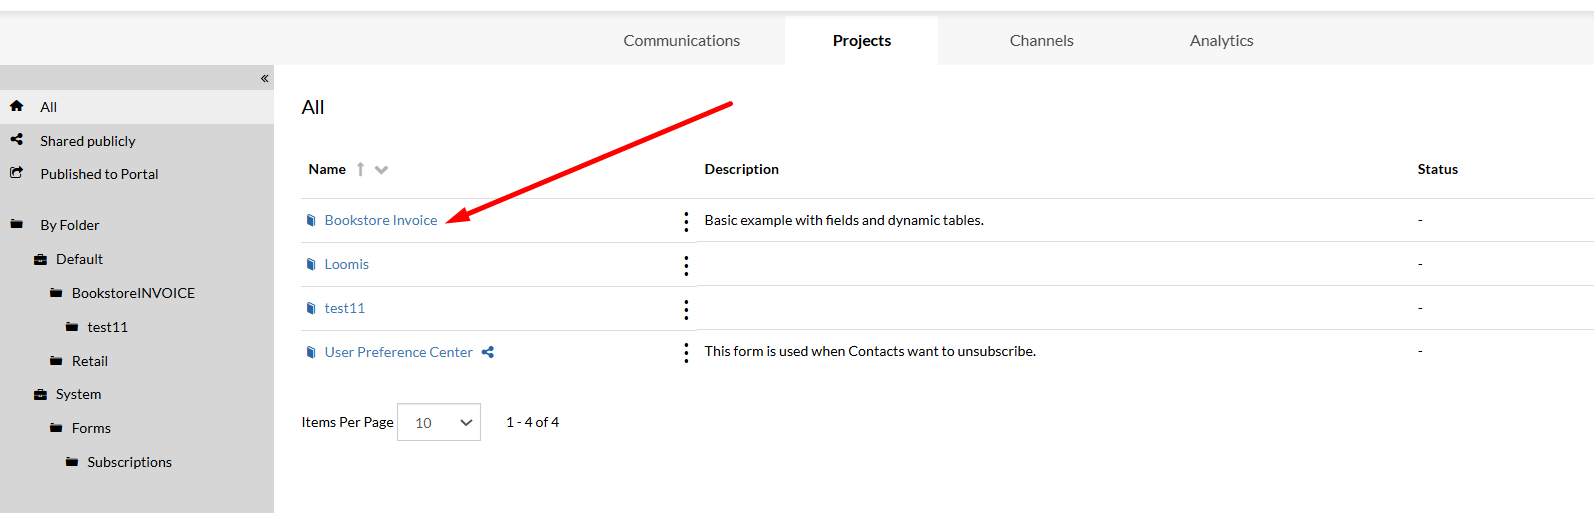
Working with Project Files
At any time, you can select a project from your projects list to customize it as needed. Once selected, you will be redirected to the Project Details page, where you can add new files or you can explore and edit the existing ones or their dependencies.
Adding New Files
Follow the steps below to learn how to insert files into a project.
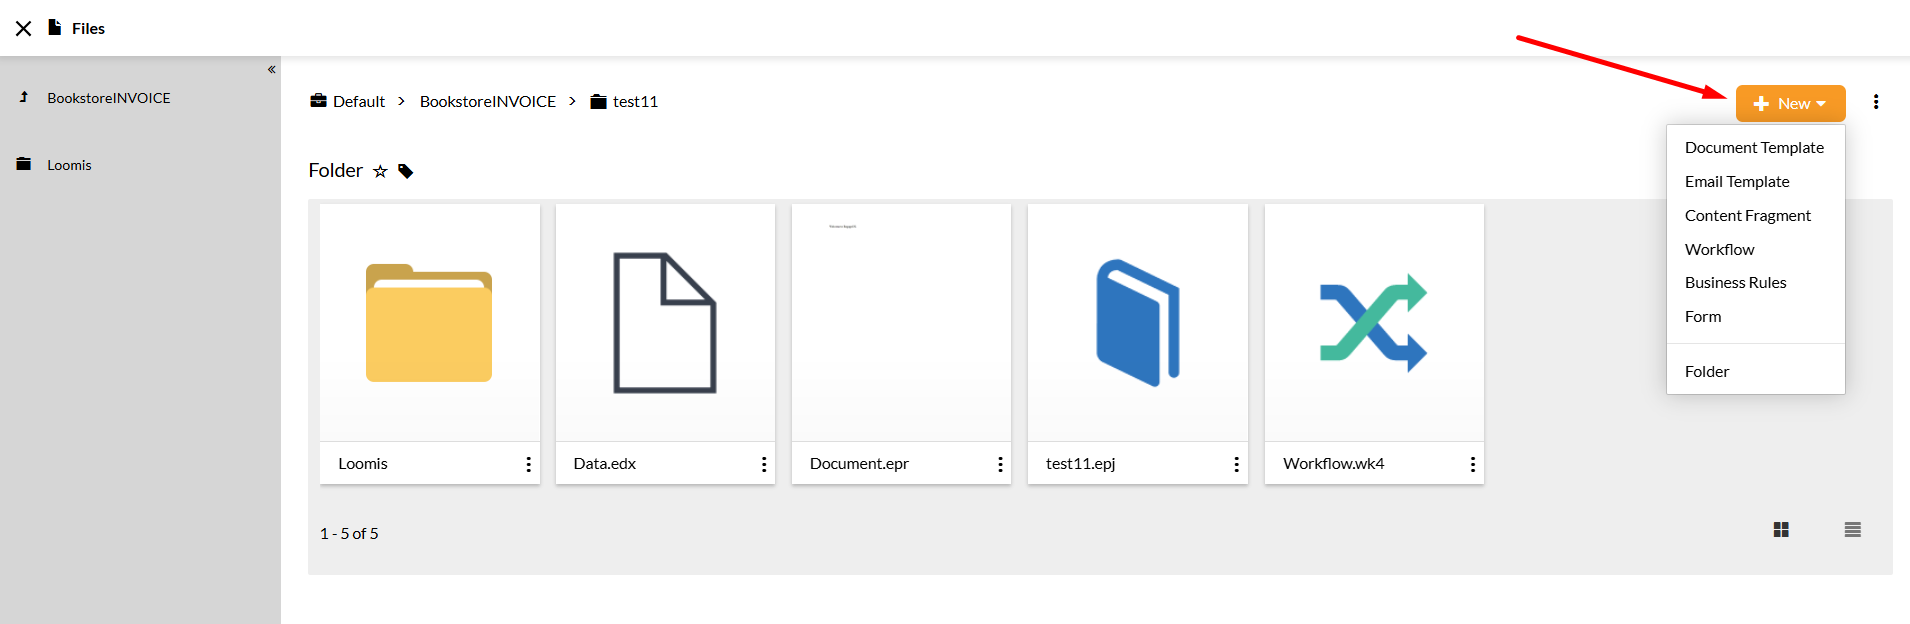
- Starting from the Project Details, select the
Newbutton from the right corner of the page. - Select the file type you want to include from the drop-down menu. Within a project, you can choose to add document templates, email templates, content fragments, workflows or forms.
Customizing Existing Files
A project contains all the assets required for building a communication, that will produce the outputs your organization demand. Since editing assets is popular, the platform provides you with a group of editors for each of the file type. All you need to do is to select the file you want to update, then choose the Edit button, and you will be redirected to the correlated page. Read through this section to learn more on each file type you can edit.
Document Templates
Document Templates are .epr files created within the MHC Studio Publisher, a stand-alone MHC solution, or by using the Online Template Editor, integrated in the Communications app. They describe the visual look & feel as well as the business rules that apply when producing a document dynamically from data.
Content Fragments
Content Fragments are .epb files created either through the EngageCX Publisher, or by using the Online Template Editor. Fragments are a powerful way to improve efficiency and consistency across your document templates. For any of your designed content, you can preserve your work in a content fragment. By doing so, you can insert it into other templates. This means that you do not have to recreate the section of content that you had already created, but perhaps more importantly, when you need to change something within that section of content you will only need to change in one location and consequentially all of your templates using this content fragment are updated.
Email Templates
To send your correspondence as an attachment to an email, you will need to create an email template. EngageCX Communications provides an easy way to create email templates and multiple options that allow you to customize and format your emails' content. Email Templates are the .ehtml files and can be edited through the Email Editor.
Workflows
Workflows are the .wk4 files, which define a series of processing steps or transformations that your data will go through, ultimately resulting in a document or set of documents being published along one or more output channels, like print, email or SMS. To build or customize a workflow, you will need to access the Workflow Editor.
Forms
EngageCX Communications allows you to create forms that capture data or enables users to create documents interactively. A form is a window or a screen that contains numerous fields or spaces to enter data. Each field holds a field label so that any user who views the form gets an idea of its contents. Forms are the .efd files, which can be build or customized through the Form Editor.
Publishing Projects to other Organizations
Sometimes, due to the fact that Communications is running on multiple servers, you may need to share assets between instances and for that, the publishing feature comes in handy. This option offers an improvement of efficiency and consistency across environment (organization) processes. Follow the steps below to learn how to publish a project to another organization.
- Access the
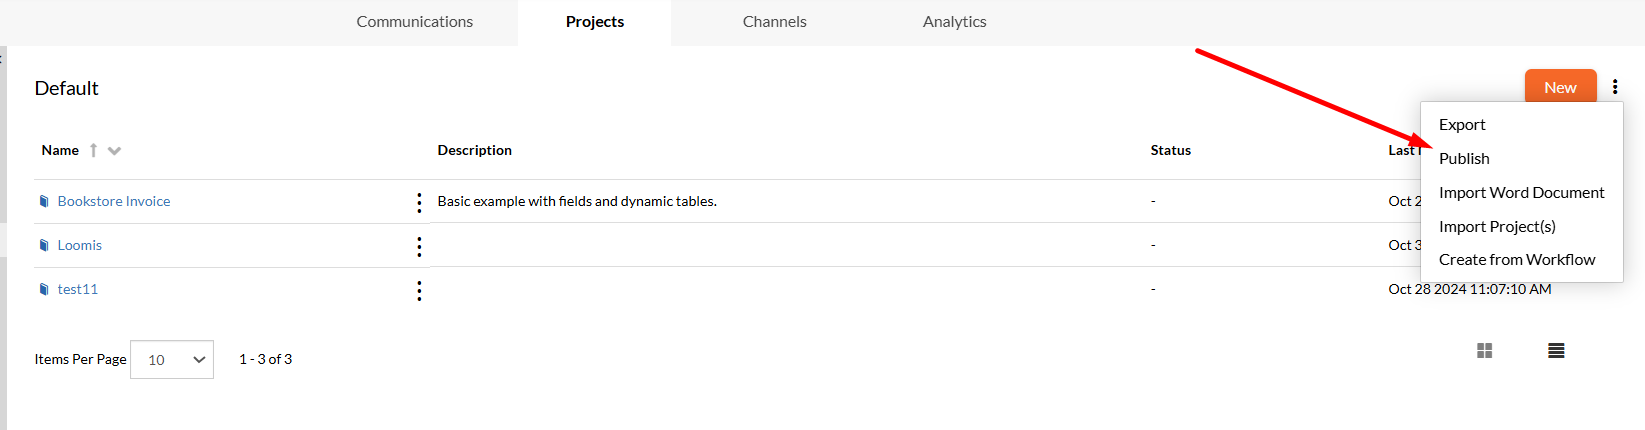
Projectstab on the toolbar. - In the Projects page, select the
More Actions( ) button from the right corner of the page, then choose thePublishoption from the contextual menu. - Select the project(s) you want to publish.
- Optionally, check the
Include Tagsoption if you want to publish also the tags included in the selected projects.
- Optionally, check the
- Select
Nextto continue. - Fill out the form with the following required fields:
Select destination: enter the URL that the engine can use to publish the project(s). It should use the following format: http://HostName, where HostName is the EngageCX server that contains the app. For example,https://apps3.stg.ecrion.com.Username: enter a username that has sufficient authority to perform a publishing procedure on the destination server.Password: type the corresponding password.Environment: optionally, if the user belongs to multiple environments (organizations), enter the organization name.
- Select
Nextto continue to the next step. - Optionally, you can add some comments that will be applied to all existing versions already created for each individual project. This is valid only for the first version published of your project. Once you're ready, select
Publishto finalize the process. - Wait until the publishing process is finished for all the selected projects.
A green status bar in the Publish dialog will inform you when the status of the communication project(s) is Published successfully. Then sign-in to the Publish Destination Server to ensure the publishing process is successfully finished. The project(s) will be deployed in a folder structure that mirrors the folder structure of the source.
Filtering Projects
Starting from the Projects page, you can filter the entities listed within.
- To filter the projects information displayed, select from the left sidebar a filter based on which you want to filter the results (e.g. Shared publicly).
Sorting Projects
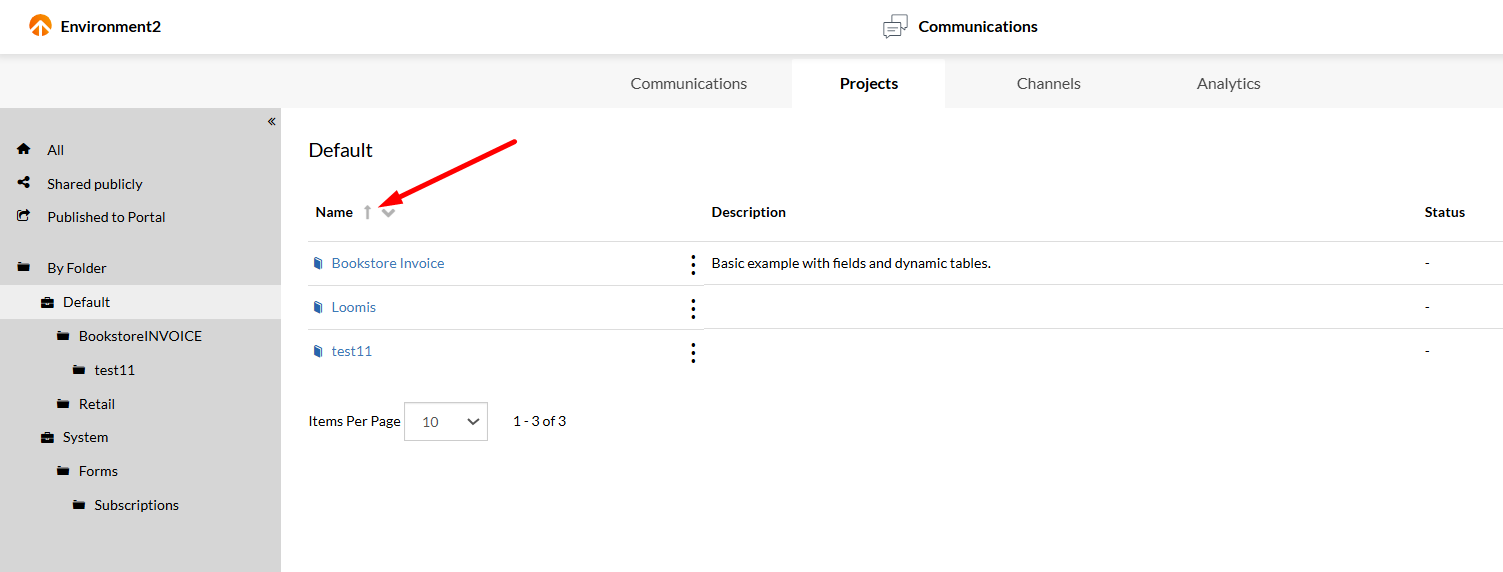
Starting from the Projects page, you can sort the entities listed within by using the available column-headers, such as Name or Last Modified.
- To sort the projects information displayed, select a column-header (e.g. Name) and the list will sort the results in ascending ( ) or descending ( ) order.
- If multiple sorting criteria are applied, such as Name and Last Modified, the high-priority is received by the last criteria set.
Contextual Projects Options
Follow the steps below to explore the options from the contextual menu of a project.
- Access the
Projectstab from the toolbar. - Select the
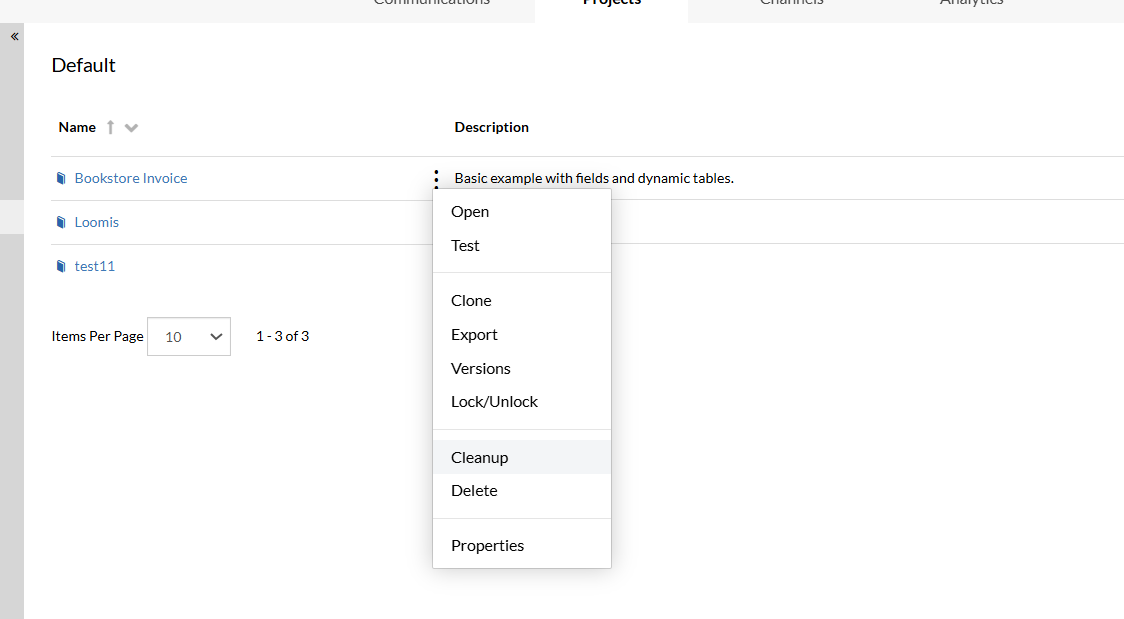
More Actions( ) button of a project from the Page Content. - From the contextual menu displayed, you can select the following options, according to your needs:
- Open: Use the
Openbutton to be redirected to the Project Details page, where you can view or edit the project assets. - Test: Use the
Testbutton to run the project in test mode in order to analyze what changes your project requires so far. - Clone: Use the
Clonebutton to make a copy of the current version of your project. For more information, please access the Cloning Projects section of this guide. - Export: Use the
Exportbutton to download a zip archive on your local machine that will contain all the communication assets and dependencies included into your project. The zip files can be added therefore to other environments by using the Import option. - Versions: Use the
Versionsbutton to open the Versions dialog and be able to create new versions of your project. For more information, access the Project Versions section of this guide. - Lock/Unlock: Use the
Lock/Unlockbutton to restrict the way other users can use your project. For more information, access the Lock/Unlock Projects section of this guide. - Cleanup: Use the
Cleanupbutton to clean up all the jobs or schedules associated to this communication project that are older than a certain amount of time. For more information, access the Cleanup Project Jobs section of this guide. - Delete: Use the
Deletebutton to permanently remove the selected project and all the files included. Note that deleting a project is an irreversible operation. - Properties: Use the
Propertiesbutton to open the Properties dialog that provides basic and advanced options for your project aspect based on its type. For more information, access the Exploring Project Properties section of this guide.
- Open: Use the
Exploring Project Properties
Once a project is created, when accessing its properties, there are two types project properties available: basic and advanced.
Basic Properties
Starting from the Properties dialog, select the Basic ( ) option, from the top-right corner.
Name: enter a new name for your project.Description: update the project description.Run Mode: depending on the project type you have selected, you can choose from various Run Mode views to display your projects after submission:Show Output: Select this option to display all documents generated once the communication is finished.Show a Message: Select this option to display a custom message after the communication has finished generating the output. *Show a Summary: Select this option to display a summary overview of all documents produced.Download Output: Select this option to automatically download the generated documents once the communication is run.Preview Document: Select this option to display a preview of all documents produced once the communication is finished.Continue Editing: Select this option to display an editable version of all documents produced once the communication is finished.
- Once you're ready, click
OK.
Advanced Properties
Starting from the Properties dialog, select the Advanced ( ) option, from the top-right corner.
- For On-Demand Communication Project types, advanced options provide you with the ability to configure template parameters.
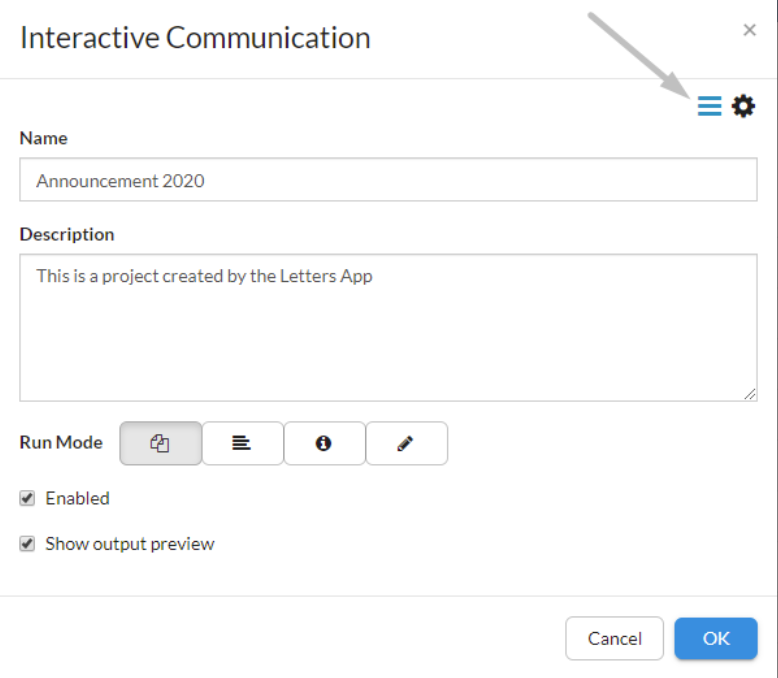
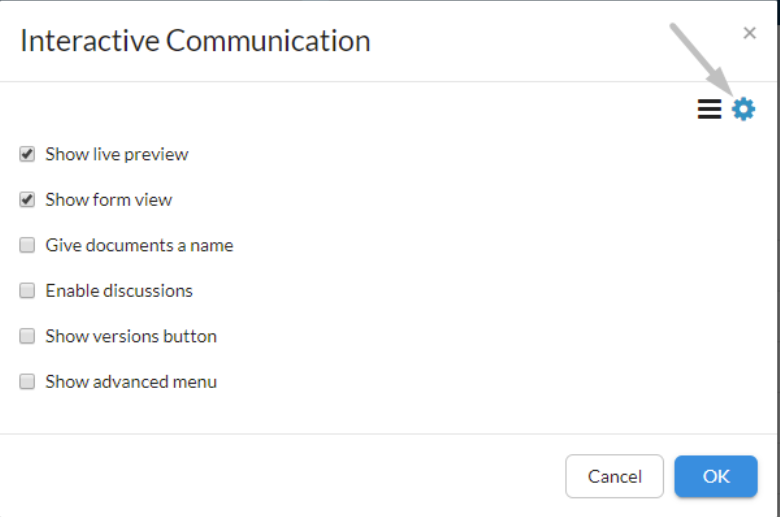
- For Interactive Communication Project types, the advanced options provide you with the ability of enabling or disabling different features presented in the final output, such as:
Show live preview: Preview while you work allows you to preview changes to your document before you commit to finalizing those changes.Show form view: Preview the form editor for the current communication that allows you to commit direct changes in the form fields.Give documents a name: Provide a name for the documents generated after the communication is run.Enable discussions: Customers can use discussions as a forum-like communication tool only if this feature is enabled.Show versions button: View all the previously created versions for the communication project.Show advanced menu: Enable the Advanced Menu in the Preview mode.
- Once you're ready, click
OK.
Cleanup Project Jobs
Accessing Cleanup option for a project will enable the following properties:
- Choose the amount of time after which the jobs will be removed.
- Provide a number of time units (e.g. 2 Days).
- Choose the time unit (
Hours,DaysorMonths).
- Select
Noneto schedule a periodical cleanup. For more details, please visit the Scheduling a Communication section from this guide. - Once you're ready, click
Run Nowto start the cleanup process.

Locking Projects
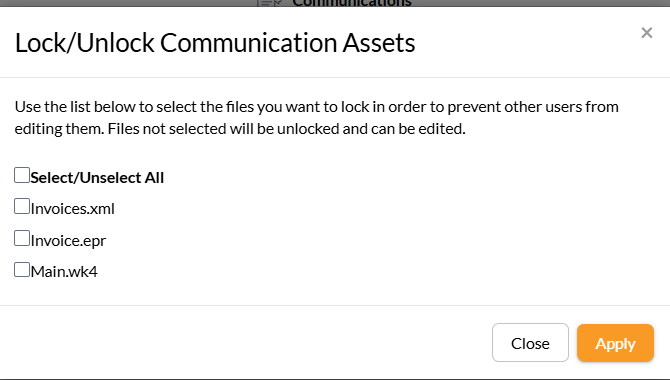
When a project is locked, it can be viewed by other users, but its content cannot be edited. In general, an environment administrator can lock a project completely when it passes Review and Approval. It will then unlock it when change requests come in; however, locking a project is not mandatory.
- Starting from Projects page, access
Lock/Unlockoption for a project. - In the Lock/Unlock Communication Assets dialog, select to lock all the existing project files or check only those you want to prevent from editing.
- Once you're ready, select
Apply. - Note that your project will be marked by the locked ( ) icon.
Cloning Projects
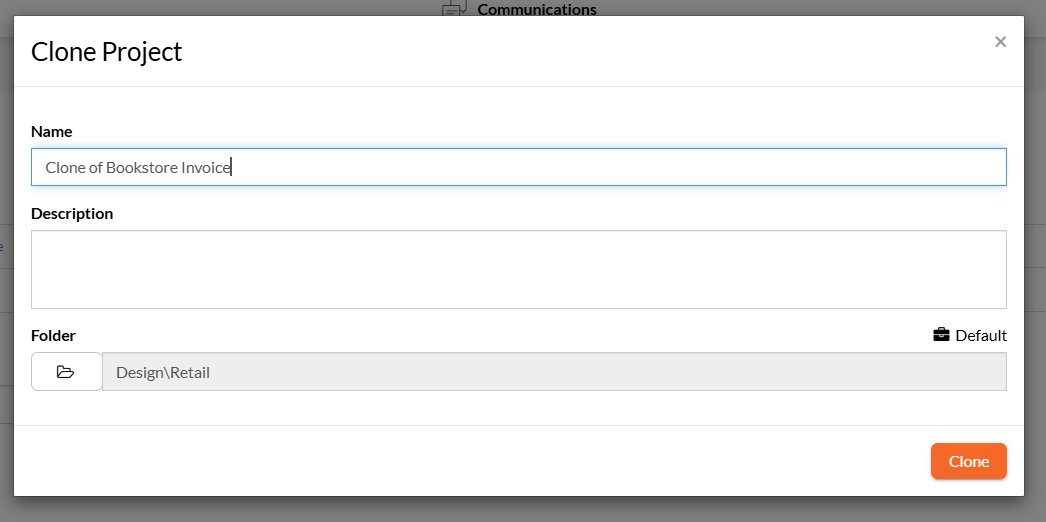
Once you click on the Clone option from the contextual menu, provide the required fields in the dialog:
Name- by default, the new name of the project will be Clone of ProjectName, but you can choose whatever name you would like.Description- give a description of the cloned project.Folder- choose the destination folder from the current workspace or another existing one, where you want the clone to be stored.- Once you're ready, click
Clone. You will be automatically redirected to the cloned contents of your project.
Note
In case the project is shared, the clone of the project will inherit this property.
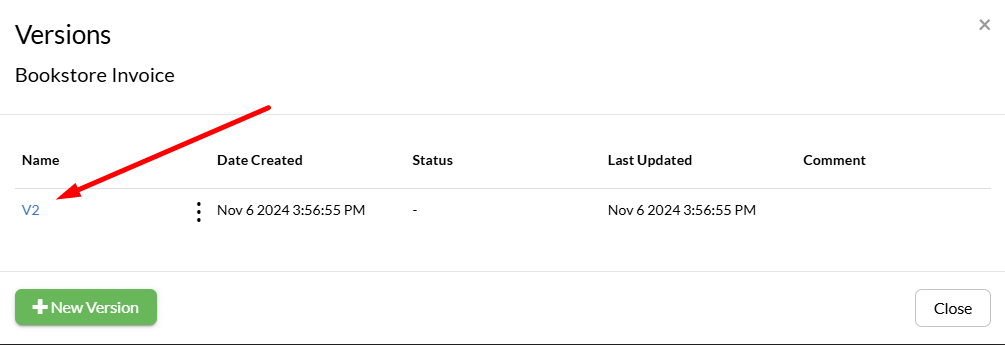
Project Versions
Versions allow you to save the state of a project and its content as a backup that you can restore later or publish to a different organization, for example from your development environment to your production environment. Versions can be created only for projects. It is suggested, as best practice, to create a version before any major edits or updates made to a project folder in case the changes fail acceptance testing and you need to roll back to a stable state. When restoring a version, this will be used as the latest version when running a communication.
Versions are seen in Communications as immutable entities. This means that once a version is created, you cannot add, edit or remove individual files within. You can only export, restore, publish, edit or delete a version as a whole.
When you add or modify files through versions, the versioning mechanism continues to behave as expected, creating a new version with each addition or change.
Creating New Versions
Follow the steps below to learn how to create a new version for a project.
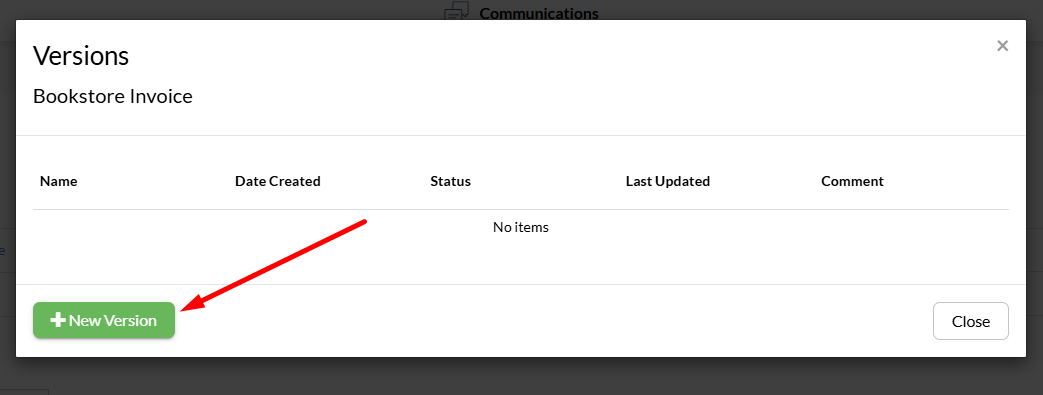
- Starting from the Projects page, select the
More Actions( ) button of a project. - Select
Versionsfrom the contextual menu. - Select the
+New Versionbutton. - Fill in the form with the required fields:
- Provide a unique and relevant name to the project version. * Optionally, add some comments. Note that the version's name configured here will be the name of the folder created in case you publish it to another environment (organization).
- Once you're ready, click
OK.
Notice that the version created will be visible in the Versions dialog. Now, it is available to be published, exported, restored or other options related to versions of a project.
Exporting Project Versions
Follow the steps below to learn how to export a version of a project.
- Starting from the Versions dialog, select the
More Actions( ) button next to the version you want to edit. - Choose
Exportfrom the contextual menu. - A zip archive will be downloaded to your local machine containing project version assets and their dependencies.
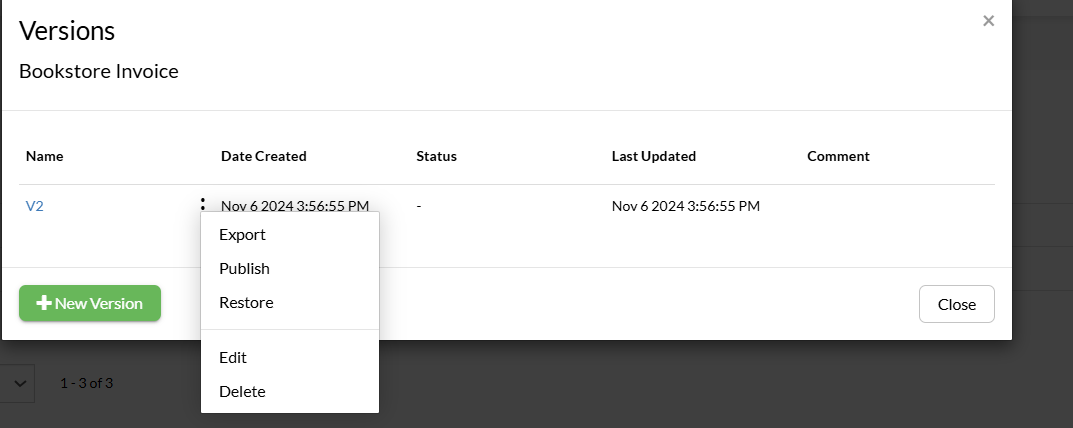
Publishing Project Versions
Follow the steps below to learn how to publish a version of a project.
- Starting from the Versions dialog, select the
More Actions( ) button next to the version you want to edit. - Choose
Publishfrom the contextual menu. - Fill in the form with the required fields:
- Enter the destination information by providing a destination server URL (for example, https://apps3.stg.EngageCX.com, the username and password of an EngageCX Account that has sufficient authority to perform a publishing procedure on the destination location. Optionally, if the username is used for multiple environments, enter the Environment name.
- To continue, click
Next. - The next step allows you to select the target workspace and a folder location to publish the project version. If the Version's name is the same as a folder already existing in the destination workspace, you have the following options:
Delete existing files: deletes the files included in the version prior to writing them in the destination folder. This means the versions are lost in the target environment. If there are extra files in the destination folder they will remain untouched.Delete only the files included in folder: deletes the destination folder and all the files within prior to publishing the version.Create subdirectory with version name: add the version's content to a subdirectory that contains the version's name.Include Tags- additionally, you can opt-in to publish tags as well. The tags are the keywords used to describe the content of a project.Choose Folder- choose the destination folder of the published version.
- Once you're ready, select
Publish.
A notification dialog will display the successful status of the publish process. You can sign-in to the Publish Destination Server to ensure that everything is functioning properly. The version will be deployed in a folder structure that mirrors the folder structure of the source.
Restoring Project Versions
Follow the steps below to learn how to restore a version of a project.
- Starting from the Versions dialog, select the
More Actions( ) button next to the version you want to edit. - Choose
Restorefrom the contextual menu. - Additionally, enter some comments, then click
Restore. Notice that the snapshot version has been restored to the project.
Editing Project Versions
Follow the steps below to learn how to modify a version of a project.
- Starting from the Versions dialog, select the
More Actions( ) button next to the version you want to edit. - Choose
Editfrom the contextual menu. - You will be redirected to the Edit Version dialog where you can change the version name or the associated comments.
- Once you're ready, click
Edit.
Deleting Project Versions
Follow the steps below to learn how to delete a version of a project.
- Starting from the Versions dialog, select the
More Actions( ) button next to the version you want to edit. - Choose
Deletefrom the contextual menu. - Confirm your selection and click
Delete. Notice that your project version is removed from the Versions list.
Versions vs Import-Export
While there are some similarities between versions and import/export, their purposes are different. Imports exist so you can upload multiple files easily into organization and exports exist so that you can download multiple files easily from the Communications app, but the data has to go through the local hard-drive. So use import/export whenever you need to upload or download files from EngageCX Communications.
For backup, restoring and publishing to a different EngageCX app or organization, the recommendation is to use versions. They are designed with this purpose in mind, so they will always be more suitable for this task than manually importing and exporting files. Additionally, Communications keeps track of versions so you can switch between them at any time, an important feature which is not possible if you just use import/export.
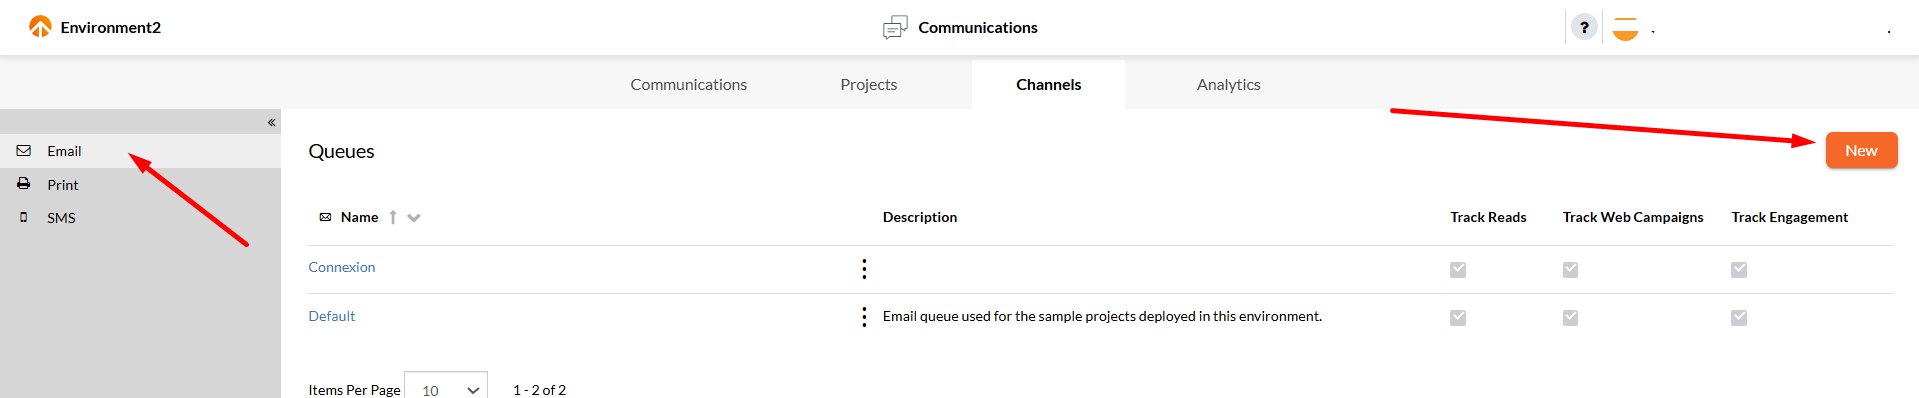
Channels
Channels are used to deliver communications directly to the final recipients. EngageCX Communications provides a multi-channel messaging for distributing documents, such as Email, Print or SMS. Before creating a channel, users need to configure a corresponding queue, then run a communication that has a channel defined. After running the communication, job tickets will be generated showing the status, the time and the name of the job that has been running in the workflow.
Configuring Channels
Communication is the key in a successful project management. It helps to exchange information through various methods by email, print or SMS channels.
Configuring a channel in Communications implies setting up a channel queue. This can be achieved by creating a corresponding queue (Email, SMS or Print) from the Channels view:
| Email Queue | Print Queue | SMS Queue |
Creating Email Queues
Follow the steps below to learn how to create an email queue.
- Access the
Channelstab on the toolbar. - Select the
Newbutton from the right-corner of the page. - Fill in the Email Queue form with the appropriate values:
Name: provide a unique and relevant name for the email channel you want to create.Description: optionally, add a description related to the channel.Email Connection: select the connection from the drop-down list. The connections configured in other EngageCX App's (Leads, Contracts, etc.) settings are mapped here and can be used once configured.Track Email Read: if enabled, this option will embed in all HTML email messages delivered through this queue a one-pixel transparent image that resides on the Communications server. When the recipient of the email loads the images for that, it will inform the Communications Server that the email has been read. ThisReadstatus will be reflected in the Status column.Track Web Campaigns: if enabled, this option will embed in the links sent by email information about the active web campaigns.Track Engagement: if enabled, this option will keep the evidence of the customers accessing the links delivered through email.Suspend tickets with bounced recipients: if enabled, this option will suspend the email ticket that has the TO recipient as a bounce list item.- Select
Send Test Emailif you want to check if the email connection is successfully configured.
- Once ready, select
Saveto update the changes.
Info
After creating an email queue, you have to set up an email connection. For more details, please visit the Email Connections section of the EngageCX User Guide. Finally, you have to access your communication workflow and configure the Email step. For more information, please visit the Email section of the Workflow Editor.
Creating Print Queues
Follow the steps below to learn how to create a print queue.
- Access the
Channelstab on the toolbar. - Select
Printtab from the sidebar. - Select the
Newbutton from the right-corner of the page. - Fill in the SMS Queue form with the appropriate values:
Name: provide a unique and relevant name for the Print channel you want to create.Description: optionally, add a description related to the channel.Printers: Select the+ Add Printerbutton to choose the device(s) to be used for printing jobs in this queue.
- Once ready, select
Saveto update the changes.
Info
After creating a print queue, you have to access your communication workflow and configure the Print step. For more information, please visit the Print section of the Workflow Editor.

Creating SMS Queues
Follow the steps below to learn how to create an SMS queue.
- Access the
Channelstab on the toolbar. - Select
SMStab from the sidebar. - Select the
Newbutton from the right-corner of the page. - Fill in the SMS Queue form with the appropriate values:
Name: provide a unique and relevant name for the SMS channel you want to create.Description: optionally, add a description related to the channel.SMS: select the SMS connection to use for jobs in this queue. If there are none available you will need to contact the system administrator to add one.
- Once ready, select
Saveto update the changes.
Info
After creating an SMS queue, you have to set up an SMS connection. For more details, please visit the SMS Connections section of the EngageCX User Guide. Finally, you have to access your communication workflow and configure the SMS step. For more information, please visit the SMS section of the Workflow Editor.

Sorting Channels
Starting from the Channels page, you can sort the entities listed within by using the only available column-header: Name.
- To sort the channels information displayed, select the column-header (e.g. Name) and the list will sort the results in ascending ( ) or descending ( ) order.

Filtering Channels
Starting from the Channels page, you can filter the entities listed within.
- To filter the channels information displayed, select from the left sidebar a filter based on which you want to filter the results (e.g. Print).

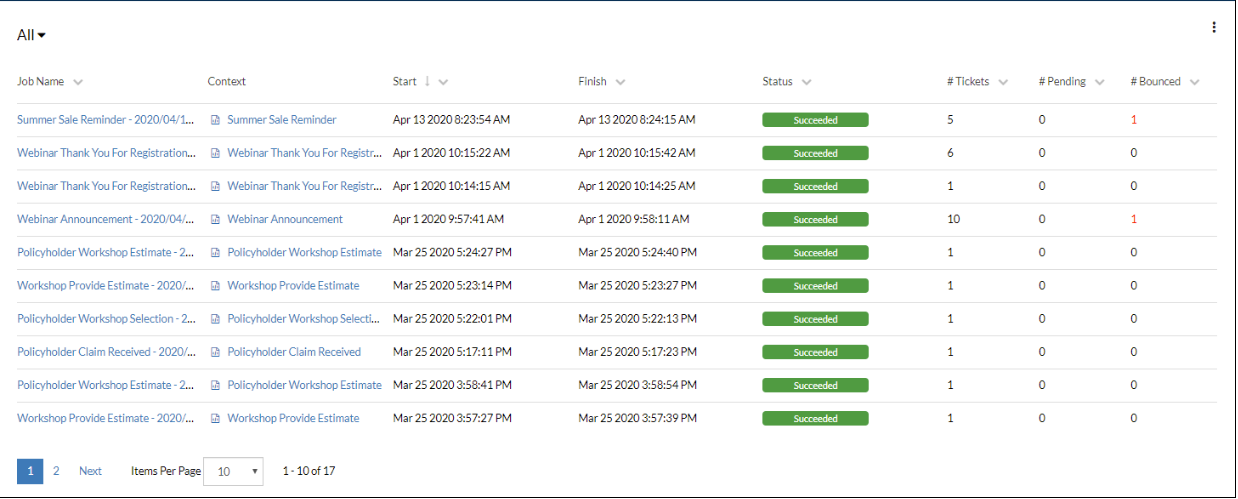
Exploring Channels Jobs
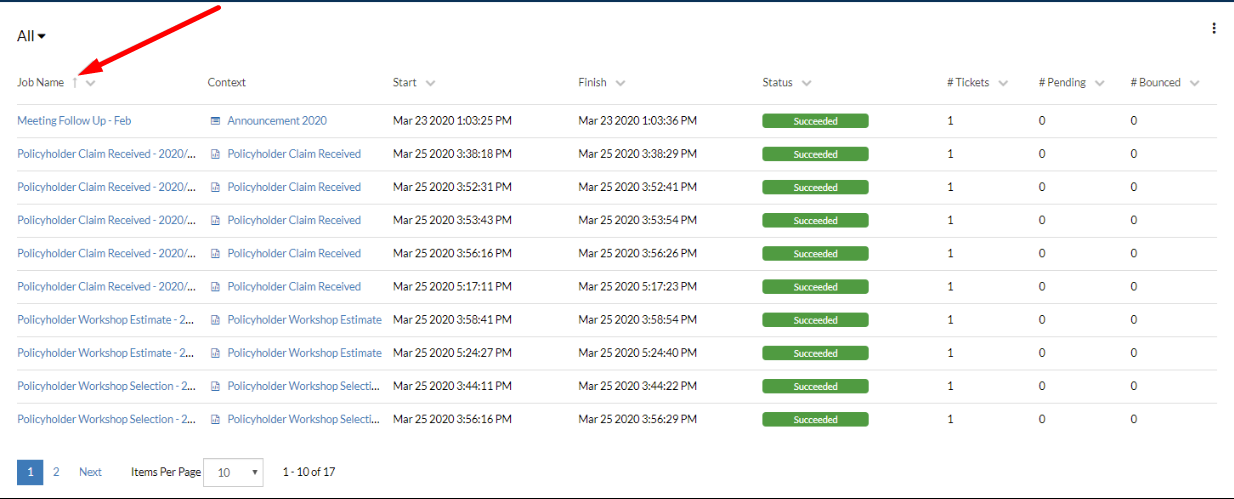
Once a channel is created, you can select a connection from the list to redirected to the Channel Jobs page, from where you can see a more detailed view of the jobs that are being completed, when deliver through the selected channel.
In the view, there will be displayed the job name, along with the project context, the start and end times of the job, its status, the number of tickets, pending or bounced of each item in the list.
Sorting Jobs
Starting from the Channel Jobs page, you can sort the entities listed within by using the available column-headers, such as Job Name, Start, Finish, Status, Tickets, Pending or Bounced.
- To sort the jobs information displayed, select a column-header (e.g. Job Name) and the list will sort the results in ascending ( ) or descending ( ) order.
- If multiple sorting criteria are applied, such as Job Name, Start, and Bounced, the high-priority is received by the last criteria set.
Contextual Channels Options
Follow the steps below to explore the options from the contextual menu of a channel connection.
- Starting from the Channels view, select the
More Actions( ) button of a channel connection. - From the contextual menu displayed, you can select the following options, according to your needs:
- Delete: Use the
Deletebutton to permanently remove the selected channel queue and all its configurations. - Properties: Use the
Propertiesbutton to access the Channels properties for modifying channel's configurations.
- Delete: Use the

Accessibility
Overview
NorthStar CCM includes accessibility and conformance support.
Accessibility
Accessibility refers to digital practices that ensure content is readable and usable by as many people as possible, including individuals with impairments or that use assistive technologies. Depending on the industry or type of content, there may be regulations requiring documents to meet certain accessibility standards. These standards can include elements like:
-
Text descriptions for images and non-text elements: Providing text descriptions or captions for pictures, charts, icons and non-text content allows users with screen readers or other assistive technologies to access your content.
-
Organized and consistent content structure: Consistently marking and structuring the headings, tables, fields, and other elements of your content allows users to more easily adapt the document to their needs or preferences, such as resizing the text or using a screen reader.
-
Styling, sizing, and colors that make your document easy to read: Using text fonts, sizes, colors, and contrasts that meet accessibility standards ensure your content is more easily readable by users with impaired vision.
Conformance
Conformance refers to meeting specific technical requirements, often related to the technical structure of a file to that it can be read, printed, or archived consistently. Within NorthStar CCM, each conformance level is based on a specific PDF version (e.g. PDF/A-1, PDF/UA, etc.).
This is relevant to accessibility because some conformance levels are accessible (PDF/UA), and other conformance levels are not considered accessible (PDF/A, PDF/X).
NorthStar CCM Accessibility Features
NorthStar CCM includes the following accessibility features:
-
Accessibility Standard Selection: Within a NorthStar CCM project, you can select a specific accessibility standard to apply to your documents, such as WCAG 2.0 AA. NorthStar CCM will then check all the guidelines required by that standard when running a report.
-
Accessibility Reports: You can run an accessibility report on any documents within that project to ensure they meet all the guidelines of the chosen accessibility standard. If there are any accessibility issues in a document, NorthStar CCM will list them. Once you’ve addressed the issues, you can re-run the report to confirm the document meets your selected conformance standard.
-
Accessibility Status: When browsing your documents in the project, you’ll see an accessibility status indicator for each document, showing whether the content has passed or failed an accessibility check, or whether it hasn’t been checked in its current form.
Setup
Opening Accessibility Settings
- From the home screen of NorthStar CCM, select “Communications.”
- Select the “Projects” tab.
- Open a project.
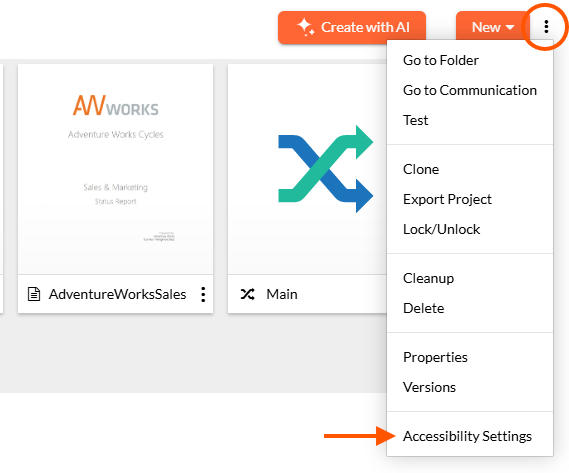
- Click the three vertical dots in the upper right corner of the screen and select “Accessibility Settings” from the drop-down menu.
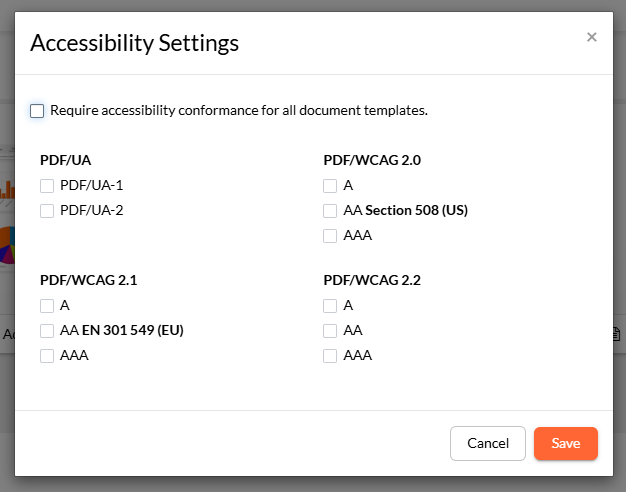
- An Accessibility Settings window will open. This allows you to set the accessibility requirements for all templates in this project.
- From the Accessibility Settings window, check the box for “Require accessibility conformance for all document templates.”
- Check the box for a document standard (see “Choosing Accessibility Standards” below). Note: selecting a higher standard automatically ensures your templates meet the lower standard (e.g., if you select PDF/WCAG 2.0 AAA, you’ll be requiring conformance to A and AA Section 508 (US) as well.)
- Click “Save.”
Choosing an Accessibility Standard

Your region, industry, or type of communication will usually define which level of accessibility is required for your documents. The different standards and requirement levels are described below:
PDF/UA
PDF/UA (Universal Accessibility) applies specifically to the PDF format. It aligns with WCAG principles (see below) but provides additional concrete rules for PDFs.
PDF/WCAG 2.0
WCAG (Web Content Accessibility Guidelines) was introduced in 2008 as a foundation for digital and online accessibility. WCAG guidelines offer three levels: A (Basic Accessibility), AA (Strong Accessibility), and AAA (Excellent Accessibility). WCAG 2.0 AA is the baseline accessibility standard for US federal agencies and contractors.
PDF/WCAG 2.1
WCAG 2.1 was released in 2018 and expanded the requirements of WCAG 2.0 to include responsive design and enhanced readability support for PDFs. WCAG 2.1 AA is the European standard for digital accessibility per EN 301 549 and can result in fines for communications that fail to meet accessibility standards.
PDF/WCAG 2.2
WCAG 2.2 was released in 2023 and expanded on the requirements of WCAG 2.1 to include error prevention and keyboard focus for form fields and links. WCAG 2.2 AA is now the benchmark for EU compliance.
Reporting
How to run a report

- From the home screen of NorthStar CCM, select “Communications.”
- Select the “Projects” tab.
- Open a project.
- Click the three vertical dots in the bottom-right corner of the document template you’d like to inspect.
- From the drop-down menu, select “Check Accessibility.” This will open the Accessibility Settings for that document. If you haven’t previously run a report for this document, the window will read “This template has not yet been evaluated for accessibility conformance.”
- Select “Run/Rerun.”
- To run a report on the document template, NorthStar CCM generates a sample PDF.
- The report will immediately run, and the results will be shown in the Accessibility Settings window.
- The Status/Result field will display “Verified” if the generated PDF meets all the rules of the selected accessibility conformance standard.
- The Status/Result field will display “Failed” if the generated PDF fails to meet one or more of the rules of the selected accessibility standard.
- The full report will be saved as a PDF. To open this PDF, click “Open Report." You can also click “Download Report” to save the Report PDF to your computer.
You can also find “Check Accessibility” options in the context menu for the List View and Tile View.
How to read a report
You can open the report in your browser or any application that can read a PDF. The PDF file name will be titled “Accessibility Report - Status - Document Name.” (e.g. Accessibility Report – Failed – Welcome Letter).
Each report will include the following:
- Template Name: The name of the template.
- Date Generated: The date and time the report was run (CT time).
- Username: The name of the user that ran the report.
- Standard Used: The accessibility standard selected for the accessibility project.
- Overall Status: This will display VERIFIED or FAILED, depending on whether the document is compliant with the accessibility standard used.
If the overall status is FAILED, the report will include a list of all the issues found in the document:
- Total Issues: This is the number of specific rule requirements that your document has failed to meet. Note: If your document fails the same rule in multiple places, this only counts as a single issue.
- Total Locations: This is the number of locations in your document containing an element that fails a rule.
Example: If your document had five paragraphs containing low-contrast text and was lacking a defined language in the “Document Information: Reading Language” property, then the report would display 2 total issues (low-contrast text and missing language property) across 6 total locations (5 paragraphs, and the document setup).
Rules Failed
Your report will contain a list of each rule from your chosen accessibility standard that your document has failed to meet. Each rule will list the locations where this rule was failed.
- Rule: The name of the failed rule, marked with a red X.
- Error: A description of the way the document broke the indicated rule.
- Location: Whether the broken rule occurs at the document or page content level.
- Rule Description: A brief description of the requirements of the broken rule.
Standards Passed
The end of the report will include the name and code for each rule from the chosen standard that was met.
Re-running a report
Once you believe all the issues have been addressed, re-run the report.
- From the Projects tab of the Communications area, click the three vertical dots in the bottom-right corner of the document template.
- From the drop-down menu, select “Check Accessibility.” This will open the Accessibility Settings for that document. Select “Run/Rerun.”
- If you’ve fixed all the issues the report will display an overall status of “VERIFIED.” Otherwise, the overall status will be FAILED and the errors that are still in need of correction will be listed below.
Note: If you are using the cloud-based NorthStar CCM template editor, you may not be able to correct all the accessibility errors generated by your report yet. Features will be added over the next several months to accommodate this need.
Monitoring
Viewing validation status
When viewing templates within a project, you will see an accessibility validation status in the top right corner of each template icon. This status message will show “Verified,” “Failed,” “Needs Rechecking,” or “Not Checked.”
- Verified: The last accessibility report run on the template found no errors, and no changes have been made to the template since the last report was run.
- Failed: The last accessibility report run on the template found errors. Note: Errors have been corrected since the last time the accessibility report was run. To check, simply rerun the report.
- Needs Rechecking: Since the last accessibility report was run, there’s been a change that may affect the accessibility of the template, including:
- Changes made to the template.
- Changes made to the subdocument the template uses.
- Changes made to the project’s accessibility settings.
- Not Checked: An accessibility report has never been run on this template.
Accessing past reports
To access previous accessibility reports run on a template, follow these steps:
- From the Projects tab of the Communications area, click the three vertical dots in the bottom-right corner of the document template.
- From the drop-down menu, select “Check Accessibility.” This will open the Accessibility Settings for that document.
- Select “Report History.” A new window will open with a list of all reports run on the template, arranged by date.
- Under the “Actions” column, you can open each report in a new window or download it as a PDF.
Accessibility Errors
This section presents all of the errors you may encounter when running accessibility reports, and how you can resolve them.
Images and figures are missing alternate text missing
- Rule: Accessibility
- Error Message: Missing or incomplete alternative text for [image or figure]
- Location: Paragraph level
- Description: Alternative text provides a textual description for images, figures, or other non-text content to improve accessibility for screen readers and assistive technologies
- Success Message: Alternative text for images and figures is present and correctly describes the content, ensuring accessibility compliance
To fix this error, you can “Edit Alt Text” or “Set Alternate Text” within a word or PDF processing application, or you can add an “alt” attribute directly to the <image> HTML tag.
Document lacks a properly tagged structure
- Rule: Tagged
- Error Message: The PDF is not properly tagged. Accessibility may be compromised
- Location: Document level
- Description: Ensures the PDF is an accessible, tagged document. Tagged content provides the necessary structure for screen readers and other assistive technologies
- Success Message: The PDF is properly tagged and meets accessibility requirements
Accessible documents include internal tags for different types of content, including headings, paragraphs, lists, tables, and other elements. These tags are used by screen readers and assistive technologies to help visually impaired people read the document. There are “Autotagging” tools that can correct missing tags, but for best results (and complex documents), it’s essential to manually review and correct the tags.
Tables aren't properly tagged
- Rule: TaggedTable
- Error Message: Enforcing rule (internal): Controls if tables with headers will be tagged as tables in the output
- Location: Document level
- Description: Ensures that all tables in the PDF are correctly tagged as tables, providing proper structure for accessibility tools and assistive technologies
- Success Message: All tables with headers are correctly tagged as tables that meets accessibility requirements
Proper internal tags allow screen readers to interpret the rows, columns, and headers of tables correctly. To correct this, review the document to ensure the presence of <Table> tags, including <TH> (table header), <TR> (table row), and <TD> (table data, or individual cells).
Non-essential elements aren’t tagged as artifacts
- Rule: TaggedArtifacts
- Error Message: Non-essential content is not correctly tagged as artifacts, which may confuse assistive technologies
- Location: Document level
- Description: Ensures that non-essential or decorative content in the PDF is tagged as artifacts, so assistive technologies can ignore it and focus on meaningful content
- Success Message: All non-essential content is properly tagged as artifacts, improving accessibility and clarity for assistive tools
When decorative or inessential content such as logos, decorative borders, or repeated page headers and footers aren’t internally tagged as artifacts within the document, screen readers and assistive technologies will attempt to convey they as meaningful, informative content, which can confuse or impart the reading experience.
Document language property is missing or incorrect
- Rule: Language
- Error Message: The document language is missing or incorrectly set, which may affect text-to-speech and accessibility
- Location: Document level
- Description: Ensures the document language is correctly set in the Document Information properties under Reading Language, which helps screen readers interpret the text accurately
- Success Message: The document language is correctly configured, ensuring proper reading and accessibility support
Screen readers and assistive tools use the document’s language property to determine how words should be pronounced and how language rules should be applied. You can fix this by setting the language field within a word or PDF processing application or manually inserting a valid “lang” attribute in the HTML tag.
Document contains prohibited background images
- Rule: BackgroundImage
- Error Message: The PDF contains background images that are not permitted according to the configured policy
- Location: Document level
- Description: Controls whether background images are allowed in the PDF, ensuring that they do not interfere with readability or accessibility
- Success Message: The document complies with the background image policy: no disallowed background images are present
Your selected accessibility policy does not allow background images in the PDF, which can interfere with readability. You can remove background images in a word or PDF processor or add a “background-image: none” CSS rule to the body element of your HTML.
Graphical elements do meet contrast requirement
- Rule: Non-Text Contrast
- Error Message: One or more UI components or graphical objects do not meet the minimum contrast ratio, which may affect visibility and accessibility
- Location: Document level
- Description: Ensures sufficient contrast between colors of user interface components and graphical objects. The contrast ratio must be at least 3:1 against adjacent colors, except for inactive, decorative, or non-essential elements. User interface components include form elements
- Success Message: All UI components and graphical objects meet the required contrast ratio, ensuring clear visibility and accessibility
Graphical elements of your document (like icons, charts, or form fields) need to meet a required level of contrast against their surroundings for ease of readability and use. You can use an online contrast checking tool to ensure that non-decorative graphical elements meet the required 3:1 contrast ratio. Low-contrast decorative graphics can be tagged as artifacts (see rule RA2.2).
Text does not meet level A contrast requirement
- Rule: Text Contrast A
- Error Message: N/A
- Location: Document level
- Description: Ensures appropriate contrast between text and background or graphical objects. For this rule, no minimum contrast is required
- Success Message: Text contrast meets the configured requirements
Different accessibility and conformance standards require different levels of contrast between text and its background, ranging from level A (minimum) to level AAA (the most demanding and accessible). If you see this error, your document has failed to meet the minimum contrast requirements of level A. You can use online contrast tools to check the level of contrast between your text and background color to achieve your required level.
Text does not meet level AA contrast requirement
- Rule: Text Contrast AA
- Error Message: Text contrast does not meet the minimum required ratio, which may reduce readability and accessibility. Text: [low-contrast text]
- Location: Document level
- Description: Ensures sufficient contrast between text and background or graphical objects. The contrast ratio must be at least 4.5:1 for normal text (below 18pt or 14pt bold) and at least 3:1 for large text, to maintain readability and accessibility
- Success Message: All text meets the required contrast ratios, ensuring clear readability and accessibility compliance
Different accessibility and conformance standards require different levels of contrast between text and its background, ranging from level A (minimum) to level AAA (the most demanding and accessible). If you see this error, your document has failed to meet the requirements of level AA, which are required by your chosen accessibility standard. You can use online contrast tools to check the level of contrast between your text and background color to achieve your required level.
Text does not meet level AAA contrast requirements
- Rule: Text Contrast AAA
- Error Message: Text contrast does not meet the required high-contrast standards, which may impair readability for some users. Text: [low-contrast text]
- Location: Document level
- Description: Ensures high contrast between text and background or graphical objects. The contrast ratio must be at least 7:1 for normal text (below 18pt or 14pt bold) and at least 4.5:1 for large text, supporting maximum readability and accessibility
- Success Message: All text meets the AAA contrast requirements, ensuring optimal readability and accessibility compliance
Different accessibility and conformance standards require different levels of contrast between text and its background, ranging from level A (minimum) to level AAA (the most demanding and accessible). If you see this error, your document has failed to meet the requirements of level AAA, which are required by your chosen accessibility standard. You can use online contrast tools to check the level of contrast between your text and background color to achieve your required level.